
Understanding Diastasis Recti: What You Need to Know
Diastasis Recti is a condition that affects many individuals, yet it remains widely misunderstood. In this comprehensive guide, we delve into the intricacies of diastasis recti, providing you with a clear understanding of its causes, symptoms, and treatment options. Whether you're a new parent, fitness enthusiast, or someone simply seeking knowledge about this condition, this article will equip you with the necessary insights to navigate diastasis recti confidently. Let's dive in and empower ourselves with knowledge about this prevalent yet often overlooked issue.
A Common Issue Among Women
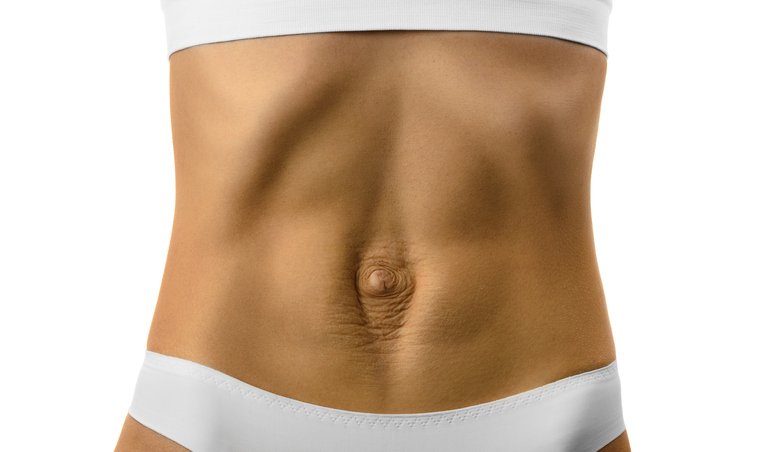
Diastasis recti, a condition affecting over 60% of childbearing women, is a significant health concern that often goes unnoticed. This condition involves the stretching or separation of the rectus abdominis muscles, primarily caused by the thinning of the midline connective tissue known as Linea Alba. The repercussions of diastasis recti separation extend beyond mere aesthetic concerns, impacting the overall health and functionality of the affected individuals.
Consequences of Diastasis Recti Separation:
One of the primary consequences of diastasis recti separation is the lack of support for abdominal organs. In severe cases, this can lead to the exposure of digestive organs, resulting in a noticeable stomach bulge. This compromised support system can contribute to various health issues, including abdominal gaping, pelvic floor dysfunction, incontinence, poor posture, constipation, and bloating. Individuals with diastasis recti may also experience stomach and back pain, further highlighting the multifaceted nature of this condition.
Identifying Diastasis Recti:
Early identification of diastasis recti, especially in the postpartum period, is crucial for effective management. Recognizing the symptoms and signs allows for timely intervention, preventing the progression of associated issues. Common indicators include the presence of a stomach bulge, doming or invagination of the linea alba during traditional ab exercises, and difficulty with everyday activities due to a compromised core function.
By understanding the potential consequences of diastasis recti and its early identification, individuals can take proactive measures to address the condition. Nipping it in the bud postpartum is key to averting the development of symptoms that can significantly impact one's quality of life down the line.
Diastasis Recti: Identifying and Assessing the Extent
Diastasis recti is a nuanced condition that can manifest in various areas of the abdominal region, namely above the belly button, below the belly button, and at the belly button. Understanding the extent of diastasis recti is crucial for effective management and intervention. An open diastasis can extend from above the belly button all the way down to below, emphasizing the importance of thorough self-assessment.

How to Check for Diastasis Recti: A Step-by-Step Guide
Identifying diastasis recti involves a simple yet insightful self-assessment that can be performed in the comfort of your own home. Here's a step-by-step guide to help you check for diastasis recti:
Lie Flat on Your Back: Begin by lying flat on your back with your knees bent. This relaxed position provides optimal conditions for a thorough examination.
Finger Placement at Belly Button: Place your fingers on your belly button, pointing towards your pelvis, and press down gently. This initial position serves as the starting point for the assessment.
Head Lift: Lift your head up about an inch while ensuring your shoulders remain on the ground. This action engages the abdominal muscles, facilitating the detection of any gaps.
Examine Gap Between Muscles: Pay close attention to any gap you may feel between the muscles. Evaluate both the width and depth of the gap for a comprehensive understanding of the extent of diastasis recti.
Repeat Below the Belly Button: Move your fingers 2 1/2” below the belly button and repeat the process. Assessing diastasis recti at multiple points allows for a more thorough evaluation of the condition.
Repeat Above the Belly Button: Similarly, place your fingers 2 1/2” above the belly button and repeat the process. Checking at three distinct points provides a comprehensive picture of the diastasis recti, aiding in accurate self-assessment.
By following these simple yet effective steps, individuals can perform a reliable self-check for diastasis recti. Early detection empowers individuals to take proactive measures and seek professional guidance if necessary, preventing potential complications associated with the condition.
Evaluating Diastasis Recti Gap: Understanding the Measurements
| Evaluation | Width | Depth |
|---|---|---|
| Optimal | 1cm (at the belly button only) | 1cm |
| Healthy | 1-2cm | 1cm |
| Borderline Diastasis Recti | 1-2.5cm | 2-3cm |
| Diastasis Recti | 2.5-4cm or more | 2-3cm or more |
| Severe Diastasis Recti | 4cm or more and 2.5-4cm | 1-2cm and 2-3cm or more |
| Very Severe Diastasis Recti | 4cm or more | 2-3cm or more |
When assessing diastasis recti, understanding the measurements of the gap is crucial in determining the severity of the condition. Here's a breakdown of diastasis recti gap evaluations:
Optimal:
Description: A gap with the width and depth of 1cm at the belly button only.
Implication: This is considered the optimal condition, indicating a healthy level of support for the abdominal muscles.
Healthy:
Description: A gap with the width of 1-2cm and a depth of 1cm.
Implication: A gap within this range is generally considered healthy, suggesting adequate support for the abdominal muscles.
Borderline Diastasis Recti:
Description: A gap with the width of 1-2.5cm and a depth of 2-3cm.
Implication: This falls into the borderline category, indicating a slight deviation from the healthy range and suggesting early signs of diastasis recti.
Diastasis Recti:
Description: A gap with the width of 2.5-4cm or more and a depth of 2-3cm or more.
Implication: This level of diastasis recti indicates a more pronounced separation, requiring attention and potential intervention to prevent further complications.
Severe Diastasis Recti:
Description: Two scenarios:
A gap with the width of 4cm or more and a depth of 1-2cm.
A gap with the width of 2.5-4cm and a depth of 2-3cm or more.
Implication: This represents a severe condition, necessitating immediate intervention and specialized care to address the significant separation.
Very Severe Diastasis Recti:
Description: A gap with the width of 4cm or more and a depth of 2-3cm or more.
Implication: This is the most critical level of diastasis recti, requiring urgent attention and a comprehensive treatment plan to mitigate potential health risks.
Understanding these measurements provides individuals with a clear framework for assessing the severity of diastasis recti. Regular self-evaluations, in conjunction with professional guidance, can aid in early detection and effective management of this condition.
Diastasis Recti self-check watch points
When assessing yourself for diastasis recti, it's crucial to consider both the width and depth of the gap between the rectus abdominal muscles. Follow these precise steps to ensure an accurate measurement:
Trigger Abdominal Activation:
Lift your head slightly off the floor to prompt spontaneous activation of the abdominal muscles. This action helps reveal the separation more distinctly.
Refer to the Self-Check Video:
Sign up to MUMMIES BABY STEPS (BELOW) to watch the "how to self-check video" for detailed guidance. If you encounter difficulty finding the gap, lift your head a bit higher until you can distinguish between the engaged muscles (firm tissue) and the connective tissue (softer) that lies between them.
Identify Muscle Alignment:
Once confident in identifying the muscles and ensuring your fingers align vertically between them, pointing downward towards the pelvis, proceed to the next step.
Record Width and Depth:
Lift your head about an inch off the floor and meticulously record both the width and depth of the separation. Avoid lifting your head too high, as this may result in an inaccurately narrow measurement.
If you have excess belly fat, press your fingers firmly into your mid-line during the self-check. You may need to lift your head and shoulders off the floor to engage the muscles fully. However, the most precise measurement occurs when lifting your head about an inch from the ground, allowing the muscles to grasp the sides of your fingers. Follow the same steps to record the width and depth once confident in muscle identification.
Taking these steps diligently ensures an accurate self-assessment for diastasis recti, contributing to a better understanding of your abdominal muscle health.


The Benefits of a Top Morning Routine: Setting the Tone for Success
In our fast-paced world, mornings can often feel like a chaotic rush to get out the door, leaving us frazzled and unprepared for the challenges of the day. However, establishing a well-structured morning routine can be the key to unlocking a wealth of physical and psychological benefits that can significantly enhance your life. In this article, we will explore the importance of a morning routine, what it should consist of, and delve into my personal morning routine.
Do We All Need a Morning Routine?
The short answer is yes, we all can benefit from a morning routine. Routines are vital throughout our lives to ensure that we live fulfilled and complete lives. They facilitate the completion of tasks and help us achieve our goals. A morning routine is like the foundation of a well-constructed building; it sets the tone for the entire day, providing stability and structure.
Imagine waking up each day with a sense of purpose and direction, knowing exactly what to do to kickstart your day. This level of organization and intentionality can be a game-changer. A morning routine empowers you to make the most out of each day, no matter what challenges lie ahead.
What Should a Morning Routine Consist Of?
Your morning routine should be tailored to your specific needs and goals. While there's no one-size-fits-all approach, it should include elements that promote physical and mental well-being, productivity, and a positive outlook. Here's my personal morning routine and a breakdown of the components that can make up a successful morning routine:
Wake: The first step is to wake up at a consistent time each day. Consistency helps regulate your body's internal clock and improves overall sleep quality.
Make my Bed: This simple act can provide a sense of accomplishment and order right from the start.
Breakfast in the garden: Connecting with nature while having your breakfast can be a serene and grounding experience, fostering a sense of peace and gratitude.
20 Minute Morning Meditation: Devoting time to meditation, even just 20 minutes, can help you centre your mind, reduce stress, and enhance focus.
Stretch/Mobility: Spending a few minutes on stretching or mobility exercises can awaken your body and prepare it for the day ahead.
Shower: A refreshing shower not only cleanses your body but also rejuvenates your mind.
Get Dressed/Ready: Dressing up for the day can boost your confidence and productivity.
Tackle the Most Challenging Task: Prioritize your most challenging or important task while your mind is at its sharpest.
Remember, your morning routine is personal to you. You can customize it to align with your goals and preferences. The key is to establish a routine that sets a positive tone for your day and helps you become the best version of yourself.
The Science-Backed Benefits of a Morning Routine
Greater Happiness: A structured morning routine can increase overall happiness by promoting feelings of gratitude and contentment.
Stress Reduction: A morning routine allows you to take control of your day, reducing stress by minimizing surprises and rushing.
Increased Productivity: Cortisol levels are higher in the morning, making it an ideal time to tackle tasks with heightened alertness and productivity.
Better Sleep Quality: Consistent sleep and wake times improve sleep quality, ensuring you wake up refreshed and ready to tackle the day.
Boosted Confidence: Maintaining a morning routine sets an example for healthy living, boosting self-confidence.
Improved Relationships: Lower stress levels and better organization can improve relationships by reducing tension and creating more quality time with loved ones.
Healthy Habits: Morning routines encourage the development of healthy habits like exercise, mindfulness, and balanced nutrition, which positively impact your overall well-being.
Energy Boost: An active morning routine can increase your energy levels and alertness throughout the day.
Combat Forgetfulness: A routine reduces the likelihood of forgetting important tasks or items, reducing the stress of forgetfulness.
Flexibility: Morning routines teach adaptability, helping you navigate unexpected challenges throughout the day.
Starting Your Morning Routine
To start a morning routine, set a schedule that suits your lifestyle and goals. Experiment with different activities and their order to discover what works best for you. Remember, the key is consistency; stick to your routine to reap its full benefits.

Creating a Morning Routine: New Mom 101
Becoming a new mum ushers in an exciting yet demanding phase of life. While your baby's needs take priority, a consistent morning routine is vital for your own health and wellbeing. A thoughtful routine sets the tone for a smoother, less stressful day. Let's explore how new mums can craft an optimal morning routine.
Wake at a Consistent Time: Waking up at the same time every day regulates your body clock and improves sleep quality, resulting in more energy and alertness to care for your little one. Be realistic about the additional time needed for baby's feedings and diaper changes.
Incorporate Mindfulness: Take a few minutes for meditation or journaling. This mindful start helps reduce anxiety, centres your mind, and boosts mood to patiently handle baby's needs.
Tackle Important Tasks First: With limited time, identify your most important tasks and complete them when your mental clarity is sharpest, whether it's responding to emails or paying bills.
Get Moving: Squeeze in light exercise like yoga, a short walk with the stroller, or postnatal core exercises. Movement energizes, relieves stress, and prepares you for an active day with your baby.
Shower and Get Ready: A refreshing shower and getting dressed can make you feel human again. Do this while baby naps or invest in an adjustable rocker or bouncer to keep baby nearby.
Eat a Nutritious Breakfast:Fuel up with a balanced breakfast to maintain your energy. Make it easy on yourself by preparing grab-and-go options like yogurt parfaits, boiled eggs, or overnight oats.
Pick Your Battles: Accept that some chores may slip through the cracks in these early months. Let go of perfectionism and focus on what matters most - your wellbeing and bonding with your baby.
Schedule Breathing Room: Building in a buffer between tasks reduces frantic rushing. This helps you stay present with your baby rather than stressing about being late.
Embrace Flexibility: Your routine will likely change daily based on your baby's needs. Allow your routine to flex rather than creating unnecessary pressure to stick to a rigid schedule.
The key is finding a morning flow that meets your physical and emotional needs while allowing you to provide attentive, loving care for your little one. With time, you'll find a morning routine that sets you and your baby up for a calm, fulfilling day.
In conclusion, a top morning routine is more than just a series of activities; it's a powerful tool for shaping your day, improving your well-being, and achieving your goals. By customizing your morning routine to suit your needs and incorporating science-backed principles, you can set the stage for a successful, fulfilling life. So, rise and shine, and start your journey toward a better tomorrow with a well-crafted morning routine!
Dealing With SI Joint Pain Part 1: What Exercises Help and What Should You Avoid

The sacroiliac (SI) joint, located at the base of the spine, plays a crucial role in connecting the sacrum to the pelvis. It acts as a shock absorber, transmitting forces between the upper body and the legs during various movements. It is often overlooked as a source of low back pain and when the SI joint becomes irritated or inflamed, it can cause severe discomfort and impaired mobility.
The most common symptoms of an irritated SI joint include:
Lower back pain, particularly in the dimples above the buttocks. SI joint pain often presents as a dull or sharp ache in the lower back, typically on one side. The pain may radiate to the buttocks, hips, or thighs.
Pain in the hip, groin, or buttocks, often felt on just one side
Pain when climbing stairs or straightening up after bending forward
Discomfort when sitting for long periods
Pain that worsens with walking, standing, twisting, or transitioning between positions
Radiating pain down the leg rarely past the knee
Causes and Symptoms of SI Joint Pain
The sacroiliac joint can be susceptible to dysfunction and inflammation for a variety of reasons. Some of the most common causes of SI joint pain include:
Pregnancy: Changes in weight, posture, hormones, and pelvic mechanics during pregnancy and childbirth often put extra strain on the SI joints, leading to pain. SI joint dysfunction is a very frequent cause of back pain in pregnant women. Let's break down these factors in more detail:
Pregnancy Alignment Shifts: The body's alignment shifts during pregnancy, tilting the pelvis forward into an anterior pelvic tilt. This shift, combined with a change in the body's centre of gravity, can cause the two bones at the SI joint to rub against each other, resulting in pain.
Hormonal Changes: Pregnancy hormones, including relaxin, soften joints, ligaments, and connective tissues to accommodate the growing baby and provide flexibility for childbirth. However, this softening can lead to increased joint mobility and reduced stability, potentially causing SI joint hypermobility and pain.
Increased Body Weight: As pregnancy progresses, the added weight increases the forces exerted on the pelvis, exacerbating the above issues.
Injury or trauma: Stress or injury to the joint from an abrupt movement, fall, or motor vehicle accident can damage the ligaments supporting the SI joint. Sports that involve twisting like golf, football, and hockey commonly lead to SI joint sprains and inflammation.
Arthritis: Osteoarthritis of the SI joint may develop over time from normal wear and tear. Rheumatoid arthritis can also affect the joint and is associated with inflammation.
Leg length discrepancy: Having one leg longer than the other alters pelvic alignment and weight distribution, which increases stress on the SI joints. This asymmetric mechanics can cause pain.
Muscle imbalances: Weakness or tightness in core, pelvic, hip, and leg muscles can impair proper stabilization of the SI joint, leading to strain and pain. Abdominal muscle separation after pregnancy is one example.
Is your low back causing your Sacroiliac Joint pain?
Your lower back can contribute to SI joint pain due to their close functional connection. Stiffness or issues in the lower back can lead to SI joint dysfunction. When the lower back isn't moving properly, it can alter the biomechanics of the SI joint, causing discomfort and pain. This is because the SI joint and lower back work together to support the spine and pelvis.
The SI joint pain you experience may not always directly originate from the SI joint itself; it can be referred pain from the lower back. Dysfunction in the lower back can create stress on the SI joint, affecting its stability and causing discomfort in the lower back and hips.
To determine if your lower back is contributing to SI joint pain, you can perform a self-assessment using a ball to target specific areas in your lower back. If pressing on a spot in your lower back reproduces your pelvic pain, it suggests that the lower back is involved in your SI joint discomfort. Addressing both lower back and SI joint mobility through appropriate exercises and consultation with a healthcare professional can help manage and alleviate SI joint pain effectively.
Assessment and Exercise
Practical assessment and exercise to help individuals determine if their lower back is contributing to their SI joint pain:
Choose a Ball: To begin, you will need a therapy ball, spikey massage ball, tennis ball, or a similar object that you are comfortable lying on top of.
Lay down on your back with your knees bent and your feet flat on the floor. Place the selected ball at the base of your rib cage, set the ball just off to one side of your spine (never place a ball directly in the middle of your spine).
Gently let the ball roll out across that one side, allowing it to press into any specific triggered areas of your lower back.
Once a triggered spot has been identified, remain there, take deep breaths, letting the ball apply pressure to the identified area.
Once the tension in the tissue has released you can move on and hunt out any other triggered areas.
Continue downward on that same side of the spine, move the ball down one segment at a time and repeat the process. Look for areas that feel important and spend enough time on each spot for it to release.
Compare the sensations on one side with the other. Note any differences in stiffness, tenderness, or tightness.
Please note that if you’re a currently pregnant you must not carry out this exercise whilst laying on your back. Alternatively, you can perform the exercise against a wall or hard back chair.
If you are experiencing significant pain or discomfort, it is essential to consult with a healthcare professional for a proper diagnosis and a tailored treatment plan. Addressing both hip and spine mobility can help individuals manage and alleviate SI joint pain effectively.
effective exercises for sacroiliac joint pain relief

Diaphragmatic Breathing
Starting Position:
Visualization: Picture the diaphragm as a dome-shaped muscle separating the chest (ribcage) from the abdomen, even though it's not physically felt.
Awareness: Stand or sit upright and place a scarf or band around the lower ribcage, gently pulling both ends to draw attention to the diaphragmatic area.
Inhalation
Focus: Direct your attention to the back and sides of the ribcage where the lungs are situated.
Breathing In: Inhale through your nose, visualizing your lungs expanding like slowly inflating balloons, feeling the scarf tighten.
Avoid Force: Do not force inhalation; it should be natural.
Diaphragm Action: Simultaneously, the diaphragm descends into the abdominal region, expanding the ribcage outward.
Exhalation
Expelling Air: Exhale through your mouth, sensing air gently leaving from the depths of your lungs.
Diaphragm Rising: Feel your diaphragm rising as you engage your deep abdominal muscles, gradually closing the ribcage.
Avoid Tension: Refrain from puffing cheeks or pursing lips to prevent tension in the neck, jaw, and face.
Benefits: Diaphragmatic breathing enhances breath control and posture, facilitating ease of movement and overall well-being.
Static Kneeling Hip Flexor/Quadriceps Stretch:
Kneel with front leg bent at a 90-degree angle.
Internally rotate back leg.
Draw abs in and Squeeze buttocks, while rotating pelvis posteriorly.
Slowly move your hips forward until a mild stretch is achieved in the front of the hip.
Raise stretch side arm up and over to the opposite side.
Hold side bend position and slowly rotate backward.
Hold for 20-30 seconds.
Switch sides and repeat.
Inner Thigh Stretch:
Sit on the floor with legs bent and knees wide, feet together. You can place a small pillow under each knee for comfort.
Keeping back straight, gently press knees toward floor using both hands on top of thighs. Avoid forcing the stretch.
Hold for 30 seconds, feeling a mild stretch of the inner thighs. Relax and repeat.
Hamstring Stretch:
Sit near the edge of a chair. Extend one leg straight out in front of you, with a flexed foot place your heel on the floor, keep the knee slightly bent.
Keep the other foot flat on the floor. Maintain a neutral spine by avoiding rounding or arching the lower back.
Hinge forward at the hips, keeping the back straight. Reach down the extended leg as far as you can without pain.
You should feel a gentle stretch down the back of the thigh. Hold for 30 seconds, breathing deeply.
Repeat on the other side.
Pelvic Clock- Semi Deflated Mini Ball
Performing the Pelvic Clock with a deflated mini ball is an effective exercise for SI joint dysfunction and overall core strength. It helps with natural pelvic movement and differentiation in the spine, sacrum, and pelvis.
Lie on your back with your knees bent and your feet flat on the floor. Position a semi deflated mini ball under your sacrum.
Inhale deeply.
Exhale while performing a deep crunch, tilting the pelvis forward (6 o'clock position).
Hold for 5 seconds.
Inhale again.
Exhale while tilting the pelvis back (12 o'clock position).
Hold and repeat the process.
SI Joint-Specific Tilt (11-1)
Similar setup with the Pelvic Clock.
If you have pain on the right, tilt slightly to the right (11 o'clock position) during the crunch.
If you have pain on the left, tilt slightly to the left (1 o'clock position) during the crunch.
Follow the same breathing strategy as in the previous exercise.
Focus on tilting toward the painful SI joint.
Lower Trunk Rotation
Lie on your back with knees bent and feet flat on the floor.
Tighten your stomach and push your lower back into the floor.
Gently rotate your legs to one side as far as you can, then do the same to the other side.
Repeat 10 to 20 times.
One Knee to Chest Stretch
Lie on your back with legs straight out in front.
Bring one knee up to your chest and grasp the back of your thigh.
Pull the knee toward your chest to stretch your buttock muscle.
Hold for 15 to 30 seconds, then return to your original position.
Repeat three times on each side.
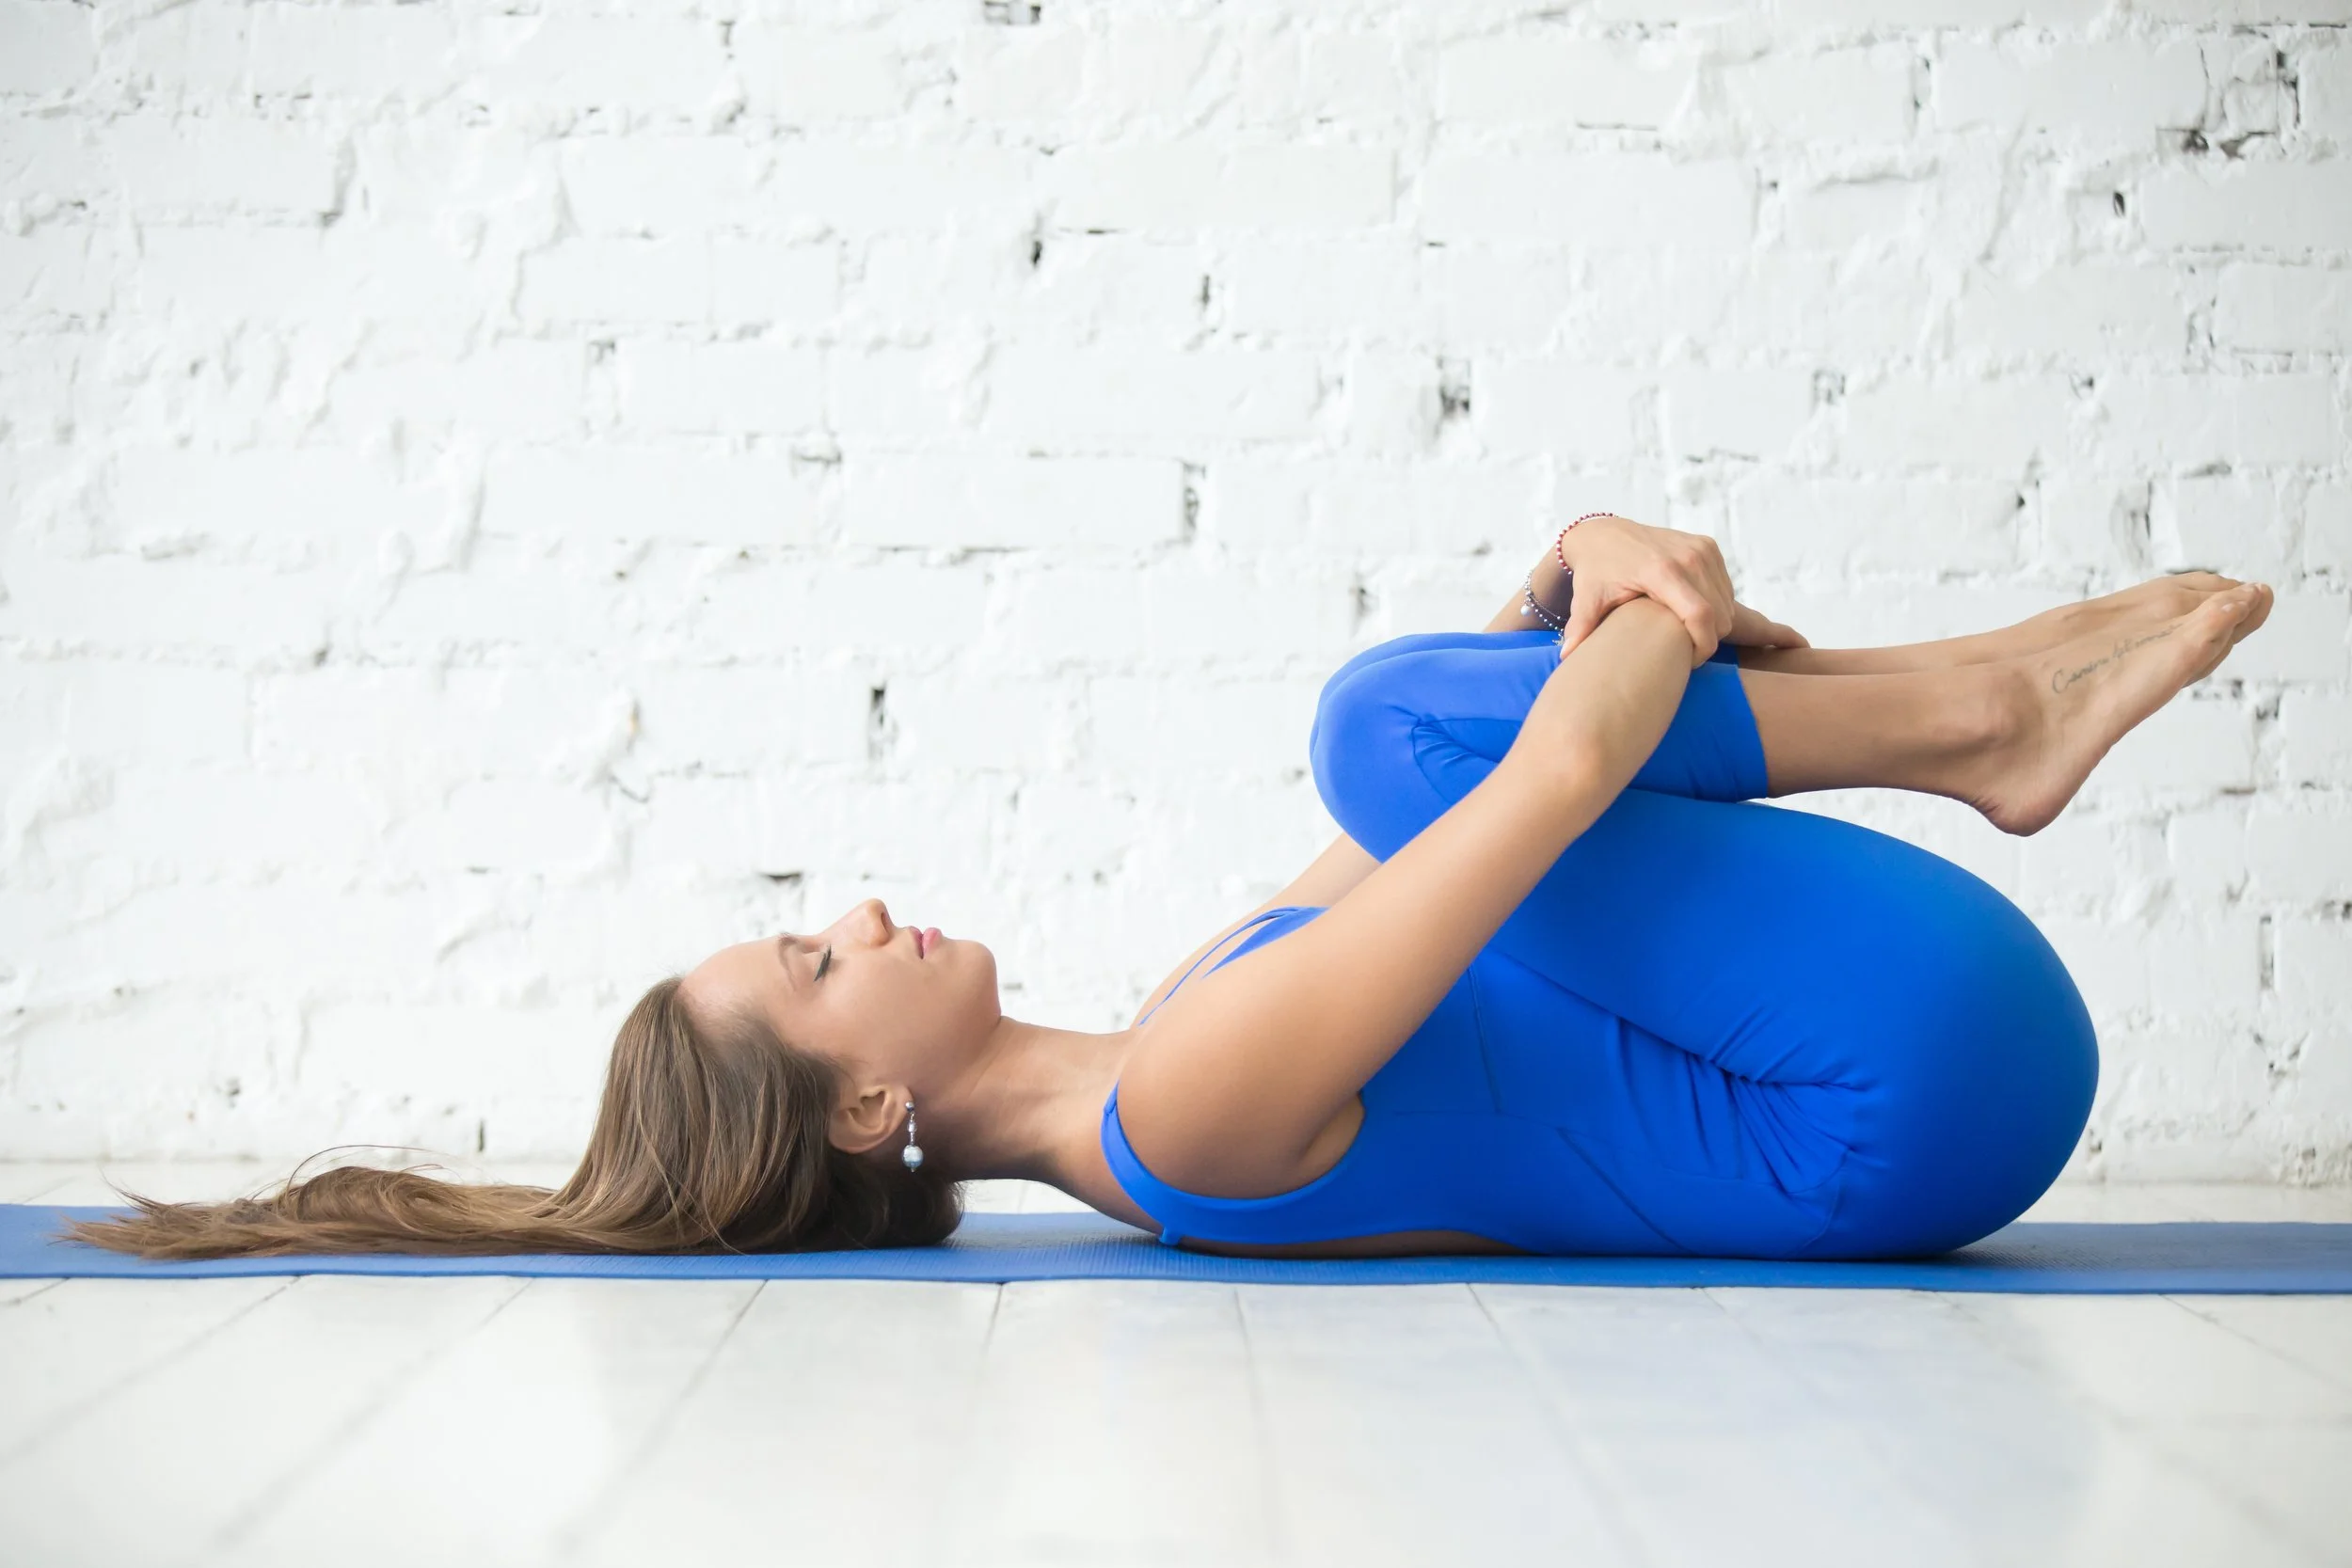
Both Knees to Chest Stretch
Lie down on your back with knees bent and feet flat.
Tighten your stomach muscles and push your lower back into the floor.
Pull both knees to your chest and hold for five seconds, then relax for five seconds.
Repeat this 10 to 20 times.
Knee Pull with Isometric Resistance
Start by lying on your back.
Pull one knee up toward your chest.
Cup your hands around the knee.
Push the knee away from you while providing resistance with your hands (isometric exercise).
Hold for several seconds, exhale, and repeat.
Leg Pull Apart with Belt
Place a belt around the legs near the knees.
Lie on your back.
Attempt to pull the legs apart against the resistance of the belt (isometric exercise).
Create an outward motion without actual leg movement.
Knee Squeeze with Stability Ball
Place a stability ball between your knees.
Squeeze the knees together, pushing against the ball (isometric exercise).
Attempt to touch the knees without allowing actual movement due to the ball.
Floor Bridge
Lie on your back with knees bent, arms against your body, and palms against the floor.
Squeeze your buttocks and raise your hips off the ground to bring your body into a straight line.
Hold for five seconds, then slowly lower yourself to the ground again.
Repeat eight to ten times.
Single Leg Extension
Lie face down, ensuring your pelvis and spine are in a neutral position. Rest your forehead on your hands. Straighten your legs, positioning them hip-width apart.
Inhale deeply and elongate your spine.
Exhale and gently lengthen one leg away lifting it an inch off the mat. Concentrate on extending your leg away from the hip socket.
Inhale again as you lower leg, all the while maintaining abdominal engagement.
Lift the leg only as high as you can while ensuring your pelvis and spine remain stable.
Repeat ten times, alternating legs.
Yoga Exercises for SI Pain Relief
Many yoga poses offer beneficial stretches for SI joint pain relief. These poses can strengthen the sacroiliac joint and reduce discomfort, as well as prevent future problems. However, it's crucial to perform these poses correctly to avoid exacerbating the issue. If you're uncertain, consult a local yoga instructor or studio for guidance and always remember to seek expert advice from a physiotherapist
1. Cobra Pose
Lie on your stomach with your legs stretched back, tops of your feet on the floor.
Spread your hands on the floor under your shoulders, elbows tucked in.
Lift your upper body off the floor, holding for five seconds, then lower it back down.
2. Locust Pose
Lie on your stomach with arms alongside your body, palms up.
Lift your head, upper body, arms, and legs away from the floor.
Hold for 15-30 seconds, then release.
3. Bow Pose
Lie on your stomach with arms along your body, palms up.
Bend your knees and bring your heels as close to your buttocks as possible.
Reach back and grab your ankles, being careful not to tense your back muscles.
Lift your feet and upper body, holding the pose for 15-30 seconds, then relax.
Dealing with sacroiliac joint pain During Pregnancy and Beyond
If you are experiencing sacroiliac joint pain while pregnant, check out Part 2 of this article for safe and effective exercises that can provide relief during pregnancy. Click [HERE] to jump to Part 2: Effective Exercises for Sacroiliac Joint Pain Relief During Pregnancy.
For those dealing with lingering SI joint pain during postpartum recovery, Part 3 outlines safe and beneficial Pilates exercises to aid in recovery after childbirth. Click [HERE] to go to Part 3: Effective Pilates Exercises for Sacroiliac Joint Pain Relief Postpartum.
With proper assessment, targeted exercises, and lifestyle adjustments tailored to the stage of pregnancy or postpartum, sacroiliac joint pain can often be effectively managed. The key is choosing the right activities and exercises to strengthen and stabilize without overstressing the SI joint. By following the guidance in Part 2 and Part 3, you can develop an appropriate exercise routine to keep your SI joint happy and healthy.
Exercises and Activities to Avoid
While the above exercises are excellent for preventing and managing SI joint pain, certain movements and activities should be limited or avoided, especially when experiencing pain:
Lunges or Step-Ups: These single-leg lower body exercises place the pelvis in a less stable position. Focus on exercises that evenly distribute your weight over both feet.
Impact Exercises: Running, jumping, and other high-impact activities can exacerbate pain due to pelvic hypermobility. Avoid these movements when experiencing SI joint pain.
Traditional Cardio Machines: Machines like the elliptical, Stairmaster, and treadmill promote single-leg activities and should be avoided.
Crossing Legs When Seated: Maintain even weight distribution by sitting with both feet flat on the floor. Avoid deep single-leg hip stretches.
Any Pain-Triggering Moves: Be mindful of activities that trigger pain, as these can vary among individuals.
Single-Leg Daily Activities: Activities such as walking, stair climbing, and getting up and down from the ground are single-leg activities. While it's not possible to entirely avoid these activities, limit extended periods of walking or stair climbing during severe pain. When rising from the ground, step up on the side that doesn't hurt.
Prevention and Lifestyle Tips
Preventing SI joint pain and maintaining the health of the sacroiliac joint are essential for promoting overall well-being and avoiding potential discomfort. Incorporating simple lifestyle adjustments and adopting good practices can significantly reduce the risk of SI joint pain and improve joint function.
1. Maintain Good Posture
Practicing good posture is crucial for maintaining proper alignment of the spine, including the SI joint. When sitting, standing, or walking, try to keep your shoulders back, chin parallel to the floor, and abdomen engaged. Avoid slouching or hunching forward, as this can place unnecessary strain on the lower back and SI joint.
2. Practice Proper Body Mechanics
Whether lifting heavy objects or performing daily activities, using proper body mechanics is essential for protecting the SI joint from injury. When lifting, bend your knees and keep your back straight, avoiding twisting or jerking movements. Engage your core muscles to support your spine and use your legs to lift, rather than relying solely on your back.
3. Stay Active and Exercise Regularly
Regular physical activity and exercise are essential for maintaining joint flexibility, muscle strength, and overall joint health. Low-impact activities such as walking, swimming, or cycling can be particularly beneficial for individuals with SI joint pain. Be sure to incorporate exercises that specifically target the SI joint and surrounding muscles.
4. Maintain a Healthy Weight
Excess body weight can place additional stress on the SI joint and contribute to pain and discomfort. By maintaining a healthy weight through a balanced diet and regular exercise, individuals can reduce the burden on their joints, including the SI joint.
5. Avoid Prolonged Sitting
Sitting for extended periods can place increased pressure on the SI joint and lead to stiffness and discomfort. If your job or lifestyle involves prolonged sitting, take breaks to stand, stretch, and walk around regularly. Consider using an ergonomic chair with proper lumbar support to maintain better posture while seated.
6. Avoid High-Impact Activities
High-impact activities such as running or jumping can put significant stress on the SI joint. If you have a history of SI joint pain or are at risk for developing it, consider engaging in lower-impact exercises or consulting a fitness professional to create a joint-friendly exercise routine.
7. Listen to Your Body
Pay attention to your body’s signals and avoid pushing yourself through pain or discomfort. If you experience SI joint pain or any discomfort, take a break and allow your body to rest and recover. If the pain persists or worsens, seek guidance from a healthcare professional.
8. Supportive Footwear
Wearing supportive and comfortable footwear can contribute to proper body alignment and reduce stress on the SI joint. Choose shoes that offer adequate arch support and cushioning, especially if you spend extended periods on your feet.
9. Strengthen Your Core Muscles
A strong core can help support the spine and SI joint, reducing the risk of injury and discomfort. Incorporate core-strengthening exercises into your routine, such as planks, abdominal crunches, and yoga poses that target the core muscles.
The sacroiliac joint plays a crucial role in stabilizing the pelvis and lower spine. When this joint becomes irritated or inflamed, it can result in significant pain and mobility impairment. There are several potential causes of SI joint dysfunction, from pregnancy and childbirth to trauma, leg length discrepancies, and muscle imbalances.
The good news is that with proper assessment, targeted exercises, and some lifestyle adjustments, many cases of SI joint pain can be effectively managed and relieved. Exercises that strengthen the muscles surrounding the SI joint, improve pelvic and lower spine mobility, and promote stability are beneficial. Yoga poses like Cobra and Locust can also provide helpful stretches.
However, individuals should avoid activities that exacerbate SI joint pain like high-impact exercises, deep single leg stretches, and prolonged sitting or walking. Listening to your body and seeking guidance from a physical therapist or healthcare provider is key. With a proper exercise routine, healthy lifestyle habits, and mindfulness of body mechanics, the sacroiliac joint can be kept happy and healthy for the long term.
For those experiencing SI joint pain during pregnancy, Part 2 outlines safe exercises to relieve symptoms without overstressing the joint. If SI joint pain lingers postpartum, Part 3 provides beneficial Pilates exercises to aid recovery. The key is choosing safe pregnancy and postpartum activities that strengthen the surrounding muscles and promote mobility without further irritation. By developing an appropriate exercise routine tailored to your needs and stage of pregnancy or postpartum, you can keep your SI joint happy and healthy for the long term. With mindful body mechanics and professional guidance, SI joint pain can often be successfully managed through strategic exercises and lifestyle adjustments.

Dealing With SI Joint Pain Part 2: Effective Exercises For Sacroiliac Joint Pain Relief During Pregnancy.

The sacroiliac (SI) joint can be a major source of pain and discomfort during pregnancy. As the body undergoes various changes to accommodate the growing baby, extra strain is placed on the SI joint connecting the sacrum and ilium bones. The loosening of ligaments along with the added weight on the pelvis can lead to inflammation and irritation. While SI joint pain can be limiting for an expectant mother, there are safe and effective exercises that can provide relief.
This article will outline beneficial exercises tailored to pregnancy that can help stabilize the SI joint, strengthen surrounding muscles, and increase mobility without overexerting the body. The key is modifying traditional exercises to accommodate a pregnant woman's changed centre of gravity and avoid high-impact movements. With proper guidance, an exercise regimen can be developed that reduces SI joint pain and prepares the body for the demands of labor and delivery.
Safe exercises during pregnancy
Diaphragmatic Breathing
Starting Position:
Visualization: Picture the diaphragm as a dome-shaped muscle separating the chest (ribcage) from the abdomen, even though it's not physically felt.
Awareness: Stand or sit upright and place a scarf or band around the lower ribcage, gently pulling both ends to draw attention to the diaphragmatic area.
Inhalation
Focus: Direct your attention to the back and sides of the ribcage where the lungs are situated.
Breathing In: Inhale through your nose, visualizing your lungs expanding like slowly inflating balloons, feeling the scarf tighten.
Avoid Force: Do not force inhalation; it should be natural.
Diaphragm Action: Simultaneously, the diaphragm descends into the abdominal region, expanding the ribcage outward.
Exhalation
Expelling Air: Exhale through your mouth, sensing air gently leaving from the depths of your lungs.
Diaphragm Rising: Feel your diaphragm rising as you engage your deep abdominal muscles, gradually closing the ribcage.
Avoid Tension: Refrain from puffing cheeks or pursing lips to prevent tension in the neck, jaw, and face.
Benefits: Diaphragmatic breathing enhances breath control and posture, facilitating ease of movement and overall well-being.
Pelvic Elevator Exercise
Starting Position
Sit upright on a chair with your feet planted on the floor, either hip-width apart or with inner thighs touching.
Distribute your weight evenly on both sitting bones and maintain a neutral, elongated spine.
Preparation
Take deep breaths, expanding your ribcage, and elongate your spine.
Exhale while imagining closing elevator doors and ascending to the first floor.
Initiate the lift by contracting from the back passage (as if holding back gas) and gradually shift this sensation forward toward the pubic bone (as if preventing urine release).
Continue to gently engage these muscles.
Inhale, maintaining the elevator on the first floor with closed doors.
Second Level:
Exhale as you rise to the second floor, slightly intensifying the pelvic floor engagement.
Inhale and hold the elevator at the second floor.
Third Level:
Exhale as you reach the third floor, engaging the pelvic floor muscles a bit more, without excessive tension.
Inhale while keeping the elevator on the third floor.
Descending:
Exhale gradually, lowering the elevator one floor at a time until reaching the ground floor.
Open the doors slowly, releasing the pelvic floor with control.
Repetition: Repeat this cycle up to five times.
Guidance:
Avoid forceful or overly tight contractions; maintain a gentle engagement.
Keep the buttock muscles relaxed, ensuring the pelvis remains steady.
Maintain an open chest and relaxed shoulders, preventing neck tension.
Continuously breathe; refrain from holding your breath throughout the exercise.
Benefits: Enhances pelvic floor awareness, control, and strength.
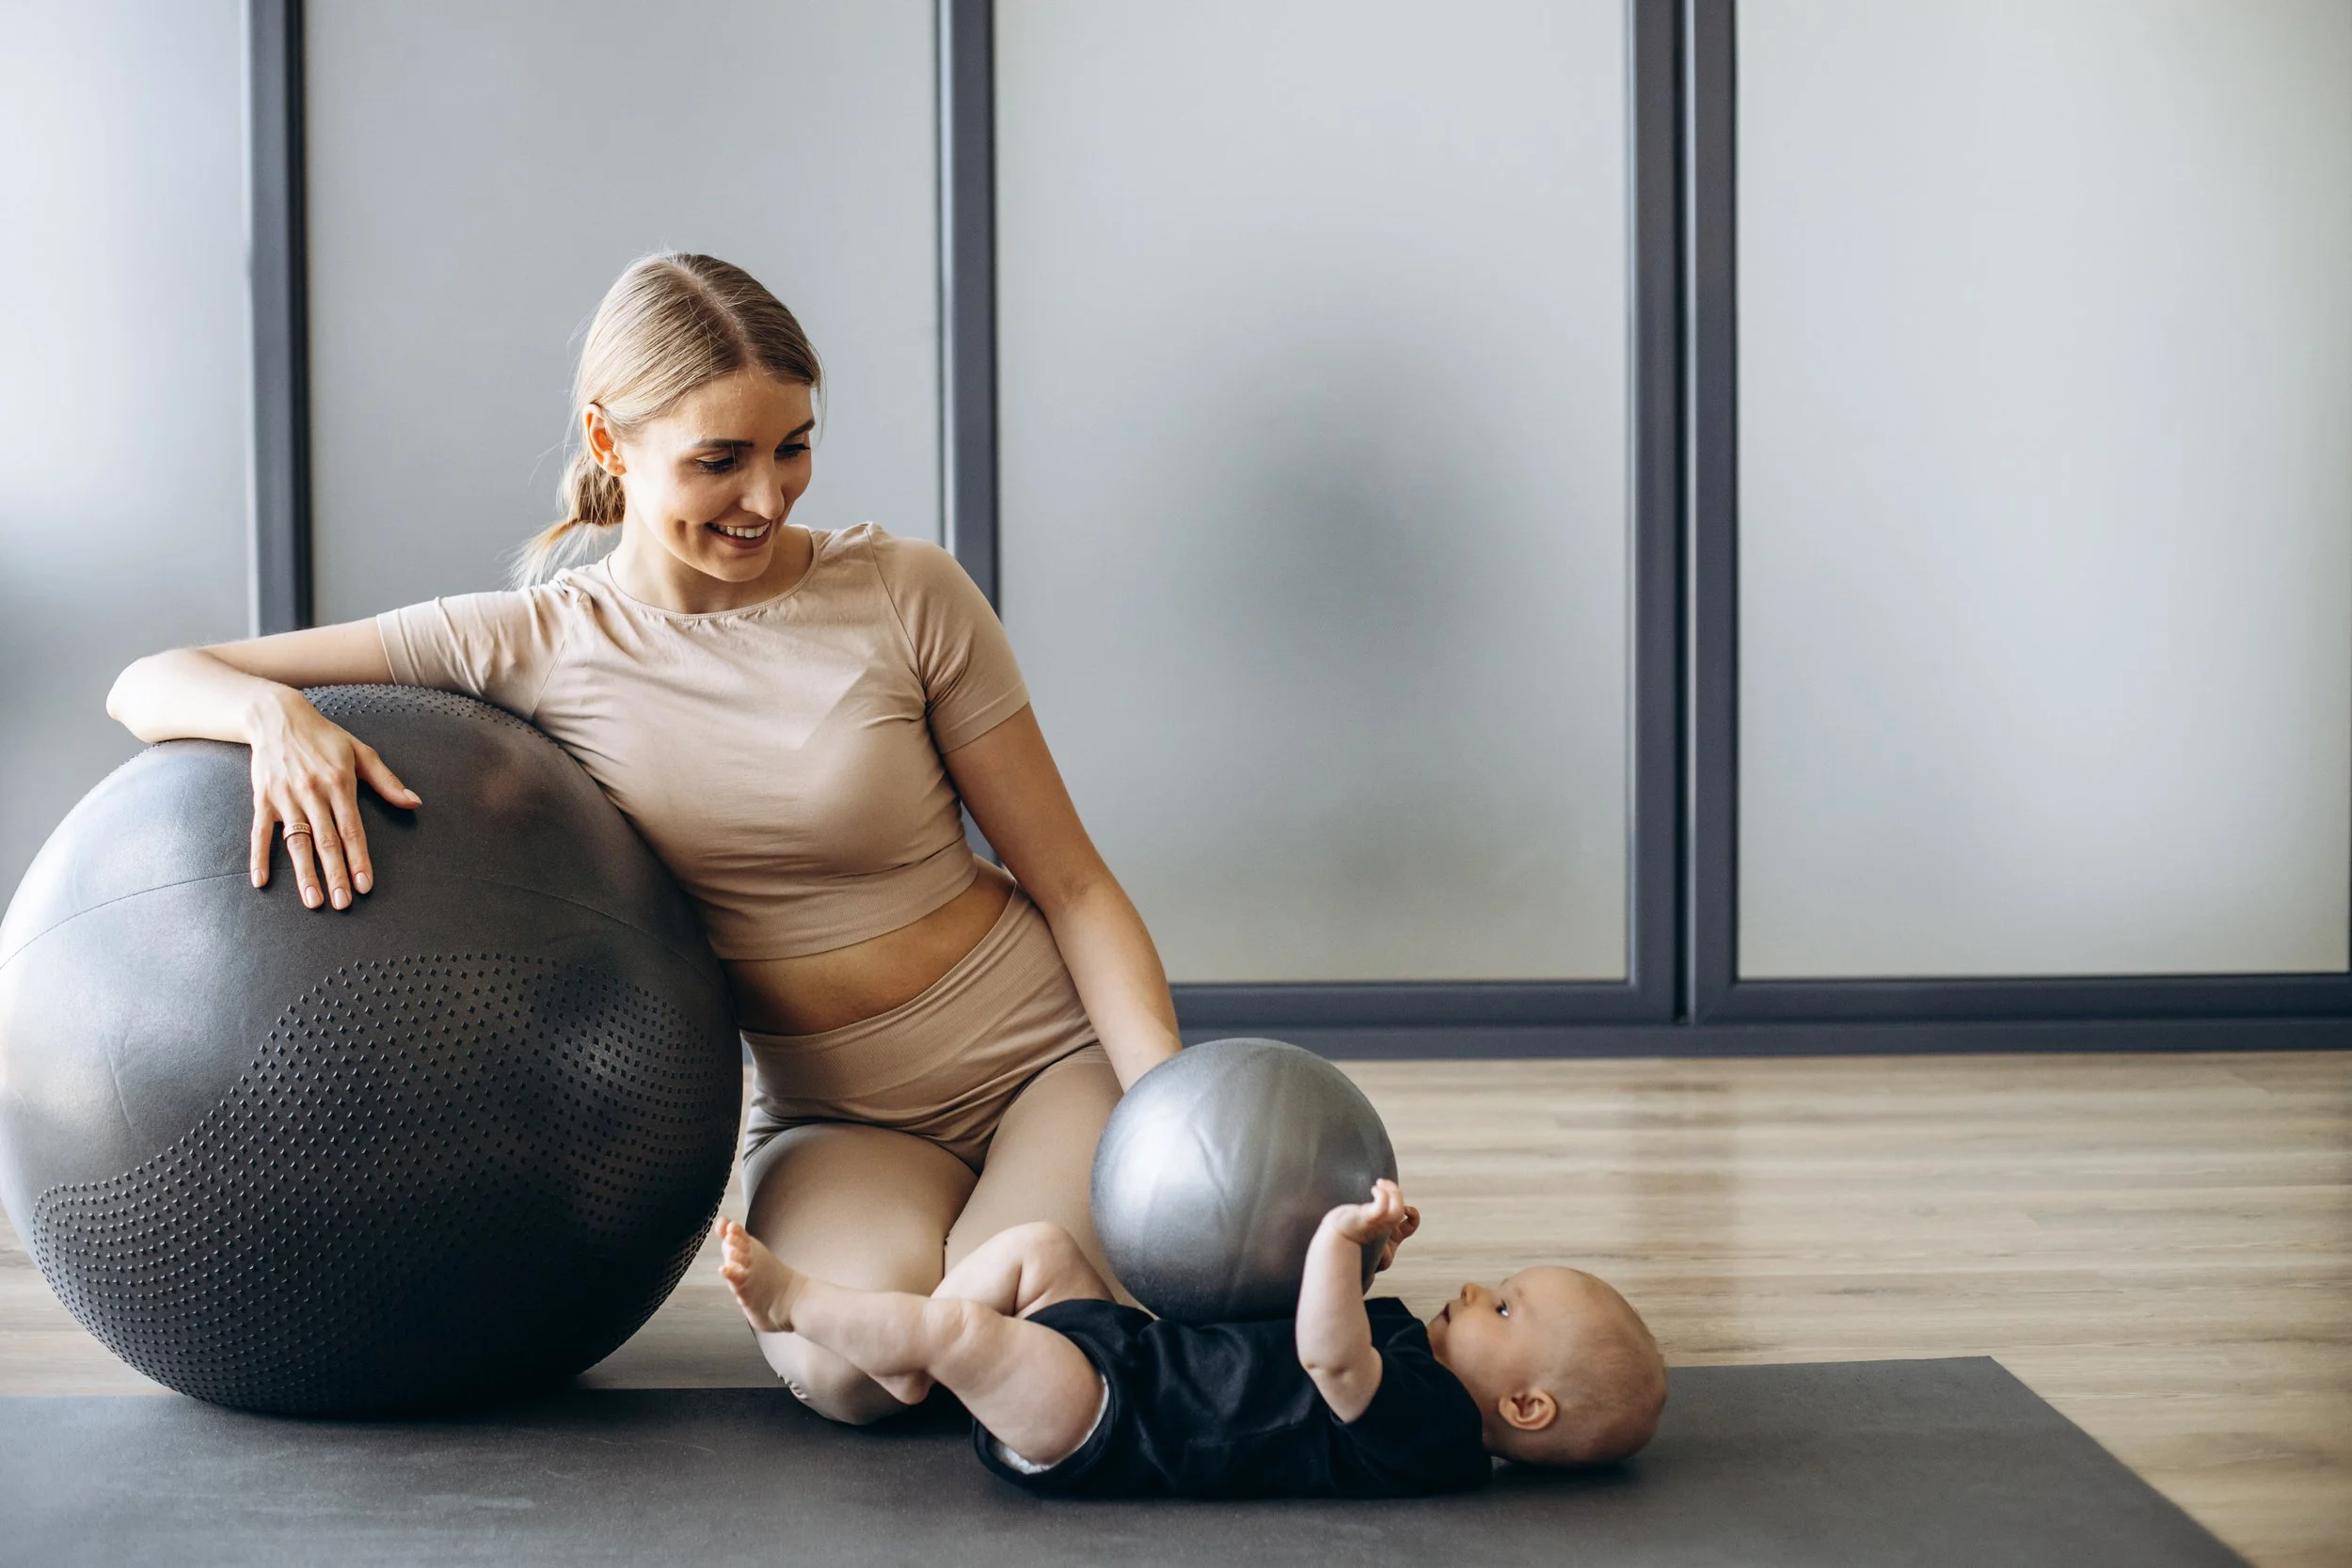
Pelvic Tilts and Circles on a Birth Ball
Sit on a birth ball with knees at a 90-degree angle and feet flat on the floor.
Place hands on knees and gently roll your back backward, creating a "C" shape with your belly.
Roll your belly forward to create another "C" shape with your back.
Repeat pelvic tilts 10 times for relief and movement in the pelvis.
Seated Ball Squeeze: Feet Parallel
Sit on a birth ball with knees at a 90-degree angle, feet flat and parallel on the floor.
Place a mini ball between your knees.
Coordinate your breath with the movement; inhale to prepare and exhale as you lift the pelvic floor while squeezing the knees together and the ball.
Hold for 5-10 seconds.
Inhale to release.
Repeat 5-10 times.
If you lack a ball, a small pillow or rolled-up towel can be used.
Seated Ball Squeeze: Hip Shift
Sit on a birth ball with knees at a 90-degree angle, feet flat and parallel.
Place a mini ball between your knees.
Shift one knee forward and the opposite hip backward.
Coordinate your breath; inhale to prepare and exhale as you lift the pelvic floor, squeezing the knees and ball while maintaining this position.
Hold for 5-10 seconds.
Inhale to release.
Repeat 5-10 times.
Switch sides; shift the opposite knee forward and the other hip backward.
90-90 Banded Ankle Rotations
Lie down on your side in a 90-90 position; knees forward in line with your hips and feet in line with your knees.
Position the back of your thighs against a box.
Place a resistance band around your ankles and yoga block between your knees.
Push the top leg's hamstring into the box.
Perform a slight posterior pelvic tilt.
Slowly turn your toes down, leading with your heel toward the ceiling.
Stay within your active range of hip internal rotation.
Repeat 10 reps each leg.
Focus on maintaining a slight posterior pelvic tilt throughout.
Feel the forward fibers of your glute muscles working.
Control the movement and maintain controlled breathing.
Ensure your head, ribs, and hips stay stacked in alignment.
Kneeling Squats
Kneel on a soft surface like a yoga mat or cushion. Your knees should be hip-width apart.
Sit your hips back and down until your glutes touch your heels. Keep your back straight, core engaged, and chest lifted.
Sit back until buttocks touch heels
Engage your core and squeeze glutes to extend hips upwards
Hold top position for 2 seconds
Slowly and with control return to starting position
Breathe in as you lower down, breathe out as you drive up.
Repeat 8-10 times.
Bird Dog
Get on your hands and knees on the floor or a yoga mat. Your wrists should be under your shoulders and your knees under your hips.
Engage your core and draw your shoulder blades down your back
Raise one leg straight back, simultaneously raise opposite arm straight forward
Keep core and shoulders engaged
Hold for 3 seconds.
Return to start and switch sides
Repeat 6-8 times per side.
Modified Side Plank
Begin lying on your side, support yourself up on your forearm and bend your knees together.
Engage your core and draw your shoulder blades down your back
Keep your shoulders stacked vertically and your neck neutral.
Raise your hips up off the floor by squeezing your glutes and obliques. Your body should form one straight line form knee to crown of the head.
Make sure to keep your hips lifted high, do not let them drop down. Maintain engagement.
Hold this side plank position for 20-30 seconds, continuing to breathe normally.
Slowly return hips to floor and switch sides, repeating on the other side
Banded Squat Hold
Stand with feet hip-width apart, toes facing forward. Place a resistance band around your knees.
Inhale as you initiate the movement by sending your hips back while keeping your chest lifted.
Exhale as you lower down into the squat position, sitting your hips back and down until your thighs are parallel to the floor.
Engage your core to keep your back straight. Press your knees outward into the band to activate your glutes and inner thighs.
Hold this bottom squat position for 30 seconds, continuing to breathe deeply. Maintain engagement of the core and glutes. Do not allow knees to cave inward.
Inhale and exhale for 30 seconds as you hold the bottom of the squat. Keep chest lifted.
To stand up, inhale and drive through your heels, straightening legs while keeping tension on the band. Maintain a neutral spine.
Exhale as you reach the top standing position.
Repeat for 2-3 sets of 30 second hold. Focus on proper form and activation of muscles.
Hip Hinge Movement:
Stand with feet shoulder-width apart, knees slightly bent. Breathe into your belly and engage your core muscles.
Initiate the movement by pushing your hips back as if closing a door behind you with your butt. Keep your spine long and neutral - don't round your back.
As you hinge forward at the hips, bend your knees slightly but keep your legs relatively straight. Do not let your knees collapse inward.
Keep the crown of your head, neck and spine in one line as you continue hinging forward from your hip joints.
Lower down until you feel a stretch in your hamstrings. Do not round your spine - go only as far as you can while maintaining a flat back.
Drive through your heels to return to standing.
Make sure you are hinging from your hips rather than bending at your lower back. Maintain a neutral spine throughout.
Start with no weight and focus on form. Progress to holding weights such as a kettlebell or dumbbell to increase challenge.
Breathe in as you hinge down, breathe out as you squeeze your glutes and return to standing. Perform slowly and controlled.
Repeat for 2-3 sets of 10-12 reps, keeping proper form.
Resistance Band Lat Pulldown
Secure a resistance band above your head to a sturdy anchor point. Grip the handles or ends of the band with a slightly wider than shoulder-width grip.
Sit or stand tall with a neutral spine. Retract your shoulder blades down and back. Engage your core.
Inhale and initiate the movement by pulling the band down toward your chest in a controlled motion. Focus on drawing your shoulder blades together as you pull.
Exhale at the bottom as your hands approach your chest. Do not round or arch your lower back.
Inhale and slowly return your arms back overhead to the starting position by straightening your arms. Maintain control throughout.
Repeat for 2-3 sets of 10-12 reps, keeping proper form. Draw your shoulder blades down and back on each rep.
Keep your shoulders down and control the movement on both the pulling and releasing phases.
Though SI joint pain is common during pregnancy, it does not have to prevent staying active. With doctor approval, choosing the right low-impact exercises can provide significant relief by keeping the joints mobile and surrounding muscles engaged. While being careful to avoid overstretching or high-impact activities, moves like pelvic tilts, resisted band work, and modified yoga can strengthen and stabilize without placing undue strain. Along with other lifestyle measures, a targeted prenatal exercise routine can help manage SI joint pain for a more comfortable pregnancy. Most importantly, new mothers should listen to their bodies, seek professional guidance, and work within their current capabilities. With the proper modifications, exercise can be tremendously beneficial for alleviating SI joint discomfort during this transformative time.
The key is staying active while honouring your body's changes and limitations during pregnancy. Seeking professional guidance can help develop the perfect exercise plan for your SI joint pain.

Dealing With SI Joint Pain Part 3: Effective Pilates Exercises For Sacroiliac Joint Pain Relief During Postpartum Recovery.
During the postpartum period, the strain of pregnancy and delivery can leave the sacroiliac (SI) joint vulnerable to dysfunction and pain. As the body recovers, the ligaments and muscles surrounding the SI joint at the pelvis require stabilization and strength. Gentle, targeted exercises can aid in realigning the pelvis, relieving SI discomfort, and restoring mobility.
This article provides effective Pilates exercises that are safe and beneficial for new mothers recovering from childbirth. The focus is on stabilizing the core and pelvis, improving alignment, and gradually rebuilding strength in the hips, back, and abdominal muscles. With modifications and awareness of the body's postpartum limitations, Pilates can be an excellent option for relieving lingering SI joint pain on the road to recovery.
safe exercises during postpartum recovery.
Diaphragmatic Breathing
Starting Position:
Visualization: Picture the diaphragm as a dome-shaped muscle separating the chest (ribcage) from the abdomen, even though it's not physically felt.
Awareness: Stand or sit upright and place a scarf or band around the lower ribcage, gently pulling both ends to draw attention to the diaphragmatic area.
Inhalation
Focus: Direct your attention to the back and sides of the ribcage where the lungs are situated.
Breathing In: Inhale through your nose, visualizing your lungs expanding like slowly inflating balloons, feeling the scarf tighten.
Avoid Force: Do not force inhalation; it should be natural.
Diaphragm Action: Simultaneously, the diaphragm descends into the abdominal region, expanding the ribcage outward.
Exhalation
Expelling Air: Exhale through your mouth, sensing air gently leaving from the depths of your lungs.
Diaphragm Rising: Feel your diaphragm rising as you engage your deep abdominal muscles, gradually closing the ribcage.
Avoid Tension: Refrain from puffing cheeks or pursing lips to prevent tension in the neck, jaw, and face.
Benefits: Diaphragmatic breathing enhances breath control and posture, facilitating ease of movement and overall well-being.
Pelvic Elevator Exercise
Starting Position
Sit upright on a chair with your feet planted on the floor, either hip-width apart or with inner thighs touching.
Distribute your weight evenly on both sitting bones and maintain a neutral, elongated spine.
Preparation
Take deep breaths, expanding your ribcage, and elongate your spine.
Exhale while imagining closing elevator doors and ascending to the first floor.
Initiate the lift by contracting from the back passage (as if holding back gas) and gradually shift this sensation forward toward the pubic bone (as if preventing urine release).
Continue to gently engage these muscles.
Inhale, maintaining the elevator on the first floor with closed doors.
Second Level:
Exhale as you rise to the second floor, slightly intensifying the pelvic floor engagement.
Inhale and hold the elevator at the second floor.
Third Level:
Exhale as you reach the third floor, engaging the pelvic floor muscles a bit more, without excessive tension.
Inhale while keeping the elevator on the third floor.
Descending:
Exhale gradually, lowering the elevator one floor at a time until reaching the ground floor.
Open the doors slowly, releasing the pelvic floor with control.
Repetition: Repeat this cycle up to five times.
Guidance:
Avoid forceful or overly tight contractions; maintain a gentle engagement.
Keep the buttock muscles relaxed, ensuring the pelvis remains steady.
Maintain an open chest and relaxed shoulders, preventing neck tension.
Continuously breathe; refrain from holding your breath throughout the exercise.
Benefits: Enhances pelvic floor awareness, control, and strength.
Leg Slides
Here's how to perform Leg Slides:
Start by lying on your back with your knees bent and feet flat on the mat. Keep your arms relaxed by your sides. (However to begin with, you may want to place your hands on your pelvis to check for unwanted movement).
Breathe in, preparing your body to move.
Breathe out as you gently connect to your centre by applying the Zip and Abdominal Hollowing [HERE]. Maintain an appropriate level of connection to your centre throughout.
Take a deep breath to prepare, and as you exhale, slide one foot forward along the mat, aiming to extend that leg straight while maintaining stability in the pelvis and a neutral spine.
Inhale as you smoothly return the leg back to the starting position, maintaining control and awareness of your movements.
Repeat the exercise with the other leg, sliding it along the mat while keeping the pelvis stable and the core engaged.
When performing Leg Slides, pay attention to the following key points:
Maintain a stable pelvis throughout the movement, avoiding any excessive tilting or movement in the hips.
Keep your core muscles activated to provide support and stability to the spine and pelvis.
Focus on lengthening through the extended leg while maintaining proper alignment and control. Breathe naturally throughout the exercise, coordinating your breath with the movement.
Knee Openings
Here's how to perform Knee Openings:
Begin by lying on your back with your knees bent and feet flat on the mat, hip-width apart.
Keep your arms relaxed by your sides. (However to begin with, you may want to place your hands on your pelvis to check for unwanted movement).
Breathe in, to prepare.
Breathe out as you gently connect to your centre.
Breathe in, preparing your body to move and maintain an appropriate level of connection to your centre throughout.
Breathe out as you allow one knee to open slowly to the side, keeping the foot down on the mat but allowing the foot to roll to its outer side. Open as far as you can without moving the pelvis.
Breathe in as you bring the knee back to the Starting Position.
Continue alternating sides, ensuring a smooth and controlled motion.
Repeat five times with each leg
When performing Knee Openings, keep the following tips in mind:
Keep your pelvis and spine still and centred throughout. Focus on your leg moving in isolation from the rest of your body.
Move your leg as far as you can without disturbing the pelvis and losing neutral.
Focus on your waist remaining long and even on both sides.
Keep your chest and the front of your shoulders open and avoid any tension in your neck area.
Remain still in the supporting leg, without tension.
Single Knee Folds
Here's how to perform Single Knee Folds:
Begin by lying on your back with your knees bent and feet flat on the mat. Keep your arms relaxed by your sides. (However to begin with, you may want to place your hands on your pelvis to check for unwanted movement.)
Breathe in, to prepare.
Breathe out as you gently connect to your centre.
Breathe in, preparing your body to move and maintain an appropriate level of connection to your centre throughout.
Breathe out as you lift your right foot off the mat and fold the knee up towards your body. Allow the weight of the leg to drop down into your hip socket and remain grounded in your pelvis and long in your spine.
Breathe in, maintaining a stable pelvis and neutral spine.
Breathe out as you slowly return the leg back down and your foot to the mat, maintaining control and engaging the core.
Continue alternating between the two legs.
Repeat five times with each leg.
As you perform Single Knee Folds, focus on the following key points:
Keep your pelvis stable and avoid any excessive movement or tilting.
Maintain a neutral spine, avoiding any arching or flattening of the lower back.
Engage your deep core muscles throughout the exercise to support and control the movement.
Breathe naturally, coordinating your breath with the movement.
Knee Circles
Here's how to perform Knee Circles:
Begin with Proper Alignment: Start by positioning yourself correctly in the Relaxation Position [HERE]
Prepare Your Leg: Gently fold one leg towards your body, ensuring controlled movement. Bend the knee further, allowing the lower leg to fully relax. Maintain a connection to your centre throughout the exercise.
Initiate the Circles: Breathe naturally and move at your own pace. Start circling your leg towards the mid-line of your body. Continue the circle down, around, and back up to the starting position. Keep the leg as close to your body as possible without disturbing your pelvis.
Change Direction: Complete up to five repetitions in one direction. Then, reverse the circle's direction.
Return to Starting Position; Conclude the exercise by bringing your knee in line with your hip joint. Ensure a stable pelvis as you lower your leg back to the mat. Return to the Relaxation Position.
Repeat on the Other Side: Perform the same sequence with the other leg, doing five repetitions in each direction.
As you perform Knee Circles, focus on the following key points:
Focus on maintaining a stable pelvis and spine throughout the exercise.
Keep the supporting leg still without any unnecessary tension.
Keep your chest open, and avoid tension in your neck area.
Begin with small circles (approximately the size of a grapefruit) and gradually increase the circle's size as you gain better control.
Spine Curls
Here's how to perform Spine Curls:
Align yourself correctly in the Relaxation Position, lengthening your arms by the side of your body on the mat. Maintain an appropriate level of connection to your centre throughout.
Breathe in, preparing your body to move.
Breathe out as you curl your pelvis underneath you, imprinting your lower back into the mat before beginning to wheel it off the mat one vertebra at a time. Roll your spine sequentially up from the mat to the tips of the shoulder blades.
Breathe in and hold this position, focusing on the length in your spine.
Breathe out as you roll the spine back down, softening the breastbone and wheeling once again carefully through each section.
Breathe in as you release the pelvis back to a neutral position.
Repeat up to ten times.
When performing Spine Curls, keep these tips in mind:
Focus on wheeling your spine off the mat vertebra by vertebra.
Control the sequential return of your spine back down to the mat.
Avoid rolling up too far, maintain the connection of your ribs to your pelvis and avoid arching your spine.
Ensure there is equal weight through both feet; this will help to prevent your pelvis dipping to either side.
Try to avoid 'hitching' your pelvis up towards your ribcage.
Knee Rolls
Here's how to perform Knee Rolls:
Align yourself correctly in the Relaxation Position. Position your legs slightly wider than hip-width apart. Reach your arms out on the mat slightly lower than shoulder height with your palms facing down. Maintain an appropriate level of connection to your centre throughout.
Breathe in, preparing your body to move.
Breathe out as you roll your left leg in from the hip joint and simultaneously roll the right leg out, also from the hip joint. Both knees will therefore roll to the right; allow your feet to peel slightly off the mat.
Breathe out and return both legs back to the centre at the same time.
Repeat to the other side and then repeat the whole sequence up to five times.
When performing Knee Rolls, keep these tips in mind:
Unlike Hip Rolls, the initiation for this action should come from the legs, specifically the top of your thigh in the hip socket.
Attempt to keep your pelvis still and square; although there will be slight reactionary movement, it is not your main objective to rotate the pelvis and spine.
Although you should have a sense of release in your hip joints, control the movement of your legs and don't just allow them to 'drop' to the side.
Ribcage Closure
Here's how to perform Ribcage Closure:
Align yourself correctly in the Relaxation Position. Maintain an appropriate level of connection to your centre throughout.
Breathe in and raise both arms to a vertical position above your chest, palms facing forwards.
Breathe out. Maintaining a stable and still spine, reach both arms overhead towards the floor. Keep your neck long and encourage the softening and the closing of the ribcage during this exhalation.
Breathe in as you return the arms above your chest. Feel your ribcage heavy and your chest open.
Breathe out and lower the arms, returning them to the mat and lengthening them by the sides of your body.
Repeat up to ten times.
When performing Ribcage Closure, keep these tips in mind:
Keep your pelvis and spine stable and still throughout. Be particularly careful not to allow your upper spine to arch as you reach your arms overhead.
Although your shoulder blades will naturally glide upwards on the back of your ribcage as your arms rise, do not over-elevate your shoulders.
It is equally as important not to depress your shoulders down your back; simply allow them to move naturally and without tension.
Fully lengthen your arms but avoid locking your elbows.
Keep your neck long and free from tension.
Zigzags - Lying
Here's how to perform Zigzags - Lying:
Align yourself correctly in the Relaxation Position and place your feet up onto a wall. Ideally your thighs will be vertical and your shins will be horizontal; your pelvis and spine remain in neutral. Bring your legs together and connect your inner thighs; the soles of your feet are flat against the wall. Maintain an appropriate level of connection to your centre throughout.
Breathe in as you turn your legs out slightly from your hips, opening your knees and sliding your feet to a small 'V' position; keep the heels together.
Breathe out as you turn the legs in, again moving from your hip joints and drawing your knees naturally towards one another; your heels will slide away from one another.
Continue to 'zigzag' your legs and feet up to six times until the legs are at a comfortable distance apart.
Reverse the movement and, in the same amount of repetitions, 'zigzag' the legs back to the Starting Position.
Repeat up to ten times.
When performing Zigzags - Lying, keep these tips in mind:
Keep your pelvis and spine stable and still throughout; focus on the independent movement of the thigh bone in the hip socket.
Although you should have a sense of release in your hip joints, control the movement of your legs and don't just allow them to 'drop' to the side.
Maintain correct alignment of the legs; your feet, knees and hips should remain correctly aligned and move together.
Avoid lifting your feet off the wall; allow the soles of your feet to slide.
Keep your chest and the front of your shoulders open and avoid any tension in your neck area.
Creeping Feet
Here's how to perform Creeping Feet:
Align yourself correctly in the Relaxation Position and place your feet up onto a wall. Ideally your thighs will be vertical and your shins will be horizontal; your pelvis and spine remain in neutral. Place your legs hip-width apart and parallel, the soles of your feet are flat against the wall. This exercise can also be performed sitting upright on a chair, with your feet hip-width apart on the floor. Maintain an appropriate level of connection to your centre throughout.
Breathe naturally throughout.
Pick up your toes and spread your feet and toes as wide as possible onto the wall, and then lift up the arches of the feet and glide the heels up the wall. Maintain contact of the feet to the wall throughout.
Repeat as above and continue creeping your feet up the wall until they can no longer stay flat.
Bend your knees and slide your feet back down the wall, returning to the Starting Position.
Repeat up to ten times.
When performing Creeping Feet, keep these tips in mind:
Avoid over-curling the toes and creating tension; try to keep the action in the arches of the feet.
Ensure that your feet remain evenly grounded and aligned on the wall and do not roll out or in.
Maintain correct alignment of your hips, knees and ankles.
The Cat
Here's how to perform The Cat:
Align yourself correctly in the Four-point Kneeling Position: Hands directly underneath your shoulders and your knees directly beneath your hips. Maintain an appropriate level of connection to your centre throughout.
Breathe in, preparing your body to move, and lengthen your spine.
Breathe out as you roll your pelvis underneath you, as if directing your tailbone between your legs; as you do so, your lower back will gently round and flex. Continue this flexion and allow your upper back to round gradually, followed by your neck, and finally nod your head slightly forwards. This position is a C-Curve, an even and balanced C-shape of the spine.
Breathe in wide to the lower ribcage to help maintain this lengthened C-Curve.
Breathe out as you simultaneously start to unravel the spine, sending the tailbone away from you, bringing the pelvis back to neutral as you also lengthen the head and upper spine back to the starting neutral position.
Repeat up to ten times.
When performing The Cat, keep the following tips in mind:
Aim for an elongated C-Curve, which is evenly flexed throughout the spine. A common mistake is to round the upper back too much.
Similarly ensure that you do not over-round the shoulders. Maintain the distance between your ears and shoulders.
Keep the head following the same curved line of the spine; do not drop it down too far.
Star (preparation)
Here's how to perform Star (preparation):
Lie face down, ensuring your pelvis and spine are in a neutral position. Rest your forehead on the mat. Straighten your legs, positioning them slightly wider than hip-width apart, and rotate them outward from the hips. Extend both arms above your head, spacing them slightly wider than your shoulders, and place your palms facing downward. Maintain a consistent connection to your core throughout the exercise.
Inhale deeply and elongate your spine.
Exhale and gently lift one arm and the opposite leg off the mat.
Inhale again as you lower your arm and leg, all the while maintaining the length of your upper body.
Repeat this movement up to ten times, alternating between arms and legs.
When performing Star (preparation), keep the following tips in mind:
Keep your abdominal muscles engaged.
Lift your arm and leg only as high as you can while ensuring your pelvis and spine remain stable.
Concentrate on extending your leg away from the hip socket.
Waist Twist Standing
Here's how to perform Waist Twist Standing:
Stand tall on the floor (not on your mat) and lengthen your spine into neutral. Your legs are in parallel and hip-width apart. Fold your arms in front of your chest, just below shoulder height. One palm is on top of the opposite elbow and the other hand is positioned underneath the opposite elbow. Maintain an appropriate level of connection to your centre throughout.
Breathe in, preparing your body to move, and lengthen your spine.
Breathe out as you initiate with a turn of the head and rotate your torso fully to the left. Keep your pelvis stable and keep lengthening up through the crown of the head.
Breathe in as you continue to lengthen your spine and rotate back to the Starting Position.
Repeat five times to each side.
When performing Waist Twist Standing, keep these tips in mind:
Your pelvis should remain still. Keep the weight even on your feet and maintain their contact with the floor throughout.
Focus on engaging your deep abdominals to help support your spine as you rotate and return.
The movement is pure rotation. Continue to keep the spine lengthening vertically and avoid arching in your back or shortening in your waist.
Carry your arms with the spine; do not allow them to lead the movement.
Allow maximum rotation of the head and neck, but ensure length throughout.
Side Reach Standing
Here's how to perform Side Reach Standing:
Stand tall on the floor (not on your mat) and lengthen your spine into neutral. Your legs are in parallel and hip-width apart. Allow your arms to lengthen down by the sides of your body. Maintain an appropriate level of connection to your centre throughout.
Breathe in as you raise your right arm out to the side and overhead.
Breathe out as you reach up and over, leading with your head, sequentially bending your spine to the left. Maintain the relationship between the right arm and your head. Your left arm will remain lengthened and slide down the outside of your left leg.
Breathe in. Maintain the length and position of your spine and focus on breathing laterally.
Breathe out as you return the spine back to the vertical position. Lower your right arm down by your side.
Repeat five times to each side.
When performing Side Reach Standing, keep these tips in mind:
As you side-bend, initiate the movement with your head, followed sequentially by your ribcage. As you return, initiate the movement from your centre.
The side bend should be a lengthened position; avoid any compression and feel support from the abdominals.
Ensure that you have moved in one plane only and not curved forward or arched back.
Maintain openness across your chest and the back of your shoulders, avoiding over reaching with your arms. Keep a relationship between the shoulders and the back of your ribcage; neither force them to depress, nor allow them to over-elevate.
Keep your shoulders and neck free from tension throughout.
Keep your head and neck in line with the rest of your spine.
Tennis Ball Rising
Here's how to perform Tennis Ball Rising:
Stand tall on the floor (not on your mat) and lengthen your spine into neutral. Your legs are in parallel and slightly closer than hip-width apart; place a tennis ball in between your ankles, just below the inside ankle bones.
If necessary, stand sideways on to a wall and place your hand on the wall slightly in front of your body to help maintain balance. Maintain an appropriate level of connection to your centre throughout.
Breathe in, preparing your body to move, and lengthen your spine.
Breathe out and rise up onto the balls of your feet, lifting your heels off the floor. Keep your spine lengthened and stable and maintain the position of the ball in between your ankles.
Breathe in. With control and maintaining length, lower your heels back down to the floor.
Breathe out as you bend your knees, keeping your heels firmly on the floor.
Breathe in as you straighten your legs and return to the Starting Position.
Repeat up to ten times.
When performing Tennis Ball Rising, keep these tips in mind:
Maintain a neutral pelvis and spine throughout. Remain long in your waist and keep a sense of your spine lengthening up and away.
Fully lengthen your legs but avoid locking your knees.
Keep your weight balanced evenly on both feet. Also, do not allow your feet to roll either in or out.
Mexican Wave
Here's how to perform the Mexican Wave:
Stand tall on the floor (not on your mat) and lengthen your spine into neutral. Your legs are in parallel and hip-width apart. Allow your arms to lengthen down by the sides of your body. This exercise can also be performed sitting upright on a chair, with your feet grounded hip-width apart on the floor. Maintain an appropriate level of connection to your centre throughout.
Breathe naturally throughout.
First, lift only your big toes off the floor, keeping the rest of your toes down.
Then, try to lift your toes one at a time in sequence until all of the toes have peeled off the floor.
Replace your toes back down in sequence, starting with the little toe and spacing them out as wide as possible.
Reverse the movement: raise the little toes first, continuing one toe at a time to the big toe.
Repeat up to five times, either working the feet separately or both together.
When performing the Mexican Wave, keep these tips in mind:
Maintain correct alignment of your leg: ensure that your foot, ankle and knee remain in line with your hip.
Continue to maintain a stable and lengthened vertical position of your pelvis and spine throughout.
Keep your chest and the front of your shoulders open and avoid any tension in your neck area.
Ankle Circles
Here's how to perform Ankle Circles:
Align yourself correctly in the Relaxation Position. Fold one leg in towards your body with stability. Clasp your hands lightly behind your thigh and lift your lower leg up slightly so that your foot is higher than your knee. This exercise can also be performed sitting upright on the mat with your legs lengthened out in front of you and your arms reaching behind your body with your hands resting on the mat for support. Maintain an appropriate level of connection to your centre throughout.
Breathe naturally throughout.
Keeping your leg still, flex your foot by moving only your ankle joint and circle your foot outwards. Complete a full circle, trying to keep your foot and toes lengthened and free from tension.
Repeat the ankle circle up to five times and then reverse the direction and circle the ankle up to five times inwards.
Repeat on the other ankle, up to five times in each direction.
When performing Ankle Circles, keep the following tips in mind:
Maintain a neutral pelvis and spine throughout. Particularly avoid twisting your pelvis or side-bending your spine as you reach to hold your leg.
Keep your thigh and shins still and correctly aligned throughout.
Remember, you want the circle to come purely from your ankle.
Try to keep your toes from being 'over-active'.
In the postpartum period, Pilates offers new mothers a way to gently rehabilitate the core and pelvis while addressing common SI joint pain. With professional guidance on proper form and technique, Pilates exercises can stabilize, strengthen, and bring the body back into alignment. While honouring the body's limitations, a customized Pilates routine helps safely rebuild the muscles surrounding the SI joint and provides an active path to healing. Along with other lifestyle measures, Pilates is an effective option for relieving SI discomfort and restoring balance to the pelvis after pregnancy and delivery. Above all, new mothers should listen to their bodies, ease back into exercise at an appropriate pace, and use Pilates as a tool to support the body's remarkable postpartum recovery.

Dealing with Pelvic Girdle Pain (PGP) During Pregnancy and Beyond
Pregnancy is an exciting time, but it can also put strain on your body in unexpected ways. One common issue faced by around 1 in 4 expectant mothers is pelvic girdle pain (PGP). This condition causes discomfort and aching sensations in the pelvic region, hips, lower back, and thighs.
While PGP is highly prevalent during pregnancy, it's crucial to remember it is not considered a normal part of carrying a child. The pain and limitations on your movements can significantly impact daily functioning. Seeking proper diagnosis and support is essential to manage PGP effectively and ensure you can enjoy your pregnancy as comfortably as possible.
In this guide, we will explore the common symptoms of PGP and how it can affect daily activities. You'll learn when it's advisable to seek medical help for pelvic discomfort. We'll also dive into the potential causes of PGP, self-care tips you can implement at home, and exercises that may help provide relief.
Arming yourself with knowledge on PGP is the first step to taking control of this condition. There are many strategies you can try to reduce pain and prevent it from disrupting your life. With proper guidance and support from your healthcare team, you can find an approach that works for you. The goal is to ensure PGP doesn't prevent you from delighting in each moment of your pregnancy journey.
Pelvic Girdle Pain vs. Symphysis Pubis Dysfunction
Pelvic girdle pain (PGP) and Symphysis Pubis Dysfunction (SPD) are two common pregnancy-related conditions that affect the pelvic joints. While they share some similarities, there are important differences between PGP and SPD:
What is Pelvic Girdle Pain?
PGP refers to pain in the joints that make up the pelvic girdle, including the sacroiliac joints, hip bones (ilium), and the lower back
The pain is typically described as a dull ache or discomfort in the lower back, hips, and buttocks.
PGP may also be associated with a clicking or grinding sensation in the pelvis.
PGP can occur any time during pregnancy or after birth.
It is caused by the hormonal changes of pregnancy that lead to increased flexibility in the pelvic joints.
PGP is general pelvic and back pain with no identifiable cause.
What is Symphysis Pubis Dysfunction?
SPD specifically refers to pain and instability in the pubic symphysis joint.
The pubic symphysis is the joint that connects the two pubic bones at the front of the pelvis.
SPD is caused by the relaxing hormones of pregnancy leading to excess mobility of the pubic symphysis.
Pain is felt directly over the pubic bone and can radiate to the inner thighs.
Summary of Differences
| Similarity | PGP | SPD |
|---|---|---|
| Cause | Hormonal changes of pregnancy | Hormonal changes of pregnancy |
| Onset | Any time in pregnancy or after birth | Typically 2nd/3rd trimester |
| Location of pain | Broad - pubic bone, lower back, abdomen | Localised - directly over pubic bone |
| Nature of pain | General, diffuse | Sharp, stabbing over pubis |
| Diagnosis | No identifiable cause, physiotherapists will make an assessment by first ruling out other causes of pelvic pain such as posture and your back and hip movements | Specifically pubic symphysis instability |
In summary, PGP and SPD onset is most common in later pregnancy due to hormonal changes affecting pelvic joint mobility and stability. Pain can also begin suddenly with physical strain. It may persist after childbirth, rather than resolving spontaneously. PGP and SPD share origins in pelvic joint dysfunction but manifest in slightly different joint locations.

Recognizing the Symptoms of Pelvic Girdle Pain
The first step in managing PGP is understanding how to identify it. Symptoms can range from mild achiness to more severe discomfort. Being familiar with the common signs of PGP allows you to take action early.
Many women experience pain and tenderness concentrated over the pubic bone at the front of the pelvis. A feeling of soreness through the groin area is also frequently reported with PGP. In some cases, the pain is generalized below the abdomen rather than isolated to the joints.
PGP also often causes aching, throbbing sensations in the hips on one or both sides. Lower back pain across one side or both sides of the spine is another telltale symptom. The discomfort is felt deep within the pelvis, distinguishing it from muscular back pain.
The character of the pain varies from dull and annoying to sharp and severe. It may be constant or intermittent. Pay attention to any new pelvic, hip, groin or lower back pain persisting more than a week or two. Recognizing these hallmark PGP symptoms is key to seeking proper diagnosis and care.
Impact on Daily Movement and Function
In addition to causing pain at rest, PGP can significantly impact your ability to perform daily activities. The condition makes certain movements that shift or load the pelvic joints extremely challenging.
Walking for more than short distances often aggravates the pain, making getting around difficult. Climbing up or down stairs may become nearly impossible depending on the location of your pain. Pain and limited mobility in the hips interferes with movements like turning over in bed.
Because PGP causes asymmetry in the pelvic joints, putting full weight on just one leg is also very painful. This makes activities like standing on one foot to get dressed, stepping in and out of a car, or even getting in and out of the bath very difficult.
Lying fully on your back or side can also become uncomfortable with PGP as it puts pressure on tender pelvic joints. The impact on basic movements around the home highlights why addressing PGP is so important to maintain strength and mobility.
Knowing When It's Time to Seek Medical Care for Pelvic Discomfort
Coping with pelvic girdle pain during pregnancy can be challenging. It's crucial to understand when to reach out to your healthcare provider for guidance and support. Seeking timely medical care ensures proper treatment and prevention of long-term dysfunction.
Seek Evaluation If Pain Impacts Daily Function
Mild pelvic soreness occasionally is not unusual during pregnancy. However, if intensifying groin, hip, back or pelvic pain is affecting your ability to perform normal daily tasks, it requires medical attention. Don't wait for the discomfort to become severe. Seek help early to keep symptoms from worsening further.
Don't Delay If Symptoms Don't Resolve in 1-2 Weeks
Acute pelvic pain that arises suddenly often resolves on its own within days or weeks. However, pelvic girdle pain lasting longer than 1-2 weeks without improvement indicates an issue requiring professional evaluation. Persistent symptoms suggest a high likelihood of PGP or other medical condition needing treatment.
Don't tough it out silently if hip, groin, or pelvic discomfort fails to get better after the initial week or two. Communicate with your doctor, midwife or physiotherapists for a full assessment. Waiting risks worsening pain and diminished function. Addressing PGP early is key.
Seeking prompt diagnosis and support for pregnancy-related pelvic pain gives you access to effective management strategies. Your healthcare team can help customize a treatment approach to keep you moving comfortably.
Examining Potential Causes of Pelvic Discomfort During Pregnancy
Pregnancy-related pelvic girdle pain does not stem from any single cause. A combination of physical, hormonal, and lifestyle factors are likely at play. Understanding the contributing factors allows you to proactively manage your risks.
Hormonal Changes Loosen Ligaments
One of the main instigators of PGP is fluctuating pregnancy hormones like relaxin. Relaxin causes ligaments throughout the body to become looser and more flexible. This prepares the body for delivery by allowing the pelvis to widen. However, it also places extra strain on the pelvic joints.
The added weight and pressure on the increasingly mobile pelvic bones lead to inflammation, irritation, and ultimately pain. Being aware this hormonal ligament laxity predisposes you to PGP allows you to take preventative measures.
Fatigue and Stress Impact Pain Perception
Carrying a child places substantial physical burdens on the body. Frequent fatigue coupled with mental stress often accompany pregnancy. This appears to lower the threshold at which sensations are perceived as painful.
When the nervous system is in a heightened state of reactivity, sensations that may normally feel like minor discomfort can become amplified into more bothersome and debilitating pelvic pain.
Growing Baby Changes Posture and Strain
As pregnancy progresses, the weight and position of your growing baby shifts the body's centre of gravity. To compensate, you instinctually arch your back more. Your posture adapts in ways that redistribute the additional forces being placed on the pelvis and spine.
This necessary change in posture strains muscles and places extra pressure on the pelvic joints. The additional burden on the pelvis leads to worsening pregnancy-related pelvic pain if preventative steps aren't taken.
Irritation of Joints and Soft Tissues
The pelvis is designed to permit a certain degree of movement. However, this mobility increases during pregnancy. Excessive motion between pelvic bones can aggravate the joints. Surrounding muscles must work harder to stabilize the pelvis.
This shows that normal pregnancy-related anatomical and biomechanical changes in the pelvis significantly contribute to PGP. Increased mobility and compensatory muscle strains heighten irritation that manifests as pain.
Pre-Existing Low Back Pain Raises Risk
Women with a history of back pain prior to pregnancy have up to a 7x higher risk of developing pelvic girdle pain. Previous injuries or weakness may predispose the pelvic joints and spine to pain. Also, past pain lowers the threshold of what is perceived as discomfort.
The takeaway is that pregnancy is not the sole cause of PGP, but rather works in conjunction with other vulnerabilities. Awareness of the various contributing factors empowers you to minimize risks through targeted preventative and supportive care.
Proactive Tips for Coping with Pelvic Discomfort at Home
Managing pelvic girdle pain on a daily basis involves making thoughtful adjustments to how you position and care for your body. Small tweaks to your posture, movements, and lifestyle can make a big difference in minimizing pain from PGP.
Pace Activities and Rest Strategically
Take breaks to sit or lie down as needed when pain flares up. Avoid rushing or straining yourself to complete tasks. Ask for help with heavy housework or lifting to reduce load on your pelvis.
Maintain Proper Postural Alignment
Distribute your weight evenly when standing. Avoid slouching when sitting. Support your lower back with cushions. Position yourself closer to work surfaces to avoid hunching over.
Modify Computer Ergonomics
Sit upright in your chair with arms relaxed at your sides. Elevate your monitor to eye level. Use a rolled towel or small pillow for lower back support.
Adjust Car Seats and Practice Safe Body Mechanics
Sit close enough to easily reach pedals without straining. Keep knees level with hips when exiting vehicles. Open doors fully and swivel your whole body together.
Use Assistive Devices for Stairs and Lifting
Lead upstairs with your stronger leg and down with your weaker leg. Carry laundry in a basket with handles rather than a pile in your arms. Squat close to the load when lifting using your legs.
Optimize Sleep Positions and Get In/Out of Bed Safely
Sleep on your side with a pillow between your knees or under your belly. Avoid lying flat on your back, which can increase PGP discomfort. Roll your whole body together, keep knees bent, and push up with your arms when getting in and out of bed.
With some proactive adjustments, you can reduce unnecessary strain on your pelvis. This helps calm aggravated joints and prevent increased pain and dysfunction. Your healthcare providers can recommend additional pregnancy-safe modifications tailored to your needs and environment.
Exercises to Help Alleviate Pelvic Discomfort

Recommended exercise during pregnancy
Diaphragmatic Breathing
Starting Position:
Visualization: Picture the diaphragm as a dome-shaped muscle separating the chest (ribcage) from the abdomen, even though it's not physically felt.
Awareness: Stand or sit upright and place a scarf or band around the lower ribcage, gently pulling both ends to draw attention to the diaphragmatic area.
Inhalation
Focus: Direct your attention to the back and sides of the ribcage where the lungs are situated.
Breathing In: Inhale through your nose, visualizing your lungs expanding like slowly inflating balloons, feeling the scarf tighten.
Avoid Force: Do not force inhalation; it should be natural.
Diaphragm Action: Simultaneously, the diaphragm descends into the abdominal region, expanding the ribcage outward.
Exhalation
Expelling Air: Exhale through your mouth, sensing air gently leaving from the depths of your lungs.
Diaphragm Rising: Feel your diaphragm rising as you engage your deep abdominal muscles, gradually closing the ribcage.
Avoid Tension: Refrain from puffing cheeks or pursing lips to prevent tension in the neck, jaw, and face.
Benefits: Diaphragmatic breathing enhances breath control and posture, facilitating ease of movement and overall well-being.
Pelvic Elevator Exercise
Starting Position
Sit upright on a chair with your feet planted on the floor, either hip-width apart or with inner thighs touching.
Distribute your weight evenly on both sitting bones and maintain a neutral, elongated spine.
Preparation
Take deep breaths, expanding your ribcage, and elongate your spine.
Exhale while imagining closing elevator doors and ascending to the first floor.
Initiate the lift by contracting from the back passage (as if holding back gas) and gradually shift this sensation forward toward the pubic bone (as if preventing urine release).
Continue to gently engage these muscles.
Inhale, maintaining the elevator on the first floor with closed doors.
Second Level:
Exhale as you rise to the second floor, slightly intensifying the pelvic floor engagement.
Inhale and hold the elevator at the second floor.
Third Level:
Exhale as you reach the third floor, engaging the pelvic floor muscles a bit more, without excessive tension.
Inhale while keeping the elevator on the third floor.
Descending:
Exhale gradually, lowering the elevator one floor at a time until reaching the ground floor.
Open the doors slowly, releasing the pelvic floor with control.
Repetition: Repeat this cycle up to five times.
Guidance:
Avoid forceful or overly tight contractions; maintain a gentle engagement.
Keep the buttock muscles relaxed, ensuring the pelvis remains steady.
Maintain an open chest and relaxed shoulders, preventing neck tension.
Continuously breathe; refrain from holding your breath throughout the exercise.
Benefits: Enhances pelvic floor awareness, control, and strength.
Pelvic Floor Release Exercise (The Flower)
Starting Position
Choose either the Four-point Kneeling Position or sit upright on a chair.
Preparation:
Inhale to prepare your body.
Exhale as you gradually draw up pelvic floor muscles, visualizing a closing flower.
Inhale, gently holding the flower closed.
Exhale to slowly allow the flower to fully open.
Inhale, slightly closing the flower to return pelvic floor to normal tone.
Repeat up to five times.
Guidance
Maintain stillness in your pelvis; the flower's closing and opening are internal.
Keep buttock muscles relaxed.
Continue to breathe throughout; do not hold your breath.
Keep chest and shoulders open, avoiding neck tension.
Optionally, blow softly through your mouth to aid in pelvic floor release.
Benefits: Learn to control and release pelvic floor muscles.
Pelvic Tilts and Circles on a Swiss Ball
Sit on a birth ball with knees at a 90-degree angle and feet flat on the floor.
Place hands on knees and gently roll your back backward, creating a "C" shape with your belly.
Roll your belly forward to create another "C" shape with your back.
Repeat pelvic tilts 10 times for relief and movement in the pelvis.
Seated Ball Squeeze 1: Feet Parallel
Sit on a birth ball with knees at a 90-degree angle, feet flat and parallel on the floor.
Place a mini ball between your knees.
Coordinate your breath with the movement; inhale to prepare and exhale as you lift the pelvic floor while squeezing the knees together and the ball.
Hold for 5-10 seconds.
Inhale to release.
Repeat 5-10 times.
If you lack a ball, a small pillow or rolled-up towel can be used.
Seated Ball Squeeze 2: Toes Out
Sit on a birth ball with knees at a 90-degree angle.
Turn your feet outward at about a 45-degree angle.
Place a mini ball between your knees.
Coordinate your breath; inhale to prepare and exhale while lifting the pelvic floor, squeezing the knees and ball while maintaining external rotation.
Hold for 5-10 seconds.
Inhale to release.
Repeat 5-10 times.
Seated Ball Squeeze 3: Toes In
Sit on a birth ball with knees at a 90-degree angle.
Turn your feet inward toward each other.
Place a mini ball between your knees.
Coordinate your breath; inhale to prepare and exhale while lifting the pelvic floor, squeezing the knees and ball while maintaining this position.
Hold for 5-10 seconds.
Inhale to release.
Repeat 5-10 times.
Seated Ball Squeeze 4: Hip Shift
Sit on a birth ball with knees at a 90-degree angle, feet flat and parallel.
Place a mini ball between your knees.
Shift one knee forward and the opposite hip backward.
Coordinate your breath; inhale to prepare and exhale as you lift the pelvic floor, squeezing the knees and ball while maintaining this position.
Hold for 5-10 seconds.
Inhale to release.
Repeat 5-10 times.
Switch sides; shift the opposite knee forward and the other hip backward.
Seated Hip Abductor Pulses
Sit on a birth ball with knees at a 90-degree angle, feet flat.
Cross your arms and place your hands on the outside of opposite legs.
Coordinate your breath; inhale to prepare and exhale as you lift the pelvic floor and push legs into your palms for resistance.
Hold for 5-10 seconds.
Inhale to release.
Repeat 5-10 times.
Alternatively, use a resistance band around your knees for pulses.
Kneeling Squats
Kneel on a soft surface like a yoga mat or cushion. Your knees should be hip-width apart.
Sit your hips back and down until your glutes touch your heels. Keep your back straight, core engaged, and chest lifted.
Sit back until buttocks touch heels
Engage your core and squeeze glutes to extend hips upwards
Hold top position for 2 seconds
Slowly and with control return to starting position
Breathe in as you lower down, breathe out as you drive up.
Repeat 8-10 times.
Cat Stretch
Get on your hands and knees on the floor or a yoga mat. Your wrists should be under your shoulders and your knees under your hips.
As you inhale,. Lift your chin and chest, and gaze slightly upward.
As you exhale, round your spine up toward the ceiling, drawing your belly button in toward your spine. Allow your head to drop down to your chest.
Focus on fully articulating your spine with each rep. Move slowly and mindfully.
Keep your shoulders relaxed and elbows slightly bent throughout the movement
Coordinating the arching and rounding of your back with your breath.
Repeat 8-10 times.
This stretch mobilizes the spine, stretches the front and back of the torso, and engages the core.
Bird Dog
Get on your hands and knees on the floor or a yoga mat. Your wrists should be under your shoulders and your knees under your hips.
Engage your core and draw your shoulder blades down your back
Raise one leg straight back, simultaneously raise opposite arm straight forward
Keep core and shoulders engaged
Hold for 3 seconds.
Return to start and switch sides
Repeat 6-8 times per side.
Donkey Kick
Start on your hands and knees on the floor or mat. Hands under shoulders, knees under hips.
Keep your back straight and core engaged throughout the movement.
Lift one leg up behind you, keeping knee bent at 90 degrees and foot flexed.
As you lift, squeeze your glute and hamstring on the working leg.
Lift the leg up as high as you can while maintaining stability in your low back. Avoid arching or rounding your spine.
Hold the top contraction for 2 seconds, continuing to squeeze the glute.
Slowly lower back down to the start position with control.
Repeat for 10 times on one side before switching.
Maintain tension in the glute throughout. Do not allow hip to drop or rotate.
Keep non-working leg stable and toes tucked.
Breathe out as you lift the leg, breathe in as you lower.
Modified Side Plank
Begin lying on your side, support yourself up on your forearm and bend your knees together.
Engage your core and draw your shoulder blades down your back
Keep your shoulders stacked vertically and your neck neutral.
Raise your hips up off the floor by squeezing your glutes and obliques. Your body should form one straight line form knee to crown of the head.
Make sure to keep your hips lifted high, do not let them drop down. Maintain engagement.
Hold this side plank position for 20-30 seconds, continuing to breathe normally.
Slowly return hips to floor and switch sides, repeating on the other side.
Here are some safe stretching recommendations if your experiencing pelvic girdle pain during pregnancy:
Child's Pose with Birthing Ball
Kneel on mat, widen knees
Sit bum on heels
Place hands on gym ball
Slowly roll ball forward to stretch back
Stretch right side of your body by moving ball towards the left and vice versa
Calf Stretches
Stand facing a wall about 2 feet away. Place your hands on the wall at shoulder height.
Step one foot back and keep it flat on the floor with toes pointed forward. The front knee can have a slight bend but avoid locking it.
Maintaining a neutral spine, push your hips forward until you feel a gentle stretch in the back calf.
Hold for 30 seconds, taking deep breaths. Repeat on the other side.
Inner Thigh Stretches:
Sit on the floor with legs bent and knees wide, feet together. You can place a small pillow under each knee for comfort.
Keeping back straight, gently press knees toward floor using both hands on top of thighs. Avoid forcing the stretch.
Hold for 30 seconds, feeling a mild stretch of the inner thighs. Relax and repeat.
Hamstring Stretches
Sit near the edge of a chair. Extend one leg straight out in front of you, with a flexed foot place your heel on the floor, keep the knee slightly bent.
Keep the other foot flat on the floor. Maintain a neutral spine by avoiding rounding or arching the lower back.
Hinge forward at the hips, keeping the back straight. Reach down the extended leg as far as you can without pain.
You should feel a gentle stretch down the back of the thigh. Hold for 30 seconds, breathing deeply.
Repeat on the other side.
Glut Stretch
Sit on the edge of a chair with feet flat on the floor.
Cross one ankle above the opposite knee and flex the foot.
Gently press the bent knee toward the ground for a stretch.
Hold for 15-20 seconds and switch to the other side.
Provides better mobility and relief around the hips.
Windmill Stretch
Stand with feet slightly apart, avoiding pain in the front of the pelvis.
Stretch your right arm down to your right foot while reaching the left palm toward the sky.
Hold the stretch for three seconds and repeat on the other side.
Helps lengthen tight muscles around the pelvis.
Do this stretch 10 times on each side once a day or as needed.
Remember to listen to your body, avoid overexertion, and maintain good posture throughout the exercises. If you experience pain or discomfort, consult a healthcare professional. These exercises can offer relief from pelvic and back pain during pregnancy.

Recommended exercise Postpartum
The right exercises can bring tremendous relief by gently stretching tight muscles, strengthening your core, and stabilizing the pelvis. Always listen to your body and stop any activity causing pain. Try these safe postpartum, recommended motions to ease PGP:
Both Pilates and yoga can be beneficial for individuals with pelvic girdle pain, as they focus on improving flexibility, strength, and body awareness. Here are some specific Pilates and yoga exercises that may help alleviate pelvic girdle pain:
Pilates Exercises:
Pelvic Clocks: Lie on your back with knees bent and feet flat on the floor. Imagine your pelvis as a clock face. Tilt your pelvis forward, backward, and sideways, tracing the numbers on the clock. This exercise helps improve pelvic mobility and stability.
Knee Circles: Lie on your back, with knees bent feet flat on the floor. Fold one leg in towards your body with control and bend the knee further, fully relaxing the lower leg.
Circle the folded knee (as if stirring a spoon in your hip joint) in both directions, keeping the movement controlled and engaging your core.
Leg Slides: Lie on your back with knees bent and feet flat on the floor. Slide one foot away from your body along the floor while keeping the other knee stable. Return to the starting position and repeat on the other side. This exercise targets the inner thighs and pelvic stabilizers.
Floor Bridge: Lie on your back with knees bent and feet flat on the floor. Engage glute muscles, then lift your pelvis toward the sky, creating a bridge. Hold the bridge for three seconds or one deep breath, then release. Do this exercise 10 times at least once a day or up to three times. Helps strengthen glute muscles to support the pelvis.
Side-Lying Leg Lifts: Lie on your side with legs stacked on top of each other. Lift the top leg a few inches while keeping the hips stable. Lower the leg back down and repeat on the other side. This exercise targets the hip abductors.
Yoga Poses:
Child's Pose: Kneel on the floor with your big toes touching and knees apart. Sit back on your heels and reach your arms forward, lowering your chest towards the floor. This pose gently stretches the lower back and hips.
Cat-Cow Stretch: Get on your hands and knees with your wrists under your shoulders and knees under your hips. Inhale, arch your back, and lift your head and tailbone (Cow Pose). Exhale, round your back, and tuck your chin (Cat Pose). This sequence helps improve spinal mobility and pelvic flexibility.
Bound Angle Pose (Baddha Konasana): Sit on the floor with your feet together and your knees out to the sides. Hold your feet with your hands and gently press your knees toward the floor. This pose stretches the inner thighs and opens the hips.
Supported Bridge Pose: Lie on your back with knees bent and feet flat on the floor. Place a yoga block under your sacrum. Hold for a few breaths to open the front of the hips and release tension in the lower back.
Warrior II Pose: Stand with your feet wide apart, turn one foot out, and bend the knee of that leg. Extend your arms to the sides, parallel to the floor. This pose helps strengthen the legs, hips, and core while improving balance.
Be patient and listen to your body. Stop any activity causing discomfort. With time, the right exercises can help stabilize your pelvis, ease achiness, and support a healthier pregnancy.
Here are some exercises to avoid:
Lunges (forward, reverse, lateral, etc.)
Step-ups
Stairmasters
Any exercise that causes pain or discomfort in the pelvis, hips, or legs
Standing on one leg
Balancing on one leg against resistance
Any activity that causes excessive spreading of the pelvis
The key things to avoid are unilateral exercises that put too much stress on one leg at a time, as well as any activities that cause pain or exacerbate PGP symptoms. Always listen to your body and avoid anything that causes discomfort. Focus on low impact exercises that keep both feet on the ground.
Self-Care Strategies to Find Relief from PGP
Caring for your body should be a priority when dealing with pelvic pain and dysfunction. Alongside therapeutic exercises, lifestyle measures like heat, massage, meditation, and modifying activity can help manage your symptoms.
Apply Heat Therapy to Sore Areas
Use hot packs, a heated towel, warm bath or shower to increase blood flow and relax muscles. Avoid heat in early pregnancy. Limit use to 20 minutes and hydrate well.
Take Relaxation Breaks
Find a quiet space to take calming breaths and clear your mind. Guided meditation apps can help you unwind. This reduces stress and nerve hypersensitivity.
Massage Tender Points
Use a tennis ball against sore spots to relieve muscle knots. Apply pressure for 30 seconds then move to a new area. Avoid massaging abdomen, and calfs.
Keep Exercising with Modifications
Stay active but listen to your body. Walking, swimming, and prenatal and postnatal yoga are great options. Avoid styles with extensive single leg standing.
Maintain a Healthy Diet
Eat foods rich in vitamin D like fatty fish, eggs, and fortified dairy to support bone health. Stay hydrated and limit sugary foods that can increase inflammation.
You Are Not Alone in Coping with PGP
Dealing with pelvic pain and restricted mobility during pregnancy can leave you feeling frustrated and discouraged. But you are not alone! As a common condition, PGP is well-understood by medical professionals who can offer effective support.
With knowledge of typical symptoms, open communication with your healthcare team, and proactive self-care, you can minimize disruption from PGP and focus on the joys of bringing new life into the world.
Remember, you have a vital role in managing your PGP, but you don't need to go it alone. Your healthcare providers and support system are there to help lighten the burden. With the right care, PGP will not prevent you from enjoying your pregnancy and the excitement of meeting and caring for your baby!

Managing Postpartum Neck Pain: Causes, Exercises, and Tips
Why Does Postpartum Neck Pain Occur?
Neck pain is a frequent complaint among new mothers after giving birth. The physical demands of caring for an infant along with bodily changes can strain the neck, leading to discomfort and reduced mobility. Understanding the causes and implementing self-care strategies can help alleviate postpartum neck issues.
Caring for a newborn baby can take a toll on a new mum's body, especially the neck. The physical demands of holding, feeding, and carrying an infant combined with hormonal changes, altered posture, and lack of sleep can strain the neck muscles leading to discomfort, limited mobility, and pain.
While neck issues are common after giving birth, they aren't normal and can be addressed through awareness, postural changes, targeted exercises, and professional help if needed.
The neck withstands a lot of weight and force daily. On average, the adult head weighs 10-12 pounds placing substantial strain on the cervical vertebrae, discs, nerves, and interconnected muscles that enable head and neck movement. After pregnancy, this strain increases as new mums spend hours hunched over holding their baby. Carrying a newborn adds more weight placing the head and neck in a forward, compressed position for extended time periods.
Additionally, pregnancy alters posture and the body's center of gravity which can impact spinal alignment and muscle balance. The hormone relaxin also increases flexibility in muscles and ligaments which reduces stability. These bodily changes continue postpartum and can contribute to neck tightness and pain.
Symptoms of postpartum neck strain include reduced range of motion, burning, stiffness, headaches, and radiating arm tingling. Moving the head or lifting the baby becomes increasingly difficult.
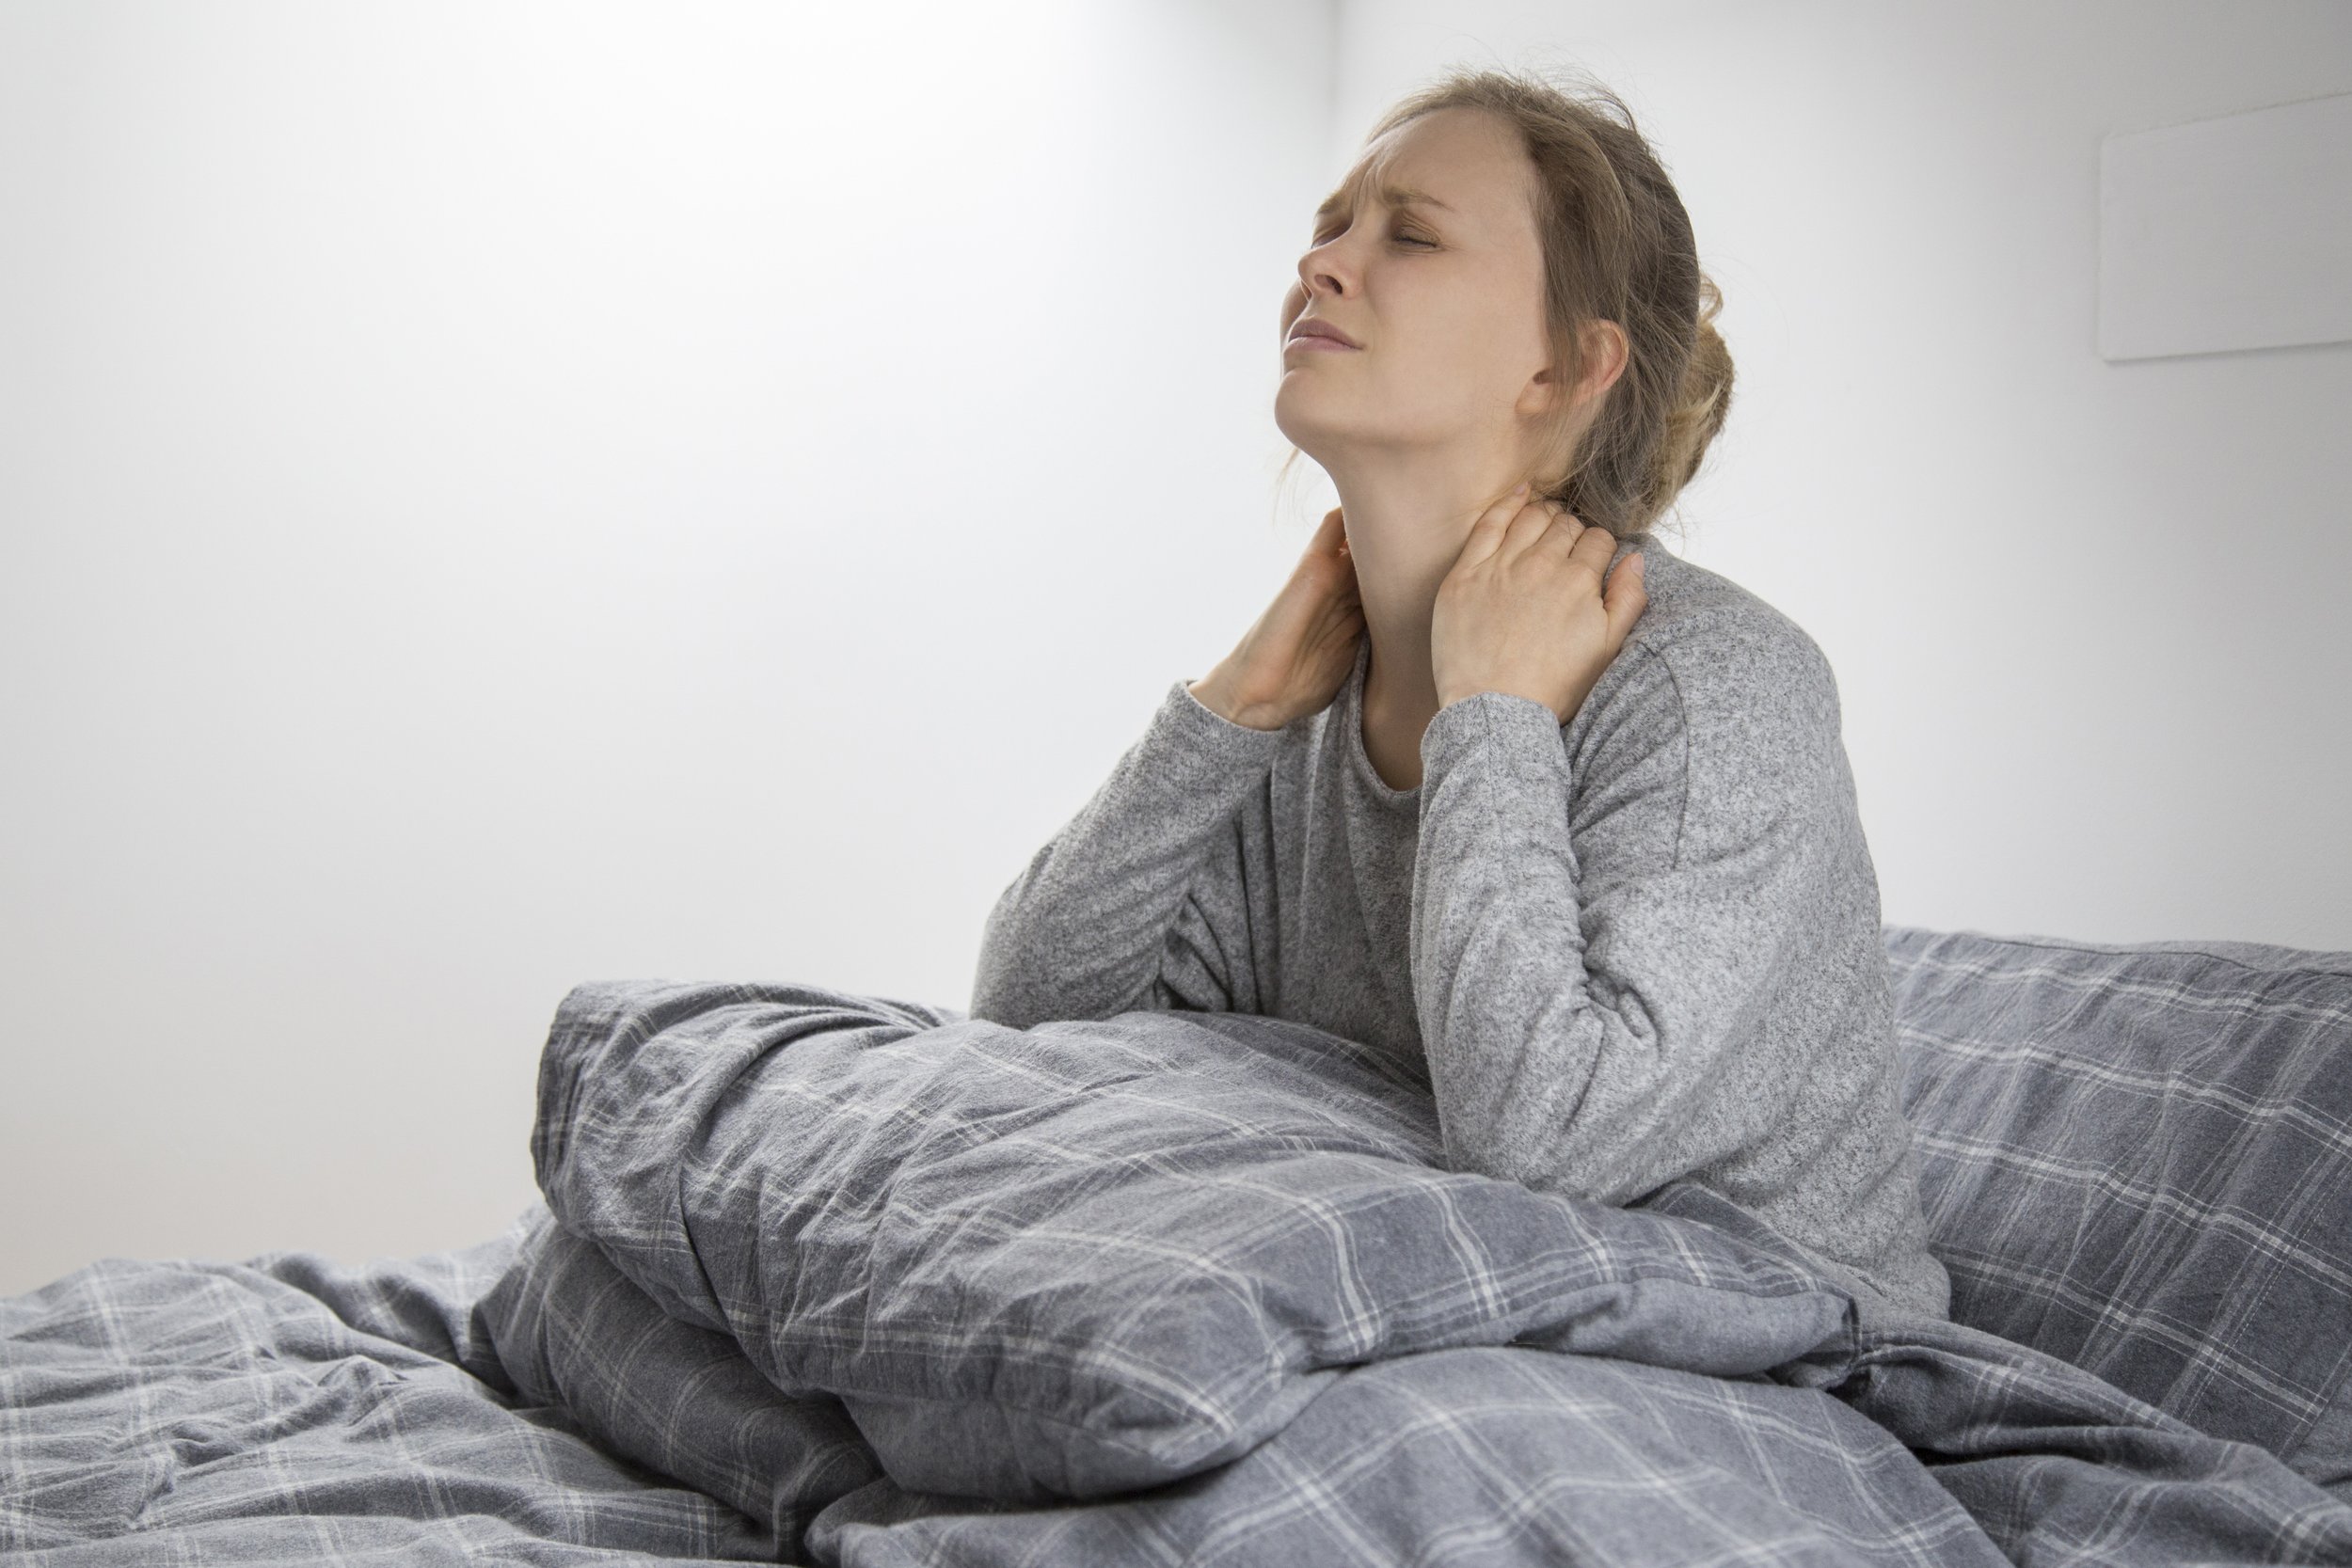
The neck undergoes a lot of strain during pregnancy and the postpartum period. Factors contributing to neck pain include:
Altered posture - Leaning forward to hold, feed, or soothe the baby strains neck muscles. The head's weight exerts pressure on vertebrae and discs.
Muscle imbalances - Pregnancy weight gain and shifting center of gravity overload some muscles while others weaken. This imbalance continues postpartum.
Hormonal effects - Relaxin and estrogen can increase ligament laxity, destabilising joints.
Sleep disturbances - Caring for a newborn reduces restorative sleep, impairing tissue healing.
Breastfeeding - Repeated neck flexion to nurse strains muscles if proper support is not used.
While frustrating, there are techniques new mums can implement to prevent and relieve neck discomfort:
Improve posture - Keep the head aligned over the shoulders. Avoid hunching over.
Use supportive pillows - Prop up baby and adjust nursing positions to minimise neck strain.
Exercise - Gentle stretches and exercises strengthen neck muscles.
Heat/ice therapy - Alternating heat and ice packs can alleviate muscle tightness and pain.
OTC medication - Anti-inflammatories like ibuprofen reduce discomfort.
Massage - Helps relieve muscle tension.
Physical therapy - Addresses muscle imbalances, movement patterns, and strengthening.
Remember that self-care is crucial postpartum. Prioritise spinal health by maintaining proper posture and alignment when performing caretaking tasks. Listen to your body and address pain promptly before it becomes chronic. With time and consistency, you can relieve neck tension and get back to enjoying your new baby pain-free.
Signs and Symptoms of Postpartum Neck Pain

Common symptoms of postpartum neck pain include:
Stiffness and reduced range of motion.
Aching, burning, or tingling discomfort.
Muscle tightness or soreness.
Headaches originating at the base of the skull.
Numbness or pins and needles in the arms.
Shoulder and upper back pain.
Relieving Postpartum Neck Pain - tips and exercises
Exercise 1: Active Range of Motion Stretches
Start by doing a rotation side to side. Slowly turn your head to one side, then the other, creating a continuous motion.
Pause for about two to three seconds on each side as you perform the rotation.
Repeat this motion about five times on each side.
This exercise helps loosen up the neck muscles without applying pressure.
Exercise 2: Side Bending
For this exercise, gently tilt your head to the side, bringing your ear towards your shoulder.
Keep your shoulders down and relaxed, avoiding any lifting of the shoulder.
Hold the stretch for about three to five seconds on each side.
Complete about five repetitions on each side to further loosen the neck muscles.
Exercise 3: Chin Tucks
Perform chin tucks by gently tucking your chin backward without lowering your head.
Keep your head level and push your chin towards the back of your head.
Hold this tuck for about five seconds.
Repeat this exercise about five times to help correct forward head posture.
Exercise 4: Upper Trap Stretch
To stretch the upper trapezius muscles, situate your right hand under your bottom to stabilise your shoulder.
With your left hand, gently pull your head towards the left side, maintaining a neutral head position.
Hold the stretch for 30 seconds.
Repeat the stretch three times on each side, ensuring both sides are stretched evenly.
Exercise 5: Levator Scapulae Stretch
Target the levator scapulae muscles by placing one hand behind your head and the other on your opposite shoulder blade.
Pull your head diagonally downwards towards your opposite knee at a 45-degree angle.
Hold the stretch for 30 seconds.
Perform the stretch three times on each side, focusing on the tense muscles at the back of the neck.
Exercise 6: Scalene Muscle Stretch
Address the front neck muscles (scalene muscles) by placing one hand just above your collarbone to stabilise it.
Turn your head towards the same side and look upward while applying gentle pressure downwards on the collarbone.
Hold the stretch for 30 seconds.
Repeat the stretch three times on each side to release tension in the scalene muscles.
Additionally, isometric exercises that involve applying gentle pressure with your hand while resisting the movement with your head. These exercises are performed for about three to five seconds each and are meant to strengthen the neck muscles without actual movement.
Here are three variations of these isometric exercises:
Isometric Exercise 1: Side Bending
Place your hand on the side of your head.
Push your head into your hand while simultaneously resisting with your hand.
Hold the pressure for about three to five seconds.
Relax and repeat this exercise three times on each side.
Isometric Exercise 2: Rotation
Place your hand on the back of your head.
Push your head into your hand and resist with your hand.
Hold the pressure for about three to five seconds.
Repeat the exercise three times on each side, pushing in the direction of rotation.
Isometric Exercise 3: Forward Motion
Place your hand on your forehead.
Push your head forward into your hand while resisting with your hand.
Hold the pressure for about three to five seconds.
Repeat the exercise three times, creating resistance by pushing your head forward.
Relieving Morning Neck Stiffness With a Tennis Ball
As a new mum you may also find yourself waking up with a stiff, sore neck that can set the tone for the rest of your day. While sleeping positions play a role, daily postures and repetitive movements often contribute to next-day stiffness. A simple exercise using a tennis ball can provide relief and improve mobility.
What Causes Morning Neck Pain?
Neck discomfort upon waking often results from accumulated positions and stresses on the cervical spine and muscles the previous day. Bending over screens, slouching at desks, or turning your head frequently can strain tissues.
Lying still all night prevents normal motion needed to nourish joints and relax muscles. As a result, you wake up feeling stiff and restricted.
Targeting Stiff Spots With a Tennis Ball
A dense rubber ball like a tennis ball enables you to apply pressure to tense areas around your neck and upper back. Rolling the ball along muscles around joints helps:
Loosen tight muscles and ligaments
Mobilise stiff joints
Increase blood flow
Decrease nerve irritation
This self-massage technique provides pain-free movement in the morning.
How to Do the Tennis Ball Neck Release
Follow these steps to perform the exercise:
Lie on your back and place a tennis ball under your neck off to one side of your cervical spine near the base of your skull (Never place the ball directly under the spine).
Gently turn your head towards the same side the ball has been to find any tender, stiff spot.
When you find a tense area, allow the ball to sink in for 30 seconds up to 1 minute until it releases.
Slowly move the ball slightly down your neck staying on the same side of your cervical spine and repeat the process, targeting any other stiff segments.
Continue slowly to work down that same side of the cervical spine until you reach the upper back.
Perform on both sides of your neck, even if one side feels tighter.
Roll the ball along your upper back too if needed (Again never place the ball directly under the spine).
Tips for Success
Apply enough pressure to address stiffness but not cause significant pain.
Breathe deeply as you hold the ball to help you relax.
Do the exercise first thing in the morning for best results.
Increase ball pressure and release time on stubbornly stiff areas.
Perform gently if you have injuries or osteoporosis.
Use a softer ball if the tennis ball causes discomfort.
Releasing neck tightness and restoring mobility every morning prevents chronic issues and discomfort. Be patient and consistent with the exercise for optimal relief.
Preventing Postpartum Neck Pain
Being proactive and implementing healthy strategies during pregnancy and post-delivery can help minimise neck strain:
Maintain good posture, especially when holding or nursing the baby.
Sleep on your side with a low, supportive pillow.
Perform gentle neck exercises to build strength.
Use small movements during activities to minimise stiffness.
Take breaks from static postures.
Get chiropractic adjustments to improve spinal alignment.
Consider physical therapy to address muscle imbalances.
While managing a newborn can be demanding, prioritising self-care helps new mothers heal and prevents chronic neck pain.
safely rebuild your body postpartum
our mummies baby steps seven day guide shows you exactly how:

looking for a complete comprehensive and progressive postnatal online exercise plan?


Overcoming Patellofemoral Pain Syndrome Postpartum

What is Patellofemoral Pain Syndrome?
Patellofemoral pain syndrome (PFPS), also called runner's knee or moviegoer's knee, is a common cause of anterior knee pain. It involves pain around or behind the kneecap (patella). PFPS often occurs without damage to knee structures.

PFPS is especially common in:
Women
Adolescents
Athletes in jumping sports
But anyone can develop PFPS, especially with certain predisposing factors.
PFPS Symptoms
The main symptom is anterior knee pain, which worsens with activities that load the joint surface behind the kneecap.
Symptoms and Descriptions
| Symptom | Description |
|---|---|
| Pain with stairs | Experiencing pain while going up or down stairs. |
| Pain when squatting | Feeling pain when doing squats or sitting on heels. |
| Pain sitting | Experiencing pain in situations like movie theaters, cars, etc., where sitting is involved. |
| Pain after sitting | Feeling pain when getting up after prolonged sitting. |
| Pain with jumping, running | Experiencing pain during athletic activities like jumping and running. |
| Grinding sensation | Feeling a grinding sensation when the kneecap grinds over the femur. |
| Clicking | Experiencing clicking sounds during knee bending. |
Symptoms range from mild to severe. One or both knees may be affected.
What Causes Patellofemoral Syndrome?
Stage 1: Factors Contributing to PFPS
Overuse of knee joint
Muscle tightness or weakness around hips and knees
Overpronation of the feet
High Q-angle (angle between hip and knee)
Previous knee injury
Occupational kneeling
Stage II: Abnormal Patellar Tracking
Excessive lateral glide
Tilting
Rotation
Superior or inferior position
Stage III: Patellofemoral Pain Syndrome Cycle
Pain behind or around kneecap
Worse with loading joint surface
Patellofemoral pain syndrome (PFPS) develops from a combination of factors that lead to abnormal mechanics and increased stresses on the kneecap and knee joint surface. It often begins with overuse or repetitive strain to the knee such as from running, jumping, or kneeling.
Contributing biomechanical factors include muscle imbalances around the hip and knee, overpronation of the feet, high Q-angle, and previous knee trauma. Tight structures like the IT band, hip flexors, and calves paired with weak glutes and core muscles lead to poor tracking of the kneecap.
This abnormal patellar tracking results in issues like excessive lateral gliding, tilting or rotation of the kneecap, or the kneecap sitting too high or low in the trochlear groove. These mechanics increase contact pressure between the back of the kneecap and the femur.
Over time, the repetitive abnormal forces cause irritation and microtrauma to the joint surface and cartilage behind the kneecap. This generates anterior knee pain that is often worse with loading the joint such as climbing stairs, squatting, or sitting for long periods.
The cycle propagates as the pain causes inhibition and weakness of the quadriceps which further reduces dynamic stability around the patella. Patients often adopt poor movement patterns to offload the painful kneecap which can worsen the imbalance.
Breaking this painful cycle requires identifying and addressing the underlying anatomical and biomechanical factors with targeted stretching, strengthening, taping, bracing, and technique adjustments. This comprehensive approach can help realign the kneecap, provide stability, and reduce joint surface pressures to relieve PFPS.
why women may be more susceptible to patellofemoral pain syndrome after pregnancy
The hormonal changes during pregnancy lead to increased ligamentous laxity and collagen remodeling in the knees and other joints. This laxity often persists postpartum and can cause abnormal forces and loads on the knee joint, especially the patellofemoral joint. Additionally, the dramatic postural shifts and weight distribution changes of pregnancy, coupled with postpartum muscular weakness and fatigue from relative inactivity, reduce dynamic knee stability. The lack of muscular support and strength after pregnancy means the knee is less able to properly distribute forces and control normal patellar tracking. Together, the residual laxity and altered biomechanics from pregnancy along with postpartum muscular imbalances lead to abnormal patellofemoral joint mechanics. This significantly increases a woman's susceptibility to developing patellofemoral pain syndrome in the months following pregnancy and childbirth as the knee joint is less able to attenuate forces and control patellar motion properly. Targeted exercise and therapy to address the residual laxity and muscular imbalances can help reduce this risk of knee pain after pregnancy.
Treating Patellofemoral Pain Syndrome
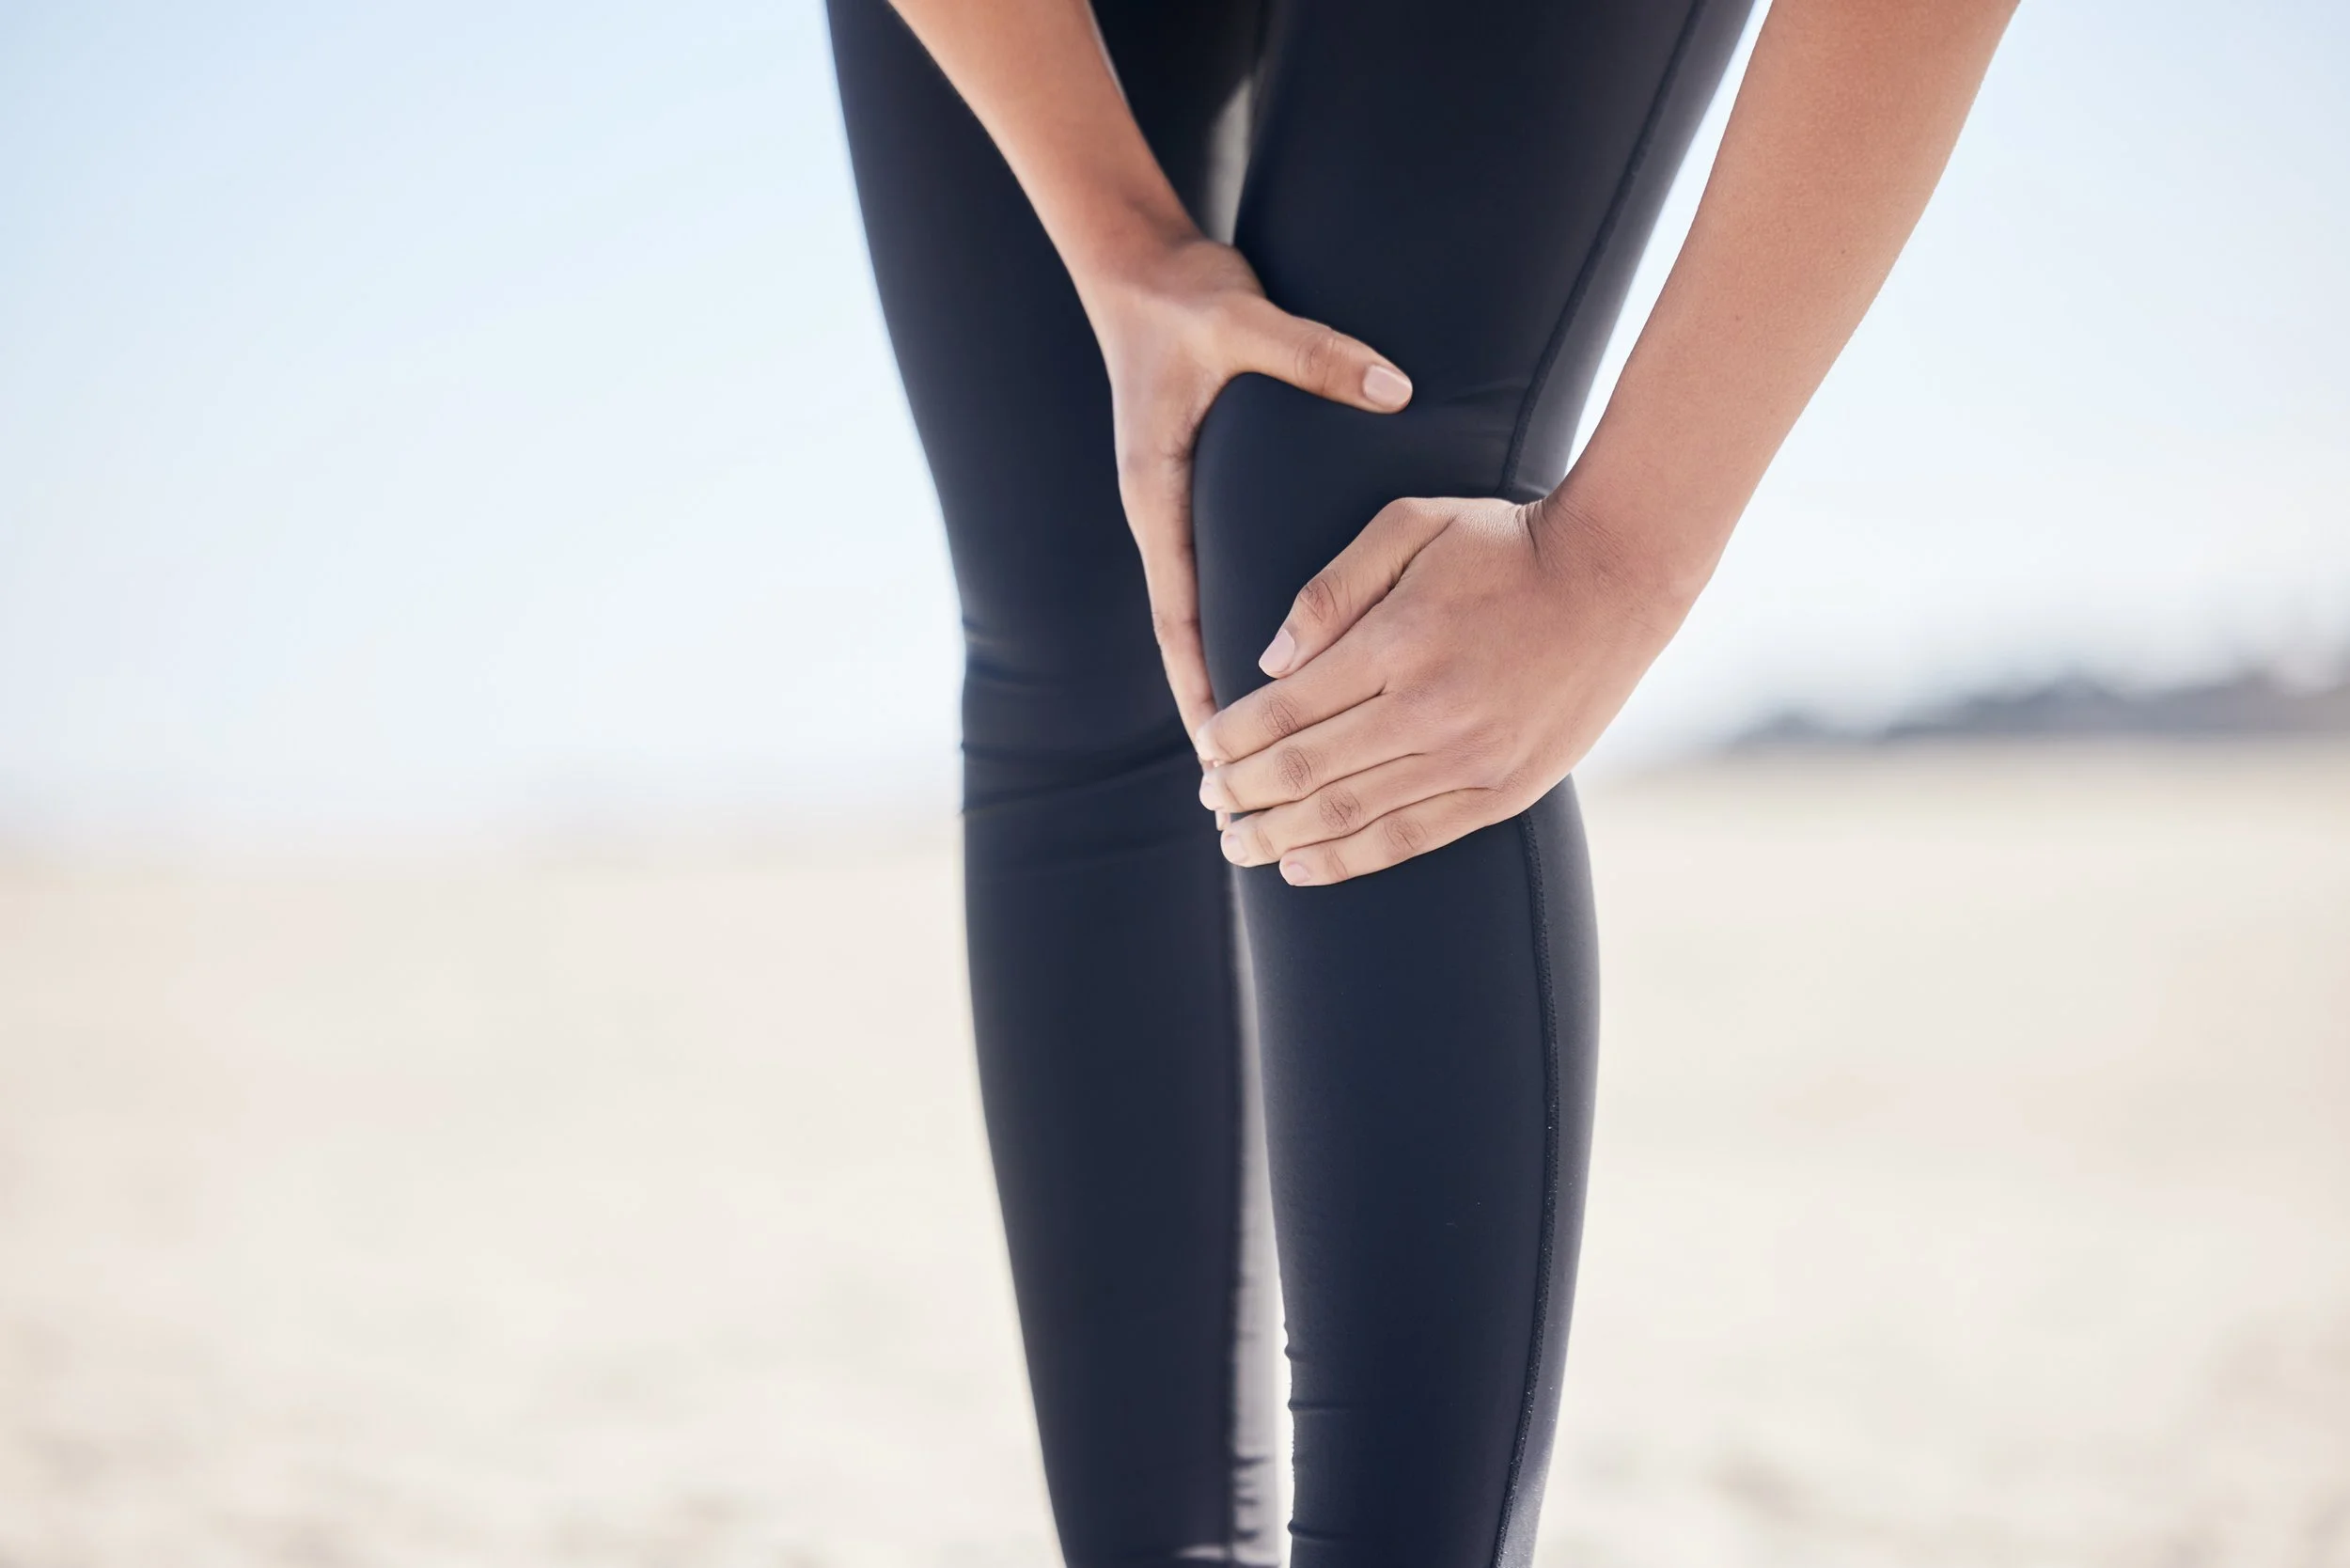
Treatment focuses on correcting contributing factors identified during the evaluation.
Conservative treatment is effective for most PFPS patients. Options include:
Rest/Modify Aggravating Activities: Avoid activities that worsen pain to allow healing.
ICE - Ice massage, cold packs to reduce pain/swelling. Apply ice for 10-15 minutes after activity.
NSAIDs - For symptomatic relief of pain and inflammation
Physical therapy - Stretching tight muscles, strengthening weak muscles, targeted exercises.
Taping/bracing - Improve patellar tracking and positioning. Reduce strain on tissues.
Foot orthotics - Control overpronation. Consider foot orthotics, heel lifts, or shoes with appropriate arch support if needed.
Weight loss - Reduce load on joint
Holistic treatment may also help relieve PFPS pain:
Massage
Acupuncture
Yoga
Pilates
Mind-body therapies
VooDoo Floss Band compression
Modalities & Advanced Treatment
Cold laser, ultrasound, or e-stim to reduce pain.
Manual therapy techniques like massage and Graston.
Dry needling tight trigger points.
Injections if indicated - cortisone or PRP.
Surgery if conservative options fail - arthroscopy or realignment.
Prevention Strategies
Maintain strength, flexibility, proper biomechanics.
Increase training load gradually over time.
Use orthotics or taping if needed.
Wear proper footwear.
Guide to Knee Rehabilitation Exercises
Properly rehabilitating the knee through targeted exercises is crucial for ensuring full recovery and preventing future injuries. This comprehensive guide will overview the essential components of knee rehabilitation programs.
Goals of Knee Rehab Exercises
The primary goals of rehabilitation exercises after a knee injury or surgery are to:
Restore full range of motion in the knee joint
Rebuild strength in the muscles surrounding the knee
Correct any biomechanical or movement pattern issues
Progress activity tolerance and return to sports/exercise
Prevent future re-injury or complications
To achieve these goals, it is important to follow a structured knee rehab protocol under the guidance of a knowledgeable healthcare professional such as an orthopedic surgeon, physical therapist, athletic trainer, or physiatrist.
Trying to take shortcuts with rehab or pushing progress too quickly often backfires and leads to repeat injuries down the line. Patience and consistency with the proper exercises are key for optimal recovery.
Getting Started with Knee Rehabilitation
When beginning a knee rehab program after injury or surgery, there are a few key points to keep in mind:
Warm Up First
Always warm up for 5-10 minutes before starting rehab exercises. This increases blood flow to the knee area and enhances range of motion. Low impact activities like walking on a treadmill or riding a stationary bike work well.
Stretch Before and After
Be sure to perform stretches before moving into strengthening exercises. Stretching helps extend range of motion gains from rehab and reduces post-exercise muscle soreness. Also do stretches after completing strengthening for optimal flexibility improvements.
Avoid Pain
Rehab exercises should not significantly worsen knee pain. Some soreness is expected, but sharp or stabbing pains indicate an issue. Discuss any concerning pain with your doctor or physical therapist.
Targeting Contributing Factors
Stretch tight structures: Hip flexors, quadriceps, IT band, calves.
Strengthen weak muscles: Glutes, hamstrings, hips, core.
Improve flexibility: Quads, hip adductors/abductors, calves.
Retrain proper movement patterns: Reduce knee valgus/hip internal rotation.
Manage weight: Reduce load on the joint.
For optimal results, knee rehab exercises should be performed consistently for 4-6 weeks unless a longer duration is prescribed. Exercises may be continued at a maintenance level after this period.
A SELECTION OF CRUCIAL sTRETCHes TO COMMENCE Knee Rehab
Stretching is a critical component of knee rehabilitation. Improving flexibility helps extend range of motion gains from other exercises. Key stretches include:
Static Gastrocnemius Stretch
Preparation: Stand facing a wall or sturdy object. Bring one leg forward toward the wall for support. Use upper body to lean against the wall, keeping outstretched rear leg straight.
Movement:
Draw abs in and activate glutes.
Keep rear foot flat, with foot pointed straight ahead. Do not allow the rear foot to cave inward or roll outward.
Bend arms, move chest toward the wall and tilt pelvis forward.
Stop movement when slight tension is felt.
Hold for 20-30 seconds.
Switch sides and repeat.
Static Soleus Stretch
Preparation: Stand facing a wall or sturdy object. Bring one leg forward toward the wall for support. Use upper body to lean against wall, keeping outstretched rear leg straight.
Movement:
Draw abs in and activate glutes.
Keep rear foot flat, with foot pointed straight ahead. Do not allow the rear foot to cave inward or roll outward.
Bend rear knee until slight tension is felt.
Hold for 20-30 seconds.
Switch sides and repeat.
Static Peroneal Stretch
Preparation: Stand facing a wall or sturdy object. Bring one leg forward toward the wall for support. Use upper body to lean against wall. Internally rotate rear les and invert (turn in) foot.
Movement:
Draw abs in and activate glutes.
Lean forward until slight tension is felt in the lateral shin of the back leg.
Hold for 20-30 seconds
Switch sides and repeat.
Seated Dynamic Shin Stretch
Preparation: Sit on the floor with your legs straight out. Place a long-loop resistance band or long towel around one of your feet.
Movement:
Gently pull the band towards you.
While keeping resistance in the band, flex and point your foot.
Hold for 24 seconds for 5-10 repetitions
Switch sides and repeat.
Static 90-90 Hamstring Stretch
Preparation: Lie on floor with legs flat. Flex hip and knee of one leg and create a 90-90 position.
Movement:
Draw abs in.
Slightly tilt pelvis anteriorly.
With hands supporting leg, mistuning your knee in line with your hip, slowly extend you heel upwards (without moving at the pelvis) until tension is felt.
Hold for 20-30 seconds.
Switch sides and repeat.
Static Standing Cross-leg Biceps Femoris Stretch
Preparation: Stand with erect posture and one leg straight, hip flexed, adducted and internally rotated on a bench.
Movement:
Draw abs in.
Maintaining an upright posture, slightly lean forward at the hip until a slight stretch is felt in the back of the thigh.
Hold for 20-30 seconds.
Switch sides and repeat.
Quadriceps Stretch
Preparation: Stand facing a wall or sturdy object. Stand with erect posture.
Movement:
Draw abs in and activate glutes.
Gently draw the heel of one foot toward the buttock while standing upright balancing on the opposite leg until a stretch is felt in the front of the thigh.
Hold for 30 seconds,
Switch sides and repeat.
Static Standing Psoas Stretch
Preparation: Stand with one leg bent and slightly forward. Internally rotate back leg.
Movement:
Draw abs in and activate glutes.
Squeeze buttocks, while rotating pelvis posteriorly.
Slowly, move body forward until a mild tension is achieved in the front of the hip being stretched.
Raise the arm (on the same side as the back leg) up and over to the opposite side, while maintaining pelvis position.
Hold side bend position and slowly rotate backward.
Hold for 20-30 seconds.
Switch sides and repeat.
Static Kneeling Hip Flexor/Quadriceps Stretch
Preparation: Kneel with front leg bent at a 90-degree angle. Internally rotate back leg.
Movement:
Draw abs in and activate glutes.
Squeeze buttocks, while rotating pelvis posteriorly.
Slowly move body forward until a mild tension is achieved in the front of the hip being stretched.
Raise stretch side arm up and over to the opposite side, while maintaining pelvis position.
Hold side bend position and slowly rotate backward.
Hold for 20-30 seconds
Switch sides and repeat.
Static Supine Piriformis Stretch
Preparation: Lie supine with right leg crossed over the left
Movement:
Draw abs in.
Place left hand on the lateral right knee and slowly pull to opposite shoulder, until a slight tension is felt in buttock region.
Hold for 20-30 seconds.
Switch sides and repeat.
Aim to perform stretching exercises 2-3 sets, 4-5 days per week. Stretching after strengthening exercises enhances flexibility gains.
A SELECTION OF CRUCIAL strength exercises TO COMMENCE Knee Rehab
To rebuild muscle strength focus on both open and closed chain exercises through the full range of motion. Closed chain exercises involve the foot planted whereas open chain exercises have the leg moving freely.
Floor Bridges
Preparation:
Lie on your back with your knees bent, feet flat on the floor, and toes pointing forward, about shoulder-width apart.
Place your arms at your sides with your palms facing up.
Movement:
Engage your abdominal muscles and activate your glutes.
Raise your pelvis off the floor until your knees, hips, and shoulders are in a straight line.
Slowly lower your pelvis back to the floor.
Repeat 10 reps.
To advance the exercise, try it as a single-leg variation.
Side Hip Abduction with Internal Rotation
Preparation:
Lie on your side on an exercise mat with your legs fully extended.
Support your head with one arm, either bent or stretched out.
Place the hand of your other arm on the floor in front of your abdomen to stabilize your upper body.
Rotate your upper leg inward at the hip joint.
Movement:
Lift your upper leg sideways towards the ceiling, leading with your heel, briefly hold it in this position, and then lower it back down.
Repeat 10 reps each leg
Ensure your body remains stable and perform the movements slowly and and under control. Your upper body should remain still as your leg moves.
For added challenge, consider using an elastic resistance band positioned just above your knee joint.
90-90 Banded Ankle Rotations
Preparation:
Lie down on your side in a 90-90 position; knees forward in line with your hips and feet in line with your knees.
Position the back of your thighs against a box.
Place a resistances band around your ankles and yoga block between your knees.
Movement:
Push the top leg's hamstring into the box.
Perform a slight posterior pelvic tilt.
Slowly turn your toes down, leading with your heel toward the ceiling.
Stay within your active range of hip internal rotation.
Repeat 10 reps each leg.
Focus on maintaining a slight posterior pelvic tilt throughout.
Feel the forward fibers of your glute muscles working.
Control the movement and maintain controlled breathing.
Ensure your head, ribs, and hips stay stacked in alignment.
Seated Straight Leg Raise
Preparation:
Sit on the floor with your right leg straight in front of you. Bend your left leg at a 90-degree angle, putting your left foot flat on the floor.
Draw your shoulder down your back and place your hands on the floor behind your body, for support.
Movement:
Engage your abdominal muscles.
Flex your right foot and tighten the thigh muscles of your right leg. Raise your right leg 6 to 8 inches off the floor. Don’t arch your back or hunch your shoulders.
Hold the right leg in the air for 10 seconds if you can.
Then lower the leg slowly and steadily down to the floor. Relax.
Repeat 5 reps each side.
To change sides bend your right leg and place your right foot flat on the floor, extend your left leg straight.
Leg Extensions While Sitting
Preparation:
Sit on a chair or stool that is high enough for you to bend your legs at a right angle (90 degrees).
You can wear a lightweight cuff on your lower leg (above the ankle) if you like.
Movement:
Slowly stretch out one leg in front of you and lift it up, then slowly bend and lower it. It should take about 5 seconds to lower it.
Repeat 10 reps each leg.
Hamstring Curls
Preparation:
Lie down prone or standing up.
Movement:
Bend your left knee, drawing your left heel towards your buttock, focusing on the hamstrings (back of the thigh).
Slowly lower your heel back to the starting position.
Repeat 10 reps each leg.
Wall Sits
Preparation:
Stand with your back flat against a wall.
Place your feet about 60 centimetres away from the wall. Your feet should be shoulder-width apart and flat on the floor, facing forward.
Movement:
Fold your arms in front of you and slowly slide your upper body down the wall until your thighs and lower legs are at a 90-degree angle.
You’ve arrived in the correct position when your thighs are horizontal, your kneecaps are facing forward, and your back is pressed flat against the wall.
Hold this position for about 20 seconds. After some time, you can gradually increase to one minute by adding 5 to 10 seconds each time.
Repeat 3 sets. After each wall sit, slide your upper body back up the wall by straightening your legs and have a 30-second break.
Calf Raises
Preparation:
Stand on a flat surface.
You can hold onto a chair or wall for support and balance.
Movement:
Raise your body onto the balls of your feet, lifting your heels off the ground.
Slowly lower your heels down while engaging the calf muscles.
Repeat 10 reps each leg.
Single Leg Balance
Preparation:
Stand with your feet positioned shoulder-width apart, pointing straight ahead. Ensure your hips are in a neutral position.
Lift your chest, slightly retract your shoulders, and tuck your chin.
Movement:
Engage your abs and activate your glutes.
Lift one leg directly beside your supporting leg. Flex your hip at a 90-degree angle, dorsiflex your toe, and slightly flex your knee. Maintain optimal alignment, including level hips and shoulders.
Hold this position for a duration of twenty seconds.
Gently return to your original position.
Repeat 3 sets each leg.
Single-leg Romanian Deadlift
Preparation:
Stand on one leg in optimal posture, keeping raised leg parallel to the standing leg.
Movement:
Draw abs in and activate glutes.
Without allowing further knee movement, maintain a straight torso and hinge forward at the hips, touching toe of standing leg with opposite hand.
While maintaining abdominal drawing in maneuver and gluteal activity, return to starting position.
Repeat 8 reps each leg.
Body Weight Squat to Calf Raise
Preparation:
Stand with feet shoulder-width apart, toes pointing forward and knees over second and third toes.
Place your hands on hips or behind the ears.
Movement:
Draw abs in and activate glutes.
Slowly begin to squat down, bending knees and flexing hips, keeping feet straight (as if sitting back into a chair). Do not allow any internal rotation at the hips or knees.
Allow the pelvis to sit back while maintaining a neutral spine. Keep the chest up and put pressure through the heels.
To rise back up, contract glutes and place pressure through the heels as knees are extended.
Stand up straight until hips, knees and feet are fully extended and then rise up on to the balls of your feet.
Avoid compensation in the low back or lower extremities.
Repeat 10 reps each leg.
Regression:
In cases of tight calfs elevate your heels whilst squatting (by placing a block under your heels).
Omit calf raise.
Holding on to a stable support.
Progression:
Unstable surface
Gradually build your strength up to 3 sets over a 4-6 weeks time frame and then progress increasing resistance with weights or resistance bands.
Optimizing Results from Knee Rehabilitation Exercises
To get the most out of knee rehab exercises:
Focus on proper form - avoid compromising form to increase reps
Build up resistance slowly over time
Ice the knee after exercise to control inflammation
Discuss any exercise-related pain with your clinician
Supplement rehab with cardiovascular exercise as tolerated
Listen to your body and allow adequate rest between sessions
Consider massage, acupuncture, or other modalities for enhancement
*Additionally its advise to incorporate active dynamic pelvic floor training around your rehabilitation routine to improve over all posture. The pelvic floor plays an important role for the coordinated triggering of almost all movements, as well as for balance and good body posture. Many back, knee and foot problems can be relieved through conscious training of the pelvic floor.
Patellofemoral pain syndrome can be a frustrating and recurrent condition for many women after pregnancy. The combination of ligament laxity, altered biomechanics, and muscle imbalances often predisposes women to knee pain postpartum. However, with a dedicated rehabilitation approach, PFPS can be effectively managed.
The key is addressing the underlying factors contributing to poor patellar tracking and increased joint stresses. This requires consistency with stretches, targeted strengthening exercises, taping, bracing, and technique adjustments over an extended duration. Consulting sports medicine specialists and physical therapists to design a customized treatment plan optimizes outcomes.
While recovering from PFPS after pregnancy demands commitment and patience, significant improvements in knee pain and function are achievable. Taking a comprehensive approach allows women to regain strength, stability, and comfort in their knees so they can return to their active lifestyles and keep up with their new bundles of joy. With proper education, support, and early intervention, the achy knees that frequently follow pregnancy do not have to be an inevitable long-term struggle.
Still struggling with knee pain? Reach out and contact us! We’ll talk you through it!
improve your postpartum posture
by Understanding your bodies structure and function capacity, we can address any postural dysfunction and prevent injury.
our one pager to better postural alignment will show you exactly how:
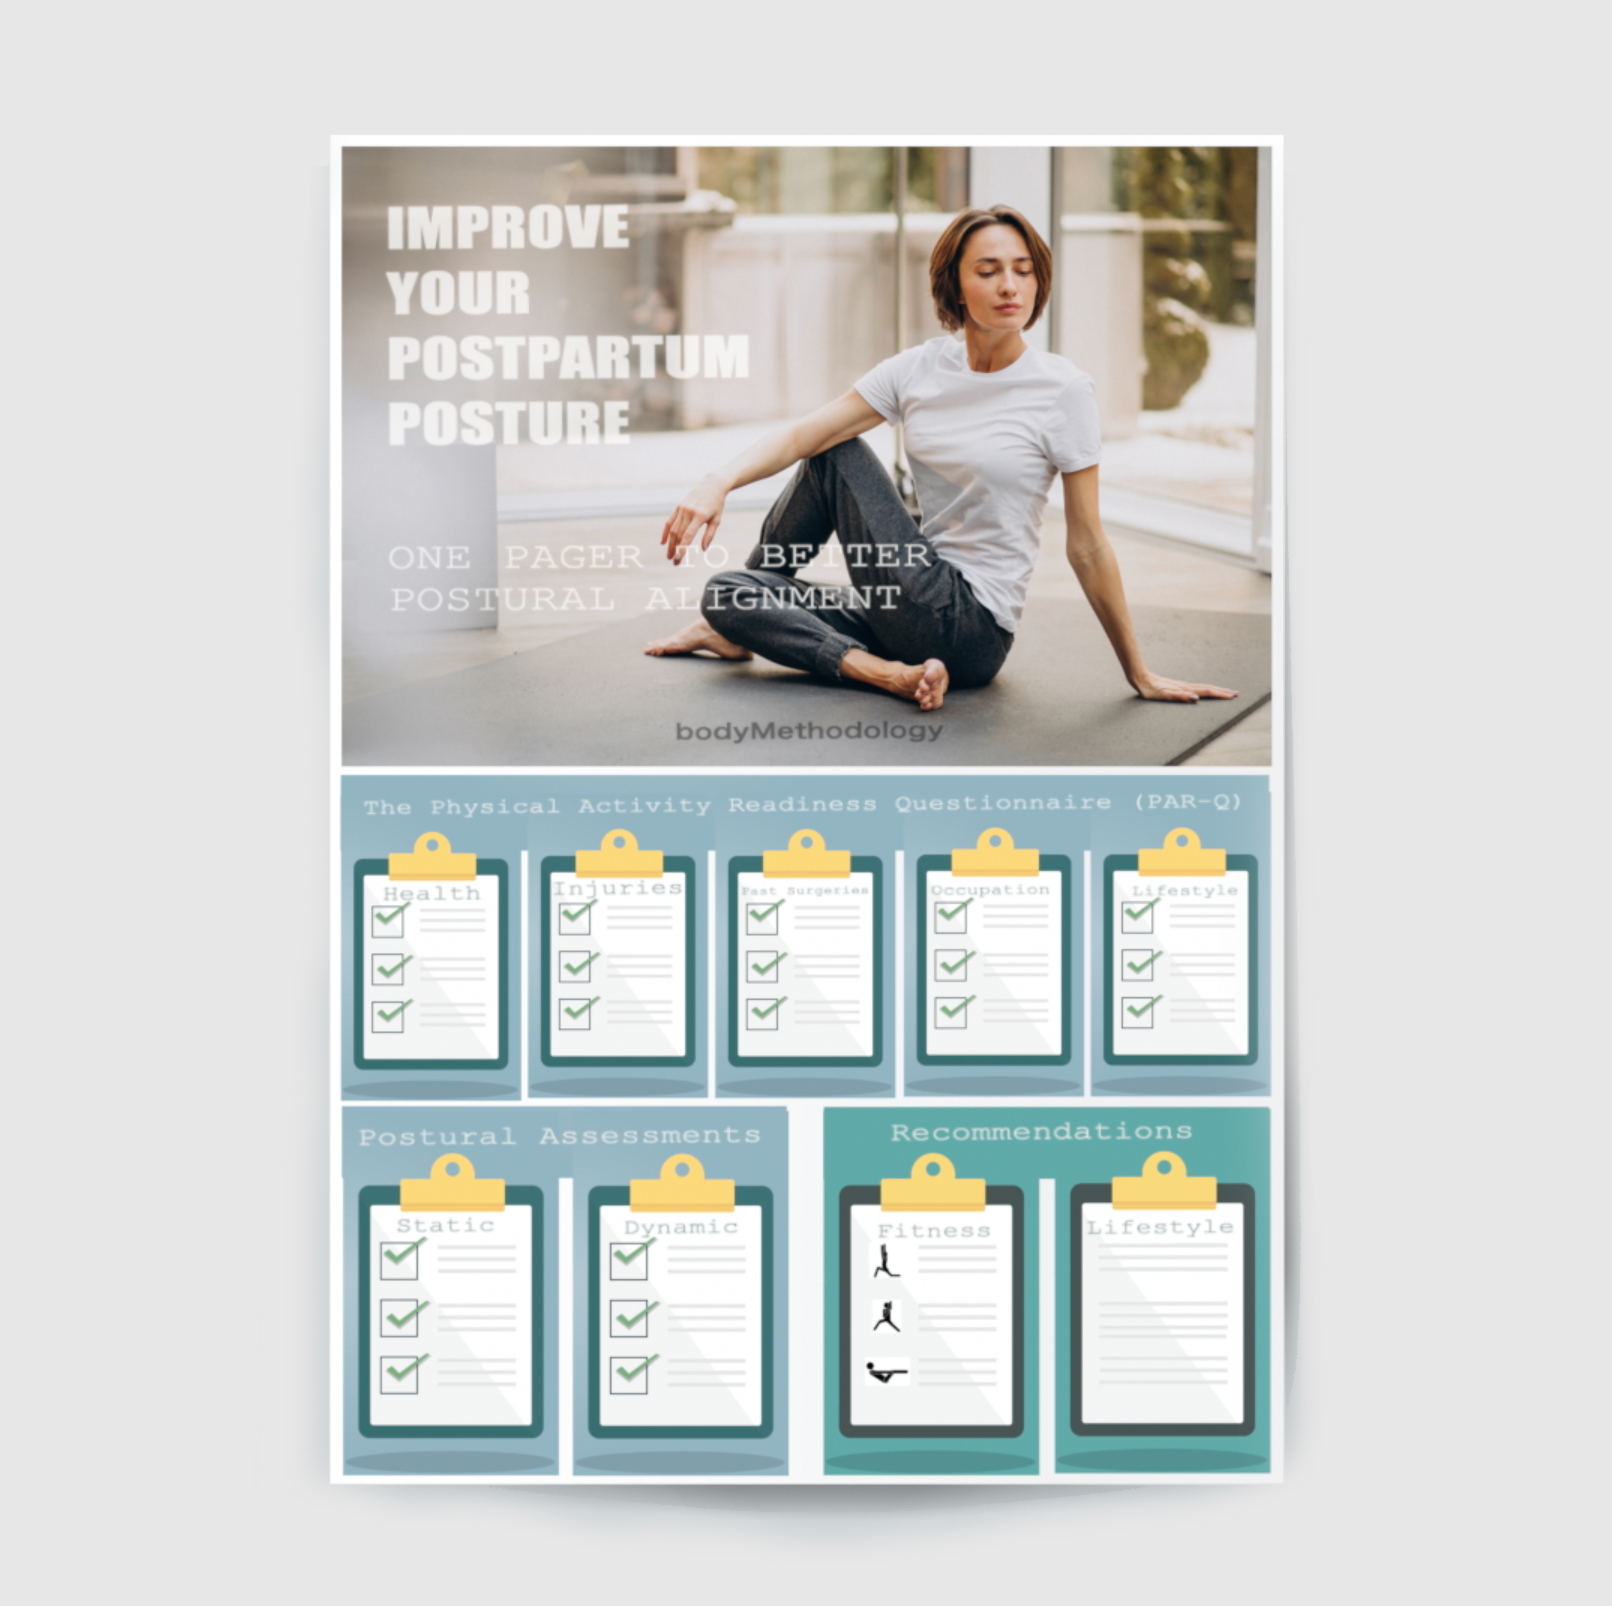

The Best Pilates Exercises For Healthy Knees Postpartum

Knee pain and injury are common issues that can arise at any age due to overuse, weakness in the surrounding muscles, or imbalance between muscle groups. It's common for new mums to experience knee pain after pregnancy. The extra weight gained during pregnancy, along with the shift in posture and pressure on the knees from carrying a baby, can lead to strain and imbalance. The hormonal changes and loosening of ligaments during pregnancy may also contribute to knee issues postpartum.
Pilates is an effective exercise system for protecting the knees and helping to prevent injury by strengthening muscles, enhancing stability, and promoting proper alignment. This article outlines some of the best Pilates moves to include in your postpartum fitness routine that specifically target the muscles around the knees, hips, and ankles to improve joint mobility and function. As the knee lies between the ankle and hip joints, imbalances and dysfunctional use of the muscles and tendons crossing any one of these joints will heighten the risk of injury or damage to the knee. This highlights the importance of improving and maintaining movement quality across the ankles and hips as well as the knees. By integrating these movements into your regular routine, you can keep your knees feeling great.
The fundamental principles of Pilates focus on core strength, precision, control, centring, concentration, breath, and flow of movement. When performed properly, Pilates exercises strengthen muscles in a balanced way, helping to support the knees and reduce excessive stress on the joints. The regimen also emphasises alignment, which is key for optimal knee function. Additionally, the concentration required helps build body awareness so you can notice imbalances and make adjustments.
recommend exercise to improve knee health:
Leg Slides
Here's how to perform Leg Slides:
Start by lying on your back with your knees bent and feet flat on the mat. Keep your arms relaxed by your sides. (However to begin with, you may want to place your hands on your pelvis to check for unwanted movement).
Breathe in, preparing your body to move.
Breathe out as you gently connect to your centre by applying the Zip and Abdominal Hollowing [HERE]. Maintain an appropriate level of connection to your centre throughout.
Take a deep breath to prepare, and as you exhale, slide one foot forward along the mat, aiming to extend that leg straight while maintaining stability in the pelvis and a neutral spine.
Inhale as you smoothly return the leg back to the starting position, maintaining control and awareness of your movements.
Repeat the exercise with the other leg, sliding it along the mat while keeping the pelvis stable and the core engaged.
When performing Leg Slides, pay attention to the following key points:
Maintain a stable pelvis throughout the movement, avoiding any excessive tilting or movement in the hips.
Keep your core muscles activated to provide support and stability to the spine and pelvis.
Focus on lengthening through the extended leg while maintaining proper alignment and control.
Breathe naturally throughout the exercise, coordinating your breath with the movement.
Knee Openings
Knee Openings are a valuable exercise in Pilates that help you focus on maintaining stability between the pelvis and spine, while promoting independent movement of your leg at the hip joint. They also help to improve hip mobility and strengthen the hip muscles.
Here's how to perform Knee Openings:
Begin by lying on your back with your knees bent and feet flat on the mat, hip-width apart.
Keep your arms relaxed by your sides. (However to begin with, you may want to place your hands on your pelvis to check for unwanted movement).
Breathe in, to prepare.
Breathe out as you gently connect to your centre.
Breathe in, preparing your body to move and maintain an appropriate level of connection to your centre throughout.
Breathe out as you allow one knee to open slowly to the side, keeping the foot down on the mat but allowing the foot to roll to its outer side. Open as far as you can without moving the pelvis.
Breathe in as you bring the knee back to the Starting Position.
Continue alternating sides, ensuring a smooth and controlled motion.
Repeat five times with each leg
When performing Knee Openings, keep the following tips in mind:
Keep your pelvis and spine still and centred throughout. Focus on your leg moving in isolation from the rest of your body.
Move your leg as far as you can without disturbing the pelvis and losing neutral.
Focus on your waist remaining long and even on both sides.
Keep your chest and the front of your shoulders open and avoid any tension in your neck area.
Remain still in the supporting leg, without tension.
Single Knee Folds
Single Knee Folds target the abdominal muscles, particularly the deep core muscles, while also working on pelvic stability and hip mobility.
Here's how to perform Single Knee Folds:
Begin by lying on your back with your knees bent and feet flat on the mat. Keep your arms relaxed by your sides. (However to begin with, you may want to place your hands on your pelvis to check for unwanted movement.)
Breathe in, to prepare.
Breathe out as you gently connect to your centre.
Breathe in, preparing your body to move and maintain an appropriate level of connection to your centre throughout.
Breathe out as you lift your right foot off the mat and fold the knee up towards your body. Allow the weight of the leg to drop down into your hip socket and remain grounded in your pelvis and long in your spine.
Breathe in, maintaining a stable pelvis and neutral spine.
Breathe out as you slowly return the leg back down and your foot to the mat, maintaining control and engaging the core.
Continue alternating between the two legs.
Repeat five times with each leg.
As you perform Single Knee Folds, focus on the following key points:
Keep your pelvis stable and avoid any excessive movement or tilting.
Maintain a neutral spine, avoiding any arching or flattening of the lower back.
Engage your deep core muscles throughout the exercise to support and control the movement.
Breathe naturally, coordinating your breath with the movement.
Knee Circles
Knee Circles are an exercise designed to help you move your thigh bone independently from your pelvis and spine. This movement not only releases tension around the hip joint but also enhances spinal stability.
Here's how to perform Knee Circles:
Begin with Proper Alignment: Start by positioning yourself correctly in the Relaxation Position [HERE]
Prepare Your Leg: Gently fold one leg towards your body, ensuring controlled movement. Bend the knee further, allowing the lower leg to fully relax. Maintain a connection to your center throughout the exercise.
Initiate the Circles: Breathe naturally and move at your own pace. Start circling your leg towards the mid-line of your body. Continue the circle down, around, and back up to the starting position. Keep the leg as close to your body as possible without disturbing your pelvis.
Change Direction: Complete up to five repetitions in one direction. Then, reverse the circle's direction.
Return to Starting Position; Conclude the exercise by bringing your knee in line with your hip joint. Ensure a stable pelvis as you lower your leg back to the mat. Return to the Relaxation Position.
Repeat on the Other Side: Perform the same sequence with the other leg, doing five repetitions in each direction.
As you perform Knee Circles, focus on the following key points:
Focus on maintaining a stable pelvis and spine throughout the exercise.
Keep the supporting leg still without any unnecessary tension.
Keep your chest open, and avoid tension in your neck area.
Begin with small circles (approximately the size of a grapefruit) and gradually increase the circle's size as you gain better control.
Ankle Circles:
Enhancing Ankle Mobility and Lower Leg Relaxation. Ankle Circles are an effective exercise for increasing mobility in your ankle joints and relieving tension in your lower legs.
Here's how to perform Ankle Circles:
Begin by ensuring proper alignment in the Relaxation Position.
Fold one leg towards your body while maintaining stability. Gently clasp your hands behind your thigh and lift your lower leg slightly, positioning your foot higher than your knee. Throughout the exercise, maintain a suitable connection to your core.
Maintain natural breathing throughout the exercise.
Keep your leg still, focusing solely on flexing your foot to move your ankle joint.
Begin circling your foot outward, striving to maintain a lengthened and tension-free position in your foot and toes.
Perform up to five ankle circles in this outward direction.
Reverse the direction and complete up to five inward ankle circles.
Repeat on the Opposite Ankle: Perform the same sequence on the other ankle, completing up to five circles in each direction.
As you perform Knee Circles, focus on the following key points:
Ensure a neutral pelvis and spine position throughout the exercise. Avoid twisting your pelvis or bending your spine to the side as you reach for your leg.
Keep your thigh and shins stationary and correctly aligned.
Focus on generating the circular motion solely from your ankle joint.
Aim to prevent your toes from becoming excessively active during the exercise.
Creeping feet
This exercise is designed to mobilize the feet and ankles while enhancing support for the arches.
Here's how to perform Creeping feet:
Begin by ensuring proper alignment in the Relaxation Position. Place your feet against a wall with your thighs vertical and shins horizontal. Keep your pelvis and spine in a neutral position. Maintain hip-width separation between your legs, and make sure the soles of your feet are flat against the wall. (Alternatively, you can perform this exercise while sitting upright in a chair with your feet placed hip-width apart on the floor.) Throughout the exercise, maintain a connection to your core.
Breathe naturally during the exercise.
Lift your toes and spread them wide on the wall. Then, raise the arches of your feet and gently slide your heels up the wall while keeping your feet in contact with it.
Continue this action, gradually creeping your feet upward on the wall until they can no longer remain flat.
Bend your knees and smoothly glide your feet back down the wall, returning to the starting position.
Repeat this sequence up to ten times.
As you perform Creeping feet, focus on the following key points:
Be mindful not to excessively curl your toes, which could lead to tension. Focus on engaging the arches of your feet.
Ensure that your feet stay evenly grounded and aligned against the wall, without rolling outward or inward.
Maintain proper alignment of your hips, knees, and ankles throughout the exercise.
Spine Curls
Spine Curls are a fundamental exercise in Pilates that help improve spinal mobility, strengthen the core, and promote proper alignment.
Here's how to perform Spine Curls:
Start by lying on your back with your knees bent, feet hip-width apart, and arms relaxed by your sides.
Maintain an appropriate level of connection to your centre throughout.
Take a in breath to prepare.
As you exhale, begin to articulate your spine, lifting your tailbone off the mat, followed by each vertebrae, until your entire spine is off the mat.
Continue to lift until you reach a bridge position, where your knees, hips, and shoulders form a straight line.
Inhale at the top of the bridge position, maintaining stability and engaging your glutes and core.
Exhale as you begin to roll the spine back down to the mat, articulating each vertebrae in a controlled manner until your spine is back in a neutral position.
Repeat the movement for six repetitions, focusing on smooth and controlled motion throughout.
When performing Spine Curls, keep the following tips in mind:
Focus on wheeling your spine off the mat vertebra by vertebra.
Control the sequential return of your spine back down to the mat.
Avoid rolling up too far, maintain the connection of your ribs to your pelvis and avoid arching your spine.
Ensure there is equal weight through both feet; this will help to prevent your pelvis dipping to either side.
Try to avoid 'hitching' your pelvis up towards your ribcage.
Oyster
This exercise is designed to enhance hip mobility while strengthening the muscles around the hip joint.
Here's how to perform Oyster:
Lie on your right side, ensuring that your shoulders, hips, and ankles are in a straight line. Maintain a neutral pelvis and spine position. Extend your right arm beneath your head, aligning it with your spine. Place your left hand on the mat in front of your ribcage, gently bending your elbow for support. Bend both knees in front of you and draw your feet back so that your heels align with the back of your pelvis. Keep a mindful connection to your core throughout the exercise.
Inhale, preparing your body for movement.
Exhale, maintaining a neutral pelvis and spine, and gradually open your top knee while keeping your feet together. This movement originates from your hip joint.
Inhale, and with control, return your leg to the starting position.
Repeat this sequence up to ten times, and then switch to your other side.
When performing Oyster, keep the following tips in mind:
Ensure proper alignment in the side-lying starting position: shoulder above shoulder, hip above hip, and knee above knee.
Keep your pelvis stable; the movement of opening the leg should only involve the hip joint.
Open your top leg only as far as you can without affecting your pelvis's position.
Continuously lengthen both sides of your waist throughout the exercise.
The top arm provides support but avoid putting too much weight on it.
Maintain an open chest and focus directly ahead of you.
side kick series - front and back
Helps to mobilise and strengthen your hips while challenging your spinal stability
Here's how to perform side kick series - front and back:
Lie on your right side and correctly align your pelvis and spine in neutral. Place a substantial cushion underneath the head to ensure that your head and neck are in line with your spine. Bend both knees in front of you so that your hips and knees are bent to a right angle. Lengthen your right arm underneath your head and in line with your spine. Place your left hand on the mat in front of your ribcage and bend your elbow to help lightly support your position. Maintain an appropriate level of connection to your centre throughout.
Lift your left leg so that it is level with the top of your pelvis. Keeping your pelvis still reach the leg slightly behind you so that it is extended lust behind the hip joint. Your leg remaining in parallel, softly point your foot.
Breathe in as you sweep your left leg forward, hinging from the hip joint. The pelvis and spine remain stable. As you reach the end of the forward movement, draw your leg slightly back, flex the foot and then pulse it a little further forward.
Breathe out as you point your foot and sweep the leg back again, to extend it just behind the hip joint.
Repeat up to ten times and then repeat on the other side.
When performing side kick series - front and back, keep the following tips in mind:
Avoid simply resting in the Starting Position but feel length and energy throughout your entire body.
Keep your chest open, and your focus directly ahead of you.
Ensure that your pelvis remains stable throughout. The action of the kick must come from your hip joint; your leg moves in isolation from the rest your body.
Be aware of your range of movement. The mobility in the hip joint and the flexibility of the surrounding muscles will dictate how far to carry the leg both forward and back. Do not allow movement to take place in the lower back.
The movement of the leg should be brisk but controlled.
Side Kick Series - Up and Down
Helps to mobilise and strengthen the hips and surrounding muscles while challenging spinal stability, balance and control.
Here's how to perform side kick series - Up and Down:
Lie on your right side in a straight line, correctly stacking your shoulders, hips and ankles. Lengthen your legs in line with your spine, connecting your inner thighs in parallel and softly pointing your feet. Your pelvis and spine remain in neutral. Lengthen your right arm underneath your head and in line with your spine. Place your left hand on the mat in front of your ribcage and bend your elbow to help lightly support your position. Maintain an appropriate level of connection to your centre throughout.
Breathe in, preparing your body to move, and actively connect your inner thighs.
Breathe out and, maintaining a stable and still pelvis and spine, slightly raise your left leg with toes softly pointed
Breathe in, lengthening your heel away flex the left foot,
Breathe out and lower the left leg with control back down to the mat.
Repeat up to ten times and then repeat on the other side.
When performing side kick series - Up and Down, keep the following tips in mind:
Maintain length and energy throughout and keep your waist long.
Focus on balancing and avoid your spine rolling.
Avoid the legs drifting forwards or backwards and maintain their parallel alignment.
Side Kick Series - Small Circles
Here's how to perform Side Kick Series - Small Circle:
Lie on your right side and correctly align your pelvis and spine in neutral. Place a substantial cushion underneath the head to ensure that your head and neck are in line with your spine. Bend both knees in front of you so that your hips and knees are bent to a right angle. Lengthen your right arm underneath your head and in line with your spine. Place your left hand on the mat in front of your ribcage and bend your elbow to help lightly support your position. Maintain an appropriate level of connection to your centre throughout.
Lift your left leg so that it is level with the top of your pelvis. Keeping your pelvis still reach the leg slightly behind you so that it is extended lust behind the hip joint. Your leg remaining in parallel, softly point your foot.
Breathe in as you lengthen your left leg begin to circle it forward, down, back and up to the Starting Position.
Breathe out. Perform another circle in the same direction.
Repeat up to five times in the same and then reverse direction.
repeat on the other side.
When performing Side Kick Series - Small Circle, keep the following tips in mind:
The circle is small, about the size of a watermelon. Keep the circle even, i.e as far as you carry the leg forward; you must carry it the same distance behind you.
Maintain the parallel position of your leg throughout the circle.
Avoid simply resting in the Starting Position but feel length and energy throughout your entire body.
Ensure that your pelvis remains stable throughout. The action must come from your hip joint, as your leg moves in isolation from the rest of your body.
Side Kick Series - Inner Thigh Lift
Mobilises and strengthens your hips, with particular focus on the inner thigh muscles, while challenging your spinal stability.
Here's how to perform Side Kick Series - Inner Thigh Lift:
Lie on your right side and correctly align your pelvis and spine in neutral. Place a substantial cushion underneath the head to ensure that your head and neck are in line with your spine. Bend left knee in front of you so that your hips and knees are bent to a right angle, allow your left knee and foot to rest on the ground. Lengthen your right arm underneath your head and in line with your spine. Place your left hand on the mat in front of your ribcage and bend your elbow to help lightly support your position. Maintain an appropriate level of connection to your centre throughout
Breathe in as you lengthen and lift the lower leg (right leg) directly up.
Breathe out and lower your leg back down with control.
Repeat up to ten times and then repeat on the other side
When performing Side Kick Series - Inner Thigh Lift, keep the following tips in mind:
Avoid simply resting in the Starting Position, but feel length and energy throughout your entire body.
Keep your chest open, and your focus directly ahead of you.
The Cat
Develops mobility and release throughout the entire length of the spine while reducing pressure on the spine.
Here's how to perform The Cat:
Align yourself correctly in the Four-point Kneeling Position: Hands directly underneath your shoulders and your knees directly beneath your hips. Maintain an appropriate level of connection to your centre throughout.
Breathe in, preparing your body to move, and lengthen your spine.
Breathe out as you roll your pelvis underneath you, as if directing your tailbone between your legs; as you do so, your lower back will gently round and flex. Continue this flexion and allow your upper back to round gradually, followed by your neck, and finally nod your head slightly forwards. This position is a C-Curve, an even and balanced C-shape of the spine; it occurs in many of the following exercises.
Breathe in wide to the lower ribcage to help maintain this lengthened C-Curve.
Breathe out as you simultaneously start to unravel the spine, sending the tailbone away from you, bringing the pelvis back to neutral as you also lengthen the head and upper spine back to the starting neutral position.
Repeat up to ten times.
When performing The Cat, keep the following tips in mind:
Aim for an elongated C-Curve, which is evenly flexed throughout the spine. A common mistake is to round the upper back too much.
Similarly ensure that you do not over-round the shoulders. Maintain the distance between your ears and shoulders.
Keep the head following the same curved line of the spine; do not drop it down too far.
Table Top
This exercise aims to challenge your stability and core strength while promoting controlled movement of your limbs.
Here's how to perform Table Top:
Begin by positioning yourself correctly in the Four-point Kneeling Position: Hands directly underneath your shoulders and your knees directly beneath your hips. Throughout the exercise, maintain a strong connection to your core.
Inhale to prepare your body for movement, lengthening your spine.
Exhale while keeping your pelvis and spine stable; slide one leg behind you, aligning it with your hip. Keep your foot gently pointed and in contact with the mat.
Inhale as you extend and lift your leg to hip height.
Simultaneously, raise the opposite arm forward, aiming for shoulder height. Maintain a stable and lengthened torso.
Exhale as you lower your extended leg to the mat and return your arm under your shoulder.
Inhale, ensuring a neutral pelvis and spine, and slide your leg back to the starting position.
Repeat this sequence up to five times on each side, alternating between the opposite arm and leg.
Variation: If you find this exercise too challenging, keep your foot in contact with the floor after straightening your leg. This will improve your balance and reduce strain on your lower back. If necessary, skip the arm movement and focus solely on sliding your leg.
When performing Table Top, keep the following tips in mind:
Maintain strong abdominal engagement to prevent your spine from sagging toward the mat in the Four-point Kneeling Position.
Continuously lengthen both sides of your waist and avoid raising your pelvis excessively toward your ribcage.
Raise your arm to shoulder height and your leg to hip height, but only if you can do so without compromising the stability of your pelvis and spine.
Allow your shoulder blade to move naturally upward on your ribcage as your arm rises, avoiding excessive elevation or depression of the shoulder.
Ensure precise coordination between your arm and leg movements.
Zigzags – Sitting
This is a great exercise for increasing mobility in the hip joints while trying to maintain a stable relationship between the hip, knee and ankle joints. It also challenges the stability of your spine as the legs move independently from the hips.
Here's how to perform Zigzags – Sitting:
Sit upright with your legs lengthened out in front of your body. Straighten your arms and circle them behind your body, to place the palms on the mat for support. Place your legs slightly wider than hip-width apart, turn them out from the hips, flex your feet and bend your knees to draw the legs in towards you as far as is possible whilst still maintaining a neutral pelvis and spine. Maintain an appropriate level of connection to your centre throughout.
Breathe in, preparing your body to move, and lengthen your spine.
Breathe out and, maintaining length and stability in your spine, straighten your legs, sliding your feet along the mat while maintaining the turned-out position and the flexed feet.
Breathe in. Keeping your legs straight, roll your legs in from the hips.
Breathe out and, maintaining the turned-in position of your legs, bend your knees and draw your legs back in towards your body, sliding the feet along the mat.
Breathe in. Keeping your legs bent, turn your legs out from the hips, returning to the Starting Position.
Repeat up to five times and then reverse the direction.
When performing Zigzags – Sitting, keep the following tips in mind:
Keep your pelvis and spine stable and still throughout; focus on the independent movement of the thigh bone in the hip socket.
Although you should have a sense of release in your hip joints, control the movement of your legs and don't just allow them to 'drop' to the side.
Maintain correct alignment of the legs; your feet, knees and hips should remain correctly aligned and move together. It is really easy to press your feet or your knees out further than your hips can turn out, but is essential that this be avoided.
Mexican Wave
This exercise helps mobilize the foot joints while enhancing coordination and control over your feet.
Here's how to perform Mexican Wave:
Begin by standing upright on the floor (not on a mat), and ensure your spine is in a neutral, elongated position. Keep your feet parallel to each other and hip-width apart. Allow your arms to hang naturally at your sides. Alternatively, you can perform this exercise while sitting upright in a chair, with your feet firmly grounded, hip-width apart on the floor. Maintain a strong connection to your core throughout the exercise.
Maintain natural breathing throughout the exercise.
Start by lifting only your big toes off the floor, keeping the other toes down.
Progress to lifting each toe one by one in a sequence until all your toes are raised.
Gently lower your toes back down sequentially, beginning with the little toe, and spread them as wide apart as possible.
Reverse the movement by lifting your little toes first and then continue raising each toe one at a time until you reach the big toe.
You can repeat this sequence up to five times, either working on one foot at a time or both feet together.
When performing Mexican Wave, keep the following tips in mind:
Ensure proper alignment of your leg, making sure your foot, ankle, and knee are in line with your hip.
Maintain a stable and elongated vertical position for your pelvis and spine throughout the exercise.
Keep your chest open and avoid any tension in the neck and shoulder area.
Single Leg Kick (preparation)
This exercise focuses on enhancing strength in the buttocks, legs, and spine, while also elongating the front of the legs and hips. It requires coordination and control.
Here's how to perform Single Leg Kick (preparation):
Begin by lying on your stomach, ensuring your pelvis and spine are in a neutral position. Your arms should form a diamond shape: place your fingertips together with palms facing down on the mat, and open your elbows. Rest your forehead on the back of your hands. Keep your legs hip-width apart and parallel.Maintain a continuous connection to your core throughout the exercise.
Inhale to prepare your body for movement, lengthening your spine.
Exhale as you kick your left heel toward the centre of your left buttock, keeping your toes softly pointed. Pulse flexing the foot, Pulse softly pointing the toes. Exhaling twice ('out, out').
Straighten and stretch your leg, lowering it back to the mat, and simultaneously kick your right foot toward your right buttock. Once again, keeping your toes softly pointed. Pulse flexing the foot, Pulse softly pointing the toes. Exhaling twice ('out, out').
Repeat this sequence up to five times.
When performing Single Leg Kick (preparation), keep the following tips in mind:
Ensure your abdominal muscles stay engaged.
Keep your pelvis stable and still throughout the exercise, moving your legs independently from your pelvis and spine.
Pay close attention to the correct alignment of your legs: hips, knees, and ankles should be in proper alignment.
Star (preparation)
This exercise aims to enhance your awareness of the independent movement of your arms and legs while keeping your torso stable.
Here's how to perform Star (preparation):
Lie face down, ensuring your pelvis and spine are in a neutral position. Rest your forehead on the mat. Straighten your legs, positioning them slightly wider than hip-width apart, and rotate them outward from the hips. Extend both arms above your head, spacing them slightly wider than your shoulders, and place your palms facing downward. Maintain a consistent connection to your core throughout the exercise.
Inhale deeply and elongate your spine.
Exhale and gently lift one arm and the opposite leg off the mat.
Inhale again as you lower your arm and leg, all the while maintaining the length of your upper body.
Repeat this movement up to ten times, alternating between arms and legs.
When performing Star (preparation), keep the following tips in mind:
Keep your abdominal muscles engaged.
Lift your arm and leg only as high as you can while ensuring your pelvis and spine remain stable.
Concentrate on extending your leg away from the hip socket.
Wall-Assisted Roll Downs
This exercise aims to enhance spine and hip mobility while simultaneously strengthening the muscles in your back, buttocks, and legs.
Here's how to perform Wall-Assisted Roll Downs:
Stand upright with your back firmly against a wall. Keep your feet parallel and hip-width apart, positioned about 30cm away from the wall. Slightly bend your knees. Maintain a neutral pelvis, ensuring it's supported by the wall. Your spine should also remain in a neutral position, preserving its natural curves. Your head may or may not touch the wall depending on your individual posture. Let your arms hang naturally by your sides.
Inhale as you elongate the back of your neck and gently lower your chin toward your chest.
Exhale as you gradually roll your entire spine forward and downward. Start by softening your breastbone, then proceed to articulate your lower ribcage, and finally, press your lower spine against the wall. Continue the roll until you can't go any further without your hips pivoting forward.
Inhale as you initiate the movement to roll your pelvis underneath you.
Exhale as you reverse the motion, rolling your spine back up and aligning each vertebra against the wall. Throughout this movement, elongate your spine until you return to the neutral position.
Repeat this sequence up to ten times.
When performing Wall-Assisted Roll Downs, keep the following tips in mind:
Maintain a smooth and sequential roll through each segment of your spine.
Focus on rolling directly along your centreline, avoiding any deviations to either side.
Sliding Down the Wall (using Swiss Ball)
This exercise is beneficial for enhancing the strength and equilibrium of your leg muscles while also promoting mobility and coordination in the hip, knee, and ankle joints. Additionally, it challenges the stability of your spine.
Here's how to perform Sliding Down the Wall (using Swiss Ball):
Stand upright with your back against a wall. Position the Swiss Ball between your lower back and the wall. Place your feet parallel to each other and maintain hip-width separation. Ensure your feet are slightly ahead of your pelvis so that when you bend your knees at a right angle, they do not extend beyond your toes. While leaning against the Ball, keep your spine elongated and in a neutral position. Allow your arms to hang down by your sides. Maintain a consistent connection to your core muscles throughout the exercise.
Inhale deeply, lengthening your spine, and begin to bend your knees. As you lower your body toward the floor, the Ball will smoothly roll up your spine. Maintain your upright position, along with a neutral pelvis and spine as you descend.
Exhale and, while grounding your feet firmly into the floor, straighten your legs to return to the starting position. As you do so, feel the Ball naturally roll back down to its initial position against your lower back.
Repeat this movement up to ten times.
When performing Sliding Down the Wall (using Swiss Ball), keep the following tips in mind:
Ensure your pelvis and spine remain in a neutral position throughout the exercise.
Keep your waist elongated and maintain the sensation of your spine lengthening upward and away from the floor.
Avoid allowing your pelvis to drop below the level of your knees.
Maintain proper alignment of your legs, ensuring that your ankles and knees stay in line with your hips.
Tennis Ball Rising
Connects your body with your legs while mobilising and strengthening the ankles and feet.
Here's how to perform Tennis Ball Rising:
Stand upright on the floor, not on a mat, and ensure your spine is in a neutral position. Keep your legs parallel and slightly closer together than hip-width apart. Place a tennis ball between your ankles, just below the inner ankle bones. If needed, stand next to a wall and place your hand on it in front of you to aid balance. Maintain a connection to your core muscles throughout.
Inhale to prepare for the movement and elongate your spine.
Exhale as you lift your heels off the floor, rising onto the balls of your feet. Maintain the position of the tennis ball between your ankles while keeping your spine stable and elongated.
Inhale, maintaining control, and gently lower your heels back to the floor.
Exhale as you bend your knees, ensuring your heels remain firmly planted.
Inhale as you straighten your legs, returning to the starting position.
Repeat this sequence up to ten times.
When performing Tennis Ball Rising, keep the following tips in mind:
Keep your pelvis and spine in a neutral position throughout the exercise, maintaining length in your waist and a sense of your spine extending upward.
Fully extend your legs without locking your knees.
Ensure your body weight is evenly distributed between both feet, and prevent your feet from rolling inward or outward.
Standing on One Leg
This exercise helps to centre your body while also strengthening your ankles and feet by challenging your balance.
Here's how to perform Standing on One Leg:
Begin by standing upright on the floor, not on a mat, and ensure your spine is in a neutral position. Bring your legs together and connect your inner thighs so they are parallel. Keep a steady connection to your centre throughout the exercise.
Inhale as you prepare to move, making sure to lengthen your spine.
Exhale as you shift your weight onto your left leg. Keep your pelvis as level as possible. Bend your right knee, lifting your foot slightly off the floor, and draw your leg up and towards your torso.
Inhale while holding this elongated and stable position. Feel the crown of your head reaching away from your grounded left foot.
Exhale as you return your right leg to the standing position and evenly distribute your weight between both feet.
Repeat this sequence up to five times on each side, alternating between legs.
When performing Standing on One Leg, keep the following tips in mind:
Ensure your pelvis and spine remain in a neutral position throughout the exercise. Avoid lifting your pelvis towards your ribcage.
Fully extend your supporting leg but avoid locking the knee.
Maintain the parallel alignment of your supporting leg, making sure your knee faces forward.
Standing Leg Press with Resistance Band
This exercise enhances muscle engagement around the hip and knee joints while challenging pelvic stability and control.
Here's how to perform Standing Leg Press with Resistance Band:
Stand facing a wall, maintaining a distance slightly beyond the reach of your arm. Bend your right leg and place your foot in the middle of the resistance band, anchoring it to the floor. Keep your feet parallel and hip-width apart. Grasp both ends of the band and extend your arms forward, placing your hands on the wall at head height. Your body should form a forward-leaning diagonal line, with your head, spine, and pelvis in neutral alignment. Ensure a continuous connection to your core throughout the exercise.
Inhale as you raise your right leg, bending at both the hip and knee.
Aim to bring your knee up and forward toward the wall, while simultaneously bringing your heel towards your buttocks
Exhale as you lower your foot back to the floor, maintaining an even effort between the hip and knee.
Perform this movement up to ten times on one leg, then switch to the other leg.
When performing Standing Leg Press with Resistance Band, keep the following tips in mind:
Distribute your weight evenly across the entire surface of your supporting foot.
Fully extend your supporting leg but avoid locking the knee.
Ensure that both legs remain parallel, and your knees point forward throughout the exercise.
Making time for self-care with Pilates after having a baby can make a big difference in overcoming postpartum knee pain. Focus on starting slowly and progressing gradually under the guidance of a trained instructor. Always listen to your body and stop any exercise that causes knee pain. With regular practice of these Pilates exercises using proper technique, along with plenty of rest, new mums will notice improved knee comfort, mobility, and stability. Pilates offers a gentle path toward regaining strength and realigning the body after pregnancy and childbirth. By taking a holistic approach to exercise during the postpartum period, mums can proactively care for their knees and enjoy getting active with their new baby.
improve your postpartum posture
By understanding your bodies structure and function capacity, we can address any postural dysfunction and prevent injury
our one pager to better postural alignment will show you exactly how…


Interval Walking for Postpartum Fitness

Are you a new mum looking to ease back into exercise and improve your fitness? Interval walking could be the perfect solution! Alternating short bursts of brisk walking with moderate recovery intervals allows you to challenge yourself without overdoing it.
benefits of interval walking postpartum
Gently builds cardiovascular endurance
Helps burn extra calories
Tones muscles
Boosts energy levels
Interval walking offers a host of benefits for mums wanting to regain their fitness after childbirth. The variations in intensity target different muscle groups while maintaining a low-impact form of exercise.
getting started with postpartum interval walking
Before embarking on any new exercise routine, it's essential to consult your doctor, especially after giving birth. Always receive medical clearance before beginning.
Once you get the all-clear, here are some tips for starting interval walking:
Invest in supportive footwear - good shoes are a must for exercising comfortably
Schedule walks when baby is settled or napping - this allows you to focus on your workout
Pick a safe route that's stroller/carrier friendly with even terrain
Start slow - listen to your body and build up gradually. Be patient with yourself!
Useful Equipment for Postpartum Walking
Having the right equipment can make interval walking with a new baby easier:
Baby carrier (Baby Sling Wrap) - allows baby to be close while keeping your hands free
Stroller - choose one with large, air-filled tires for smoother ride
Hydration pack - ensures you stay hydrated during workout
Beginning a postpartum walking routine takes patience, consistency and self-care. But the payoffs for your body and mind make it so worthwhile!
sample interval walking routine
Once you've gotten the all-clear from your doctor, you can follow this sample routine to incorporate interval walking into your postpartum fitness journey. Remember to listen to your body and adjust the intensity and duration based on how you feel.
Things to consider before embarking on an interval walking routine.
Before incorporating any interval training into your daily postpartum walks, we recommend gradually building your body back up, so you can comfortably walk for a 30-minute duration. Steadily strengthen the body by lengthening the distance of your walk in short increments.
Phase one: Gradually build up the duration of your walks to 15 minutes
Phase two: Progress to incorporate two 15-minute walks into your day
Phase Three: Increase your efforts to reach the stage where you are comfortable walking for a 30-minute duration.
Phase four: Advance by heading out for 3-4 30-minute walks a week.
Once you have reached Phase Four and are effortlessly managing to consistently complete 3-4 30-minute walks over a two-week time frame, you are safe to begin incorporating intervals.
Here's a simple walking interval program you can consider:
Duration: Aim for a total workout time of 20-30 minutes. You can adjust the duration based on how you're feeling today— How much sleep one has managed to get the night before will have a direct impact on your energy levels so please be kind to yourself. It’s important to always listen to your body.
Frequency: If you enjoy your interval walk today, why not try building up to 3-4 interval walking sessions per week? This will help you gradually improve both strength and stamina.

Warm-Up
Walk at an easy, comfortable pace for 5-10 minutes
Focus on your posture - keep your chin parallel to the ground and relax your shoulders
Do some deep breathing to oxygenate your muscles
The warm-up preps your body for the workout ahead
Interval 1
Walk at a moderate, conversational pace for 3 minutes
Gently engage your core muscles and stand tall
Check in with your breathing - deep, rhythmic breaths
Interval 2
Increase your pace to brisk walking for 1 minute
Pump your arms as you walk, engaging your arm and shoulder muscles
It’s important to continue deep breathing through this higher intensity interval
Interval 3
Return to a moderate walking pace for 3 minutes
Check your posture and core engagement
Monitor your breath, make sure you're not holding your breath
Repeat the interval pattern of moderate and brisk intervals 2-4 times, for a total of 20-30 minutes of interval walking.
Cool-Down
Finish with 5-10 minutes of gentle walking to lower your heart rate
Allow your breathing to return to normal
Reflect on how your body feels after the interval training
Cool Down Stretches
After your cool-down walk, take a few minutes to perform some gentle stretches to improve flexibility and aid in recovery. Focus on stretching your calf muscles, hamstrings, hip flexors, and lower back.
Be sure to hydrate well before, during and after your interval walking sessions. Proper hydration aids muscle recovery and performance.
recovery and safety tips for postpartum interval walking
Interval walking provides an excellent workout, but recovery is just as important! Here are some tips to promote healing and stay safe:
Modify- Remember, the intensity and duration of each interval can be adjusted based on your comfort level.
Hydrate properly - Drink plenty of water before, during and after your walk. Proper hydration prevents dizziness and aids muscle recovery.
Pay attention to symptoms - If you feel any pain, bleeding or concerning symptoms during or after walking, stop and consult your healthcare provider. Don't try to push through pain.
Take rest days - Walking 3-4 days a week is sufficient. Be sure to take 1-2 rest days in between sessions to allow your body to recover.
Don't overdo it - Progress gradually to avoid injury or overexertion. Increase duration and intensity slowly over several weeks. Patience is key!
Get enough sleep - Quality sleep allows your body to heal itself. The recommended 7-9 hours per night may prove difficult, so try grabbing 20 minute power naps around babies sleep schedule and utilising mediation techniques.
Eat a balanced diet - Nutritious meals provide energy for walking and aid postpartum recovery. Focus on lean proteins, fruits/veg, whole grains.
Engage your pelvic floor - Engage your pelvic floor muscles periodically during the walk to strengthen this key area.
Stop if you feel discomfort - Don't push through, if you experience any pain, discomfort, or unusual symptoms, stop the exercise and rest.
The postpartum period deserves ample time and care. By taking it slow, listening to your body, and staying safe, interval walking can be an excellent fitness activity for new mums.
the benefits are worth it!
Starting an interval walking routine as a new mum requires patience, consistency and self-compassion. But the benefits for your postpartum recovery and fitness journey make it so worthwhile!
Here’s a recap of the key advantages interval walking offers:
Gradually builds cardiovascular endurance and stamina
Helps tone and strengthen muscles throughout your body
Provides a metabolism boost to help shed extra pregnancy weight
Engages your core and pelvic floor muscles to aid healing
Improves mood and energy levels
Gets you outdoors for a dose of mood-boosting sunlight
Allows you to bring baby along for the journey
As long as you have medical clearance, interval walking can be a fabulous form of postpartum exercise. It allows you to gently challenge yourself without overexerting your body.
Be proud of yourself for making your health a priority! Celebrate the small fitness wins and know that each step is helping you heal and grow stronger.
improve your postpartum posture
our one pager to better postural alignment will show you exactly how:

safely rebuild your body postpartum
our mummies baby steps seven day guide shows you exactly how…

Unlocking The Secrets Of C-Section Pouches: Causes and Solutions
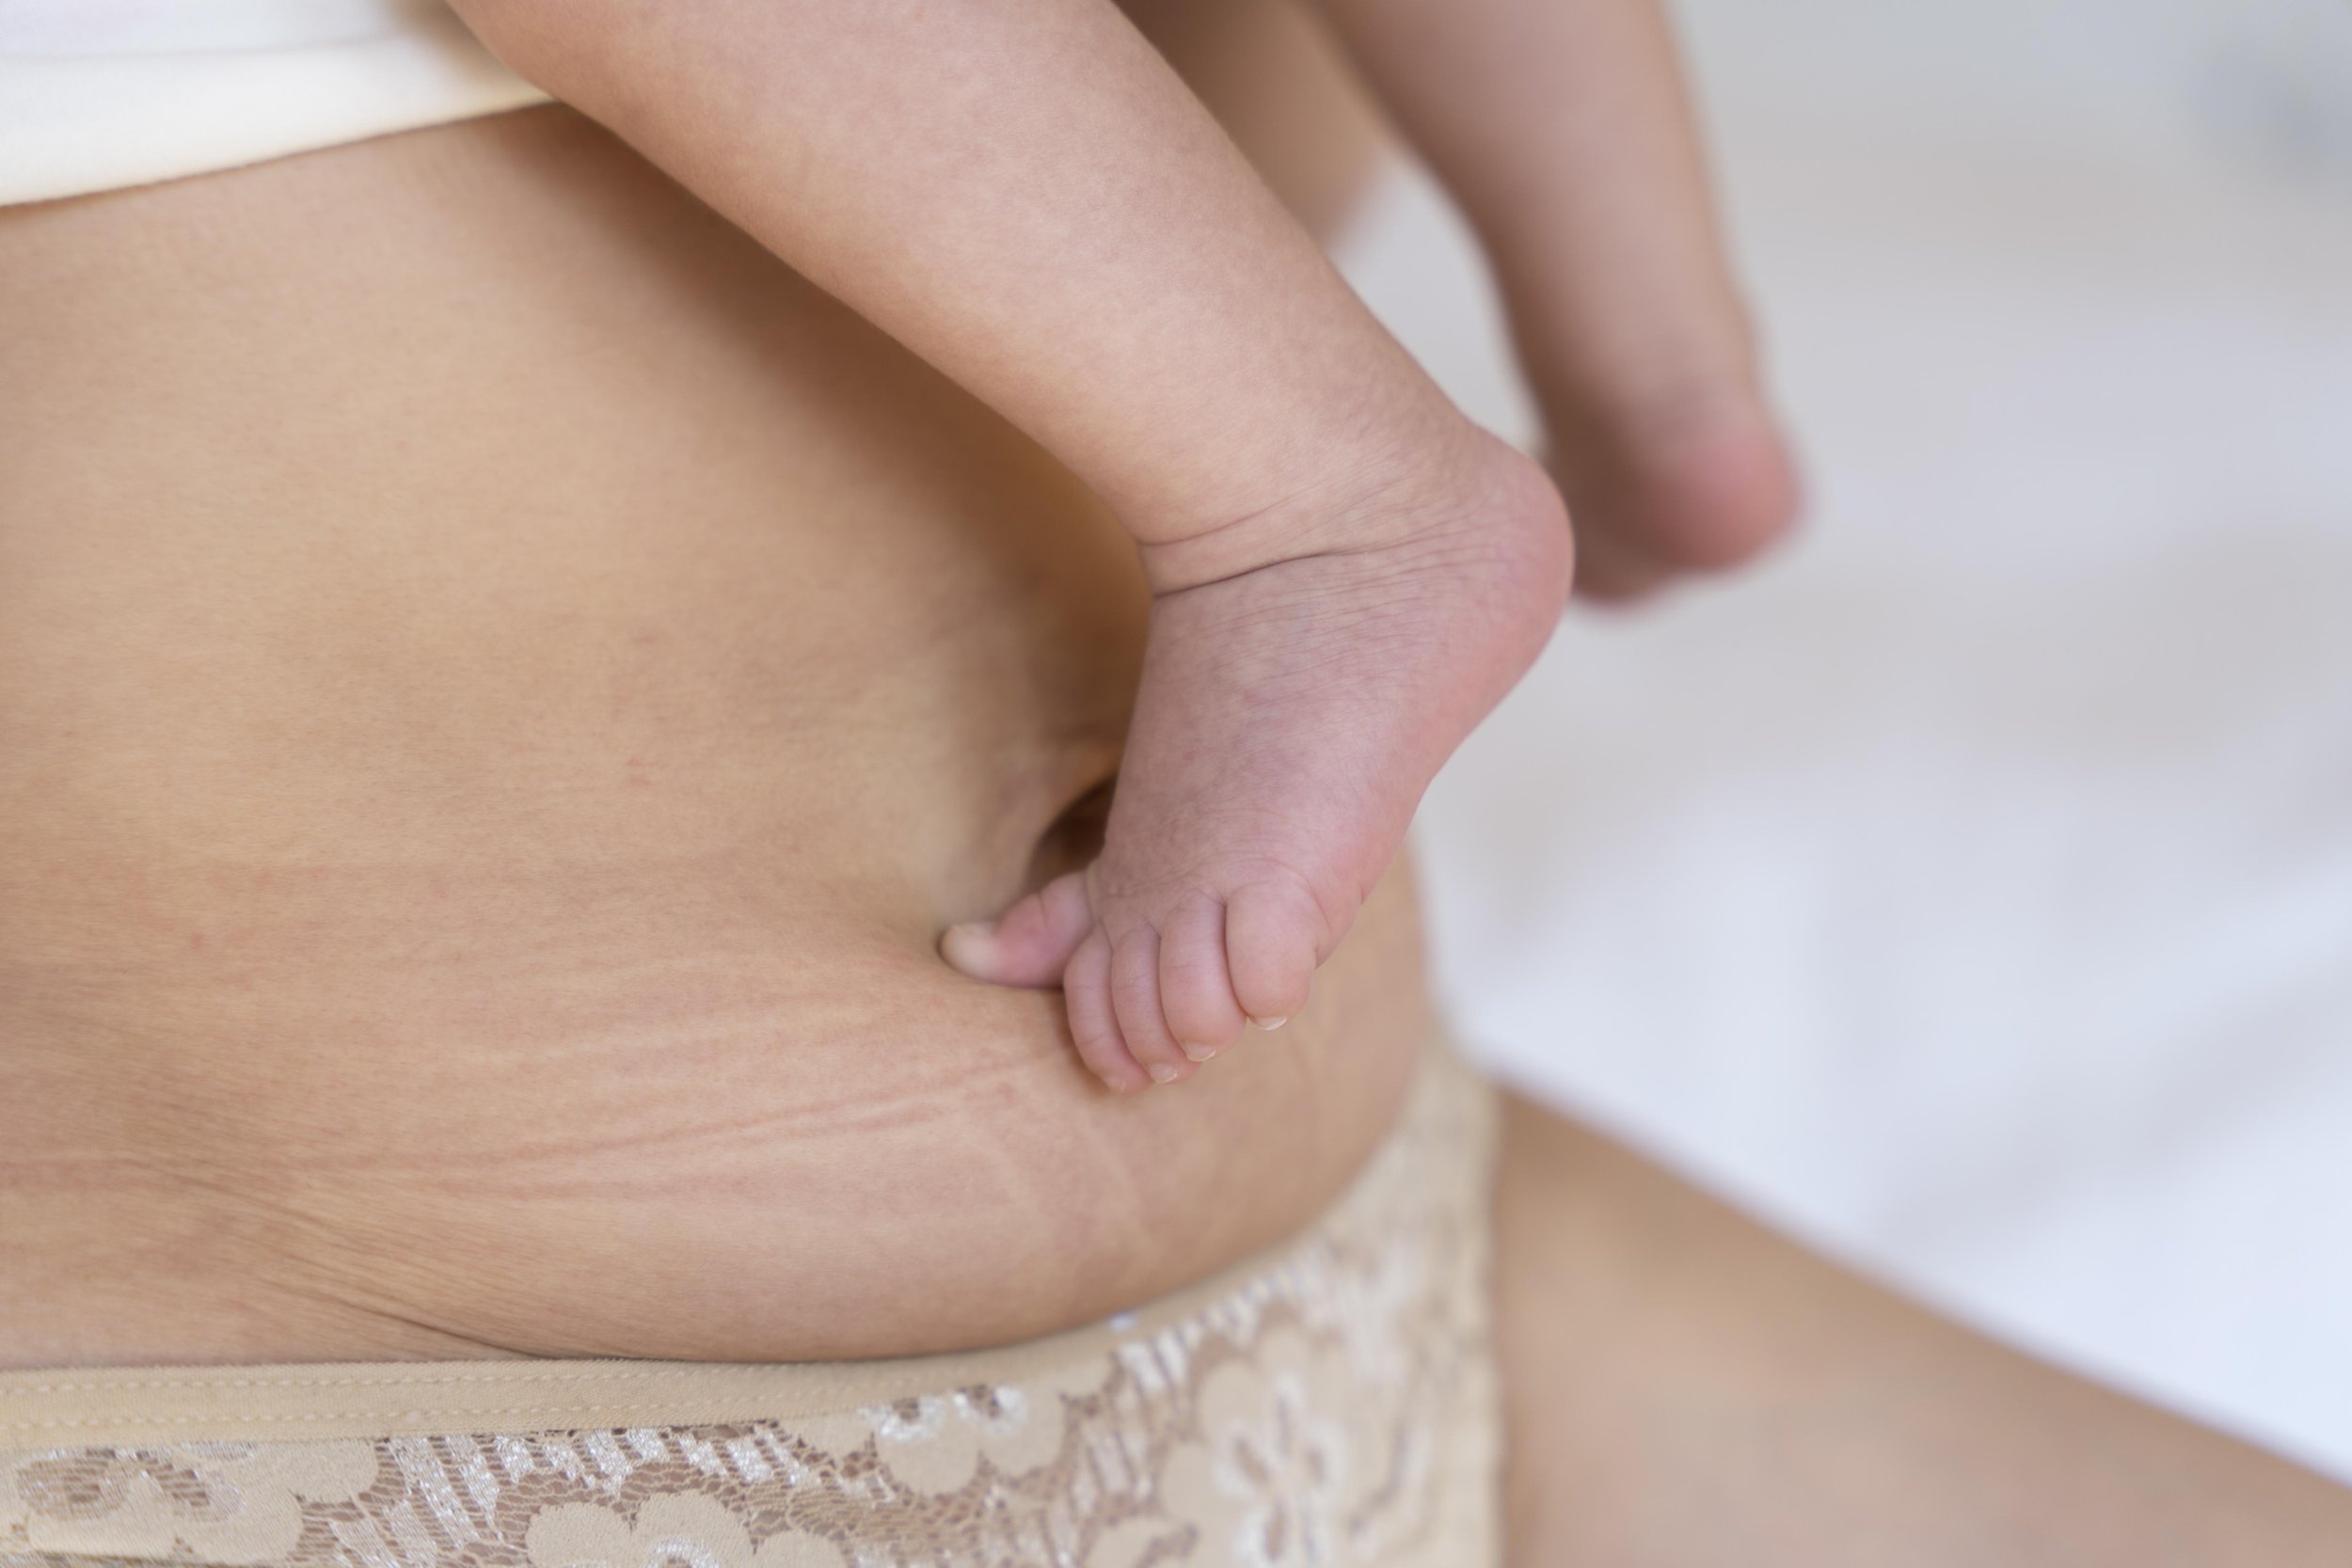
understanding c-section pouches
During pregnancy, a woman's body undergoes remarkable changes as it adapts to nurture the developing baby. While these changes are generally temporary, childbirth often leaves behind some permanent physical effects. One such common occurrence after a caesarean section delivery is the development of a noticeable "pooch" or bulge along the lower abdomen, medically termed a C-section pouch.
This pouch is composed of excess skin, fat deposits, and scar tissue that accumulates above the incision site made during the C-section procedure. Also referred to as a "shelf", "overhang", or "mummy tummy", this protrusion can be distressing or concerning for many new mothers. However, it's important to understand this postpartum change is incredibly common and experienced by the majority of C-section mums to some degree.
In this guide, we will explore the causes, characteristics, prevention methods, and treatment options available for C-section pouches. The goal is to provide new mothers with helpful insights and advice for managing concerns related to the abdominal changes that often accompany caesarean delivery. With realistic expectations, appropriate self-care, and support when needed, you can smooth your transition into postpartum life and motherhood.
what happens during c-section surgery
To understand the origins of a C-section pouch, it helps to first examine what occurs during the caesarean delivery itself. This major abdominal surgery involves making incisions through several layers of tissue to access and remove the baby.
The surgeon will make a horizontal incision, known as a "bikini cut", through your lower abdominal wall layers. The abdominal muscles are separated, allowing access to the underlying peritoneal cavity. The uterus is then incised, permitting delivery of the infant.
After clamping and cutting the umbilical cord, the placenta is removed and the uterus closed with sutures. At this point, the surgeon's primary focus is safely delivering the baby and closing the hysterotomy incision. This key layer called the fascia must be closed properly to allow appropriate healing.
The remaining abdominal layers - including fatty subcutaneous tissue, muscles, and skin - are then closed up. However, the cosmetic outcome is not the main priority. The closure techniques focus on safety and optimal postpartum recovery. The remaining healing process is dependent on the mother's genetics, self-care, and other individual variables out of the surgeon's control.

what causes a c-section pouch?
There are several key factors that can contribute to the development of excess tissue and protrusion along the incision site after a caesarean delivery.
Scar Tissue Formation
The inevitable formation of scar tissue along the abdominal incision is a prime cause of a C-section pouch. This fibrotic tissue can create bands beneath the skin, causing indentation or puckering on the surface. The degree of scar tissue determines the firmness and contour irregularities.
Loose Skin from Pregnancy
During pregnancy, the growing baby and hormones like relaxin soften tissue and allow abdominal expansion. But after delivery, the skin may lose elasticity and fail to fully retract. This loose, stretched skin contributes to the pouching effect.
Genetics and Skin Type
Some women have innate strong connective tissue and skin elasticity. For others, genetics result in weaker abdominal walls prone to protrusions and loose skin after pregnancy. Ethnic background can also play a role.
Repeated Stretching from Multiple Pregnancies
Women undergoing multiple C-sections experience repeated expansion and surgical trauma to the area. This compounds the issue and often exacerbates the amount of scarring, skin laxity, and pouching.
Weight Gain and Fat Deposits
Pregnancy weight gain in the abdominal region, as well as hormonal shifts encouraging fat storage, can lead to increased adipose tissue deposits along the lower belly overhanging the incision.
Understanding the ways C-section surgical trauma, genetics, and lifestyle habits contribute provides you with knowledge to make informed self-care and management decisions.
signs and symptoms of a c-section pouch
There are several characteristic signs and symptoms that indicate the presence of a C-section shelf or overhang along the incision line:
Visible Bulge or Protrusion
The most obvious symptom is a visible bulge or fullness just above the bikini-line incision scar. It may appear rounded, like a small paunch. Typically more noticeable when standing upright.
Physical Discomfort
The pouch may cause discomfort such as soreness, tenderness, or chafing as it rubs against clothing. Extra weight from the overhanging tissue can also cause strain. Some experience painful tugging along the incision scar.
Changes in Clothing Fit
Pants, dresses, and undergarments may fit differently due to the lower abdominal protrusion. Waistbands might feel tight and dig in. Women may need to adjust clothing style and sizing.
Emotional Distress
Coping with physical changes can be emotionally difficult, especially when the body no longer aligns with a woman's self-image. The pouch may worsen body confidence and self-esteem.
Skin Irritation
Excess skin folds along the incision may lead to irritation, rashes, or infection due to moisture build-up, chafing, and decreased airflow to the area.
Noticing these symptoms can be upsetting. However, it’s helpful to know many women experience similar changes. There are solutions available to help manage the discomfort and appearance of a C-section shelf.
prevention tips and strategies for c-section pouches
While a post-caesarean pouch may be unavoidable due to scar tissue formation, there are some prevention strategies that can help minimize its extent:
Maintain Healthy Pregnancy Weight
Gaining weight within recommended guidelines for your pre-pregnancy BMI can help prevent excess fat deposits and skin stretching. Discuss optimal weight goals with your healthcare provider.
Exercise During Pregnancy and Postpartum
Staying active with cardio, strength training, and core work can help strengthen abdomen and pelvic muscles. This makes them less prone to loosening and separation from pregnancy.
Follow Balanced Nutrition and Hydration
Eat a well-balanced diet with plenty of protein, fiber, and vitamins to nourish skin health. Stay hydrated to improve skin's elastic properties. Consult your doctor about supplements.
Use Postpartum Belly Wraps
Wearing belly wraps or binders after delivery can provide compression and support to abs. This facilitates tighter muscle recovery. Ensure proper fit and comfort.
Closely Follow Doctor's Instructions
Adhere to all prenatal and post-delivery guidelines from your healthcare providers to optimize healing and minimize risks of complications that could worsen lax skin and scarring.
While not completely preventable, making proactive choices during the prenatal and postnatal periods can help minimize the protrusion and issues associated with your C-section shelf.
treatment options for c-section pouches
If a C-section shelf becomes a significant concern, there are both non-surgical and surgical treatment options available. The best approach depends on factors unique to each patient. Here are some exercises that can help reduce a C-section pouch:
Belly Breathing
Lie on your back and place your hands on your belly. Take a deep breath in through your nose, feeling your abdomen expand into your hands. Breathe out through your mouth, pulling your bellybutton in toward your spine. Repeat 5 to 10 times, 3 times a day
Pelvic Tilts
Sit on the edge of a chair with your feet on the floor. Tilt your pelvis forward and backward, engaging your core. Perform 8 to 12 times with a 2-minute rest between contractions. Repeat 2 times per day
Wall Sits
Stand with your feet 1 to 2 feet away from the wall. Slowly lean back toward the wall, lowering yourself into a sitting position with your hips and knees at 90 degrees. Engage your core and hold for 30 seconds. Repeat 5 times
Bridge Pose
Lie on your back with your knees bent and feet flat on the ground. Lift your glutes up into a bridge pose, making sure your body weight is in your shoulders. Hold for 30 seconds and repeat 5 times
Planks
Get into a push-up position with your forearms on the ground. Engage your core and hold the position for 30 seconds. Repeat 3 to 5 times
It's important to consult with your healthcare provider before starting any exercise routine, especially after a C-section. They can provide personalized guidance based on your specific needs and recovery progress.
Diet
Maintaining a balanced and nutritious diet can aid in weight loss and reduce the accumulation of excess fat around the abdomen. Include plenty of fruits, vegetables, lean proteins, and whole grains in your diet
Compression Garments
Belly bands, shapewear, and ab binders can provide external support to flatten and smooth the appearance of the pouch. Look for adjustable, breathable fabrics.
Scar Massage Techniques
Massaging C-section scars helps break up thick, painful internal scar tissue over time. This can reduce external puckering. Perform gently once incision is fully closed.
Skin Care
Using topical creams or lotions that contain ingredients like vitamin A can help improve skin elasticity and reduce the appearance of scars
Potential Surgical Procedures
If nonsurgical options are ineffective, abdominoplasty and liposuction can remove excess skin/fat and improve abdominal contours. Discuss risks/benefits thoroughly with your plastic surgeon.
Treatment plans should be customized to each patient’s unique circumstances. Combining multiple approaches, such as exercise, nutrition, and scar massage, often provides optimal overall results. Patience is key, as it may take months to see improvements.
expectations and outlook when managing c-section pouches
It's important for mothers to set realistic expectations when addressing post-caesarean abdominal changes. Each woman's experience will be unique.
Complete Removal May Not Be Possible
While treatment can improve the appearance of a C-section pouch, some leftover loose skin or bulging may persist. Severe cases with extensive scarring or multiple pregnancies may be harder to fully correct.
Be Patient and Diligent
Seeing results from lifestyle changes, exercises, and scar massage takes consistency and time, often months. Quick fixes are unlikely. Addressing muscle separation and loosening also requires dedication.
Focus on Health, Not Just Cosmetics
The number one priority is your physical and emotional health, not just aesthetics. Make self-care and bonding with baby your focus, not rushing to get your pre-baby belly back.
Remember the Surgeon's Role
Understand your caesarean surgeon's goal was safely delivering your child, not cosmetic perfection. The remaining healing process was up to your body's variables.
Accepting the limitations and being patient with the process is key to finding emotional peace and physical relief. In time, diligence and support can help you manage the changes.
conclusion: be kind to yourself through the changes
The arrival of a new baby is an exciting and transformative chapter filled with challenges, triumphs, and changes both big and small. The development of a C-section pouch is an extremely common postpartum change faced by millions of caesarean mothers.
While the protruding pooch may feel disheartening, remember - your body grew and birthed a human! That is no small feat. The abdominal variations are simply signs of the remarkable journey you've undertaken.
With compassionate self-care, practical lifestyle adjustments, and support from your loved ones and healthcare providers, you can manage the pouch and continue flourishing in your new role as mother.
This guide covered the origins of the pouch, methods for prevention and improvement, as well as setting realistic outlooks and expectations. We hope it provided you with helpful insights and a reminder to be patient with and kind to the incredible body that brought your sweet baby into this world.
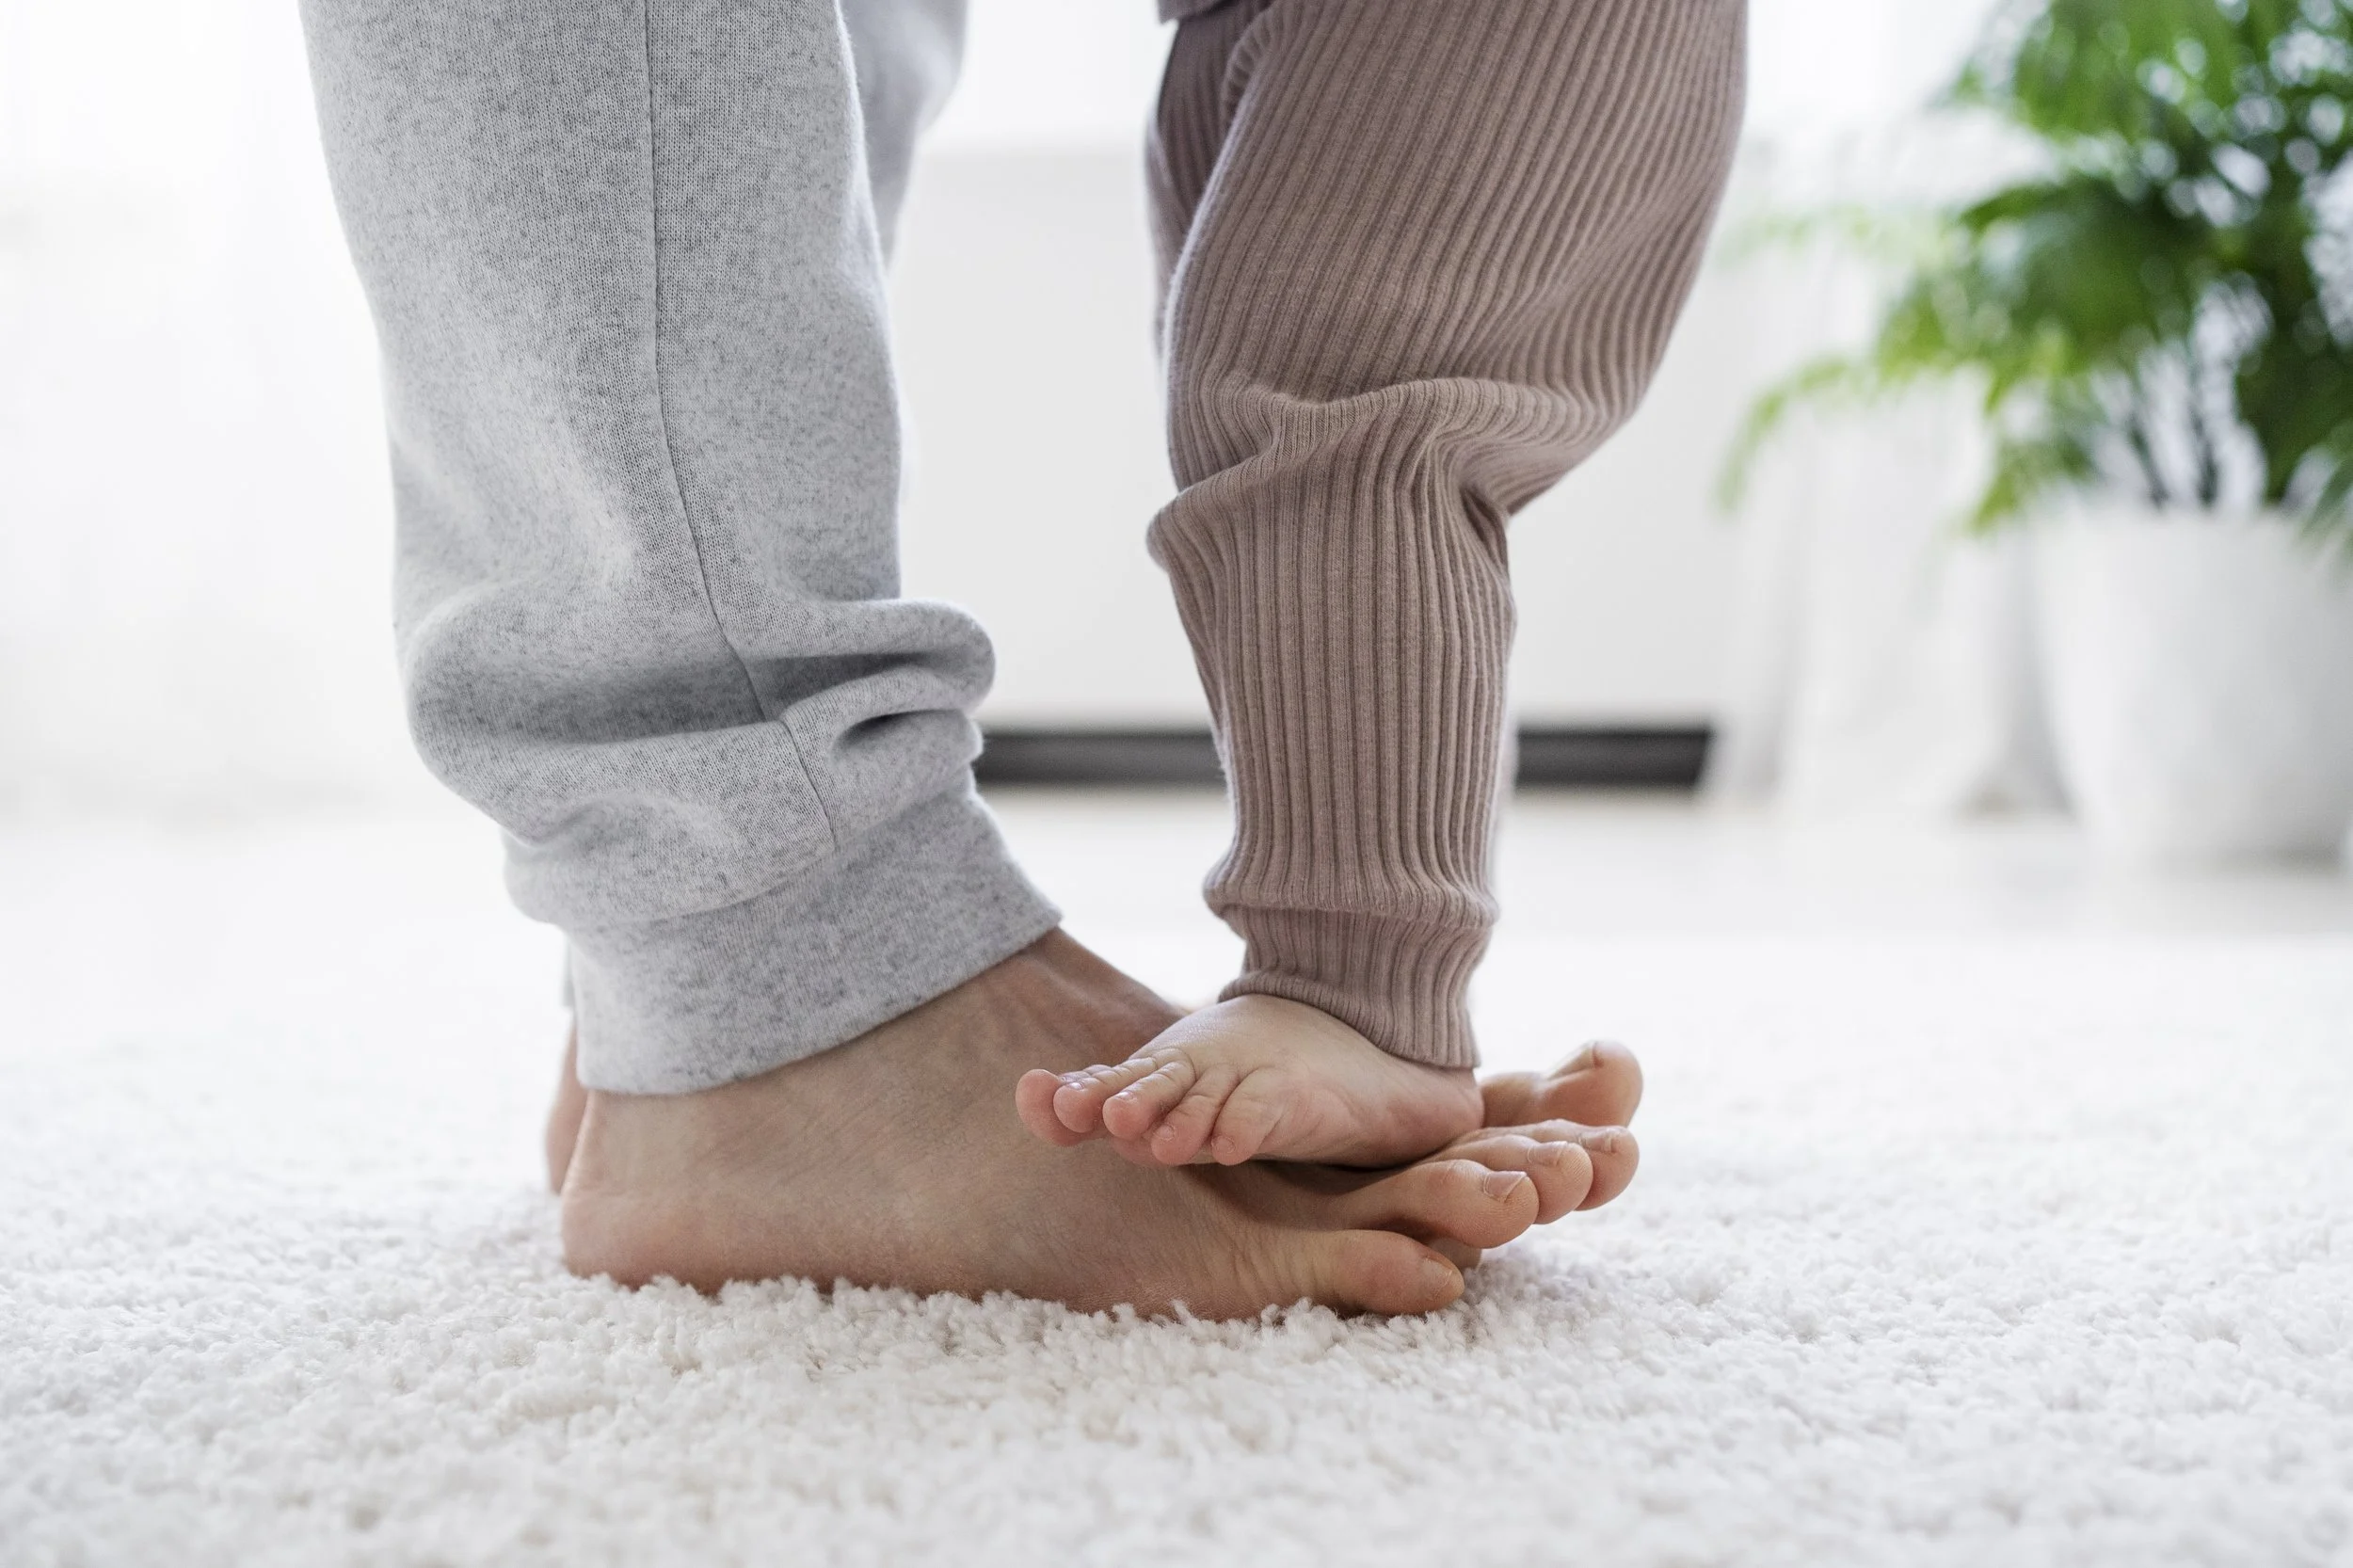
Postpartum Foot Pain
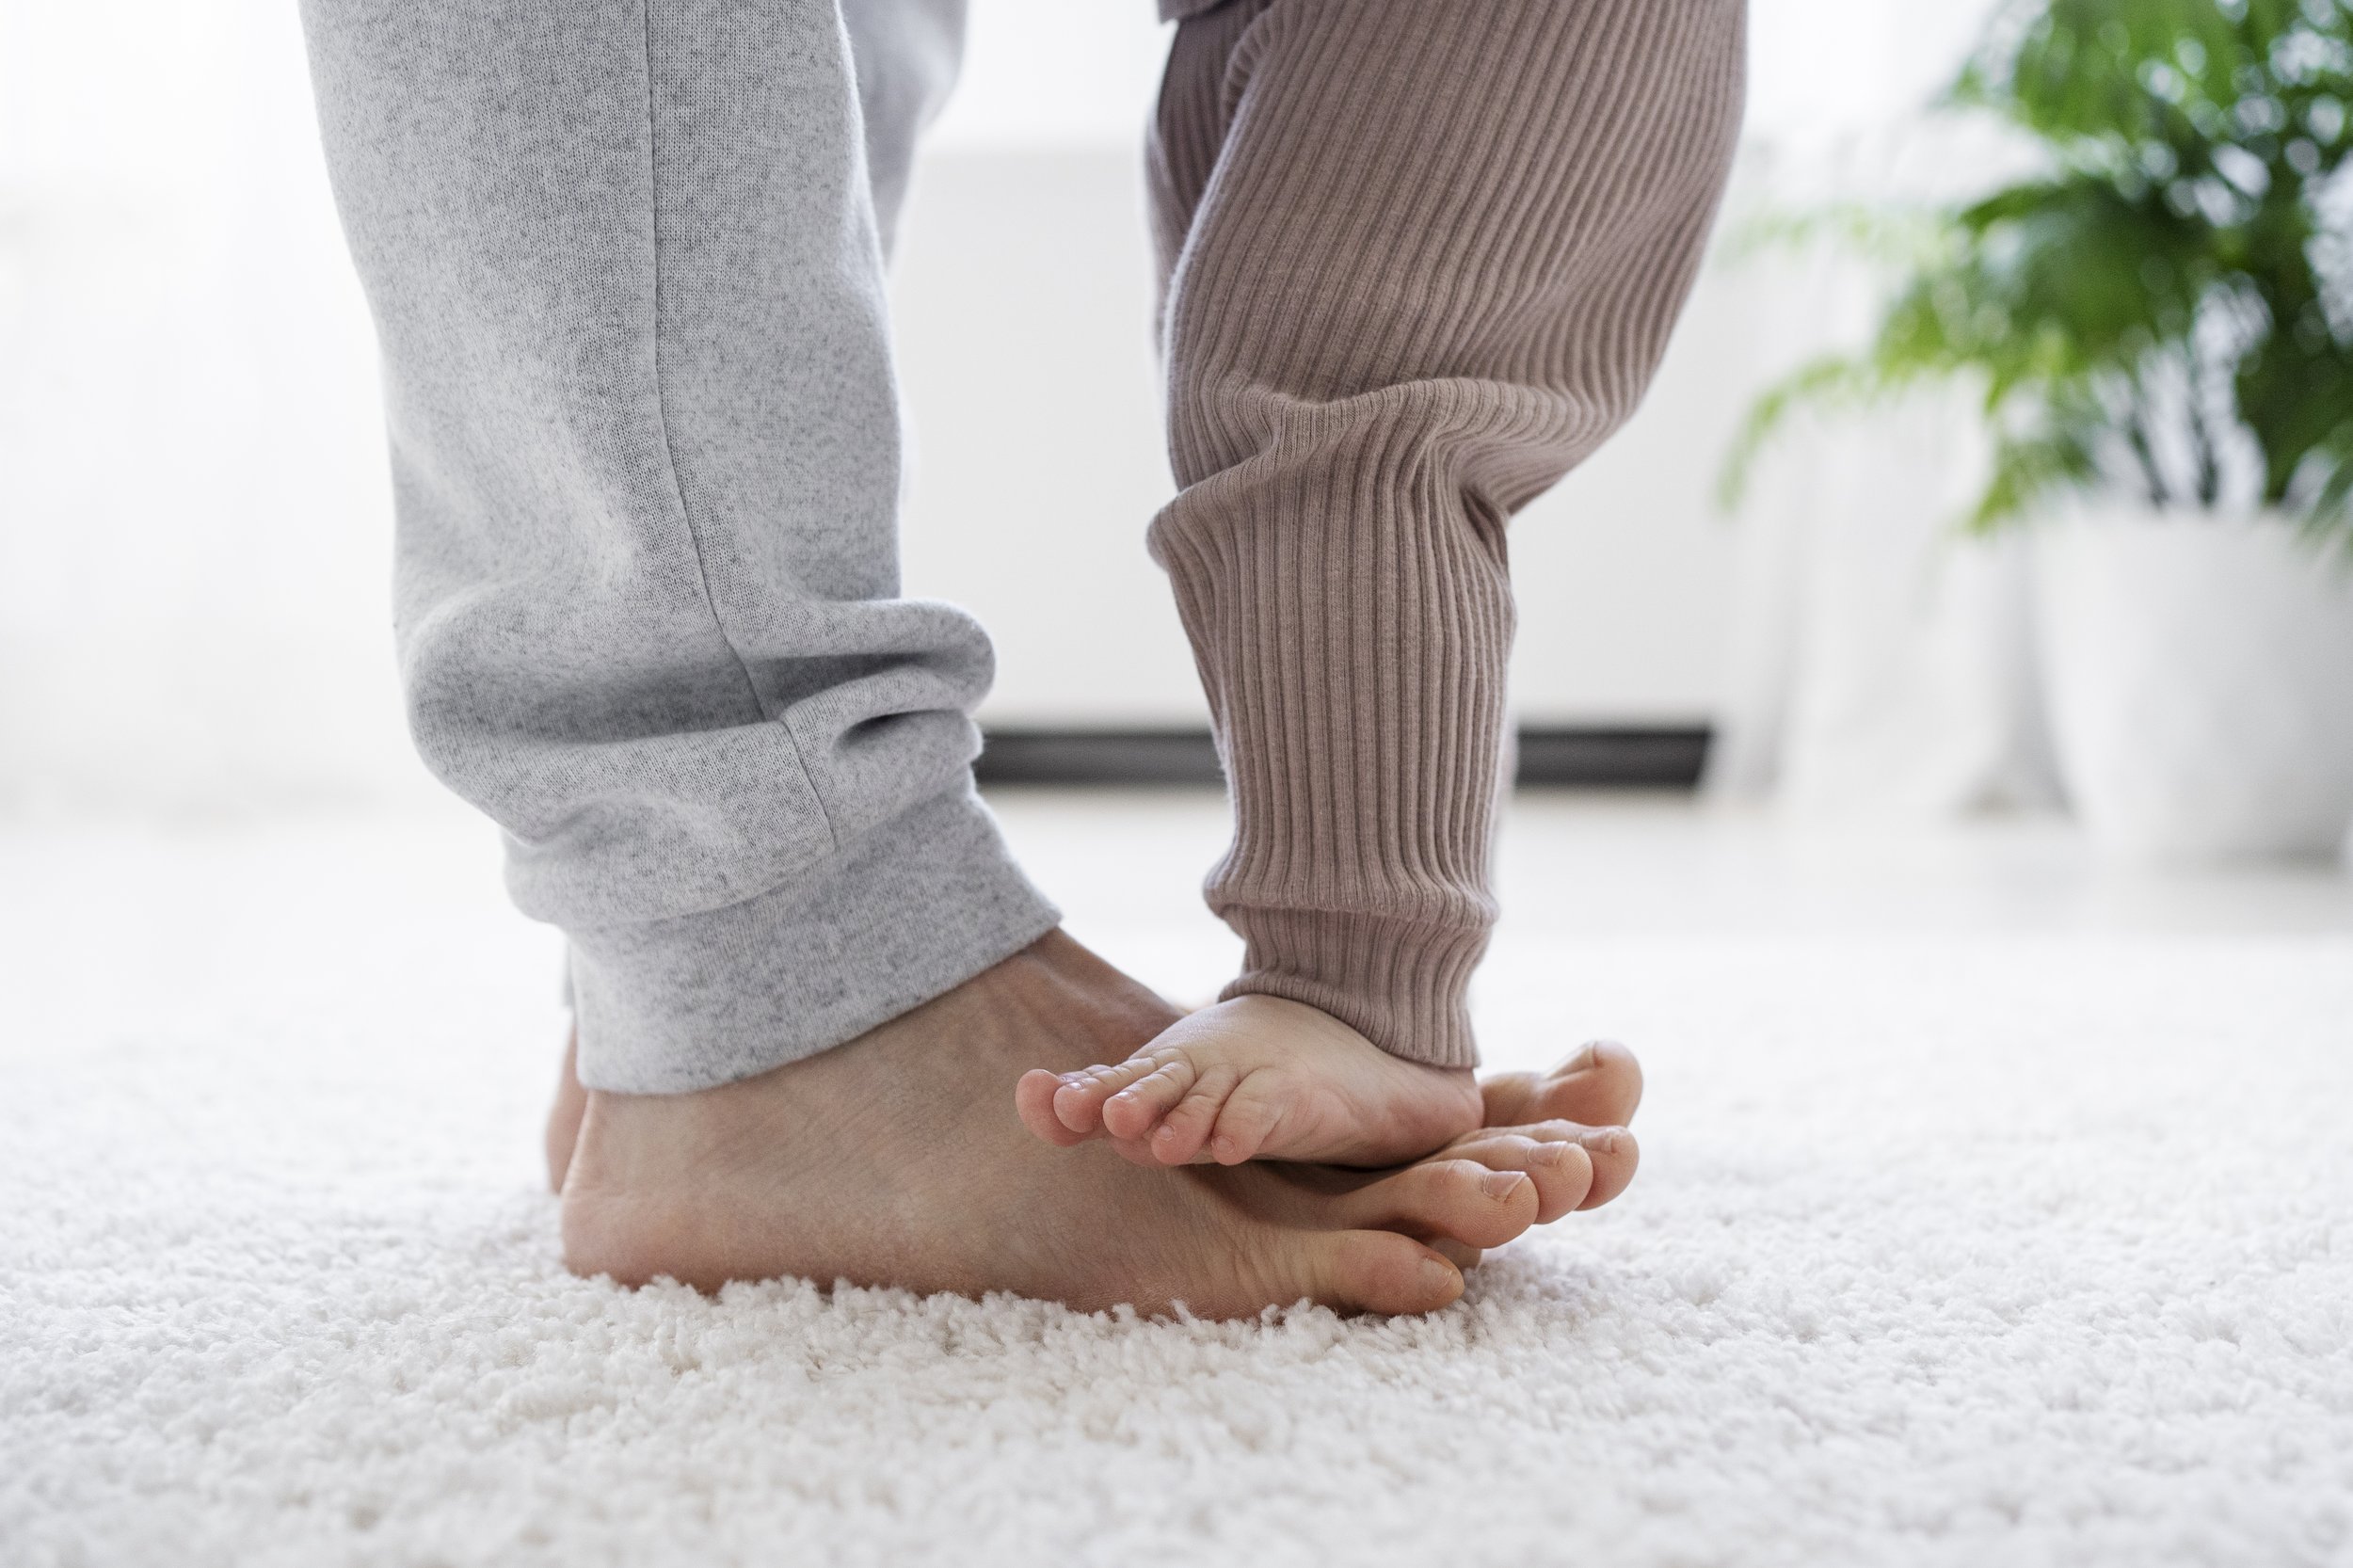
the Impact of Pregnancy on the Feet
During pregnancy, the body undergoes incredible transformations to support the growth and development of the baby. These changes have a direct impact on the feet, which play a crucial role in carrying the extra weight and adapting to the shifting dynamics of the body. The changes include an increase of approximately 50% in blood and fluid production. Hormonal changes can lead to edema, causing swelling in various parts of the body such as the hands, face, ankles, neck, and other extremities. It's common for the feet to grow by about half a size.
It may take several weeks for the extra fluids to be eliminated from your system. To expedite this process, it is recommended to consume foods rich in potassium, such as fruits and vegetables. Potassium helps counterbalance the water-retaining effects of sodium. Additionally, it is advised to drink more than the usual eight glasses of water per day, particularly if you are nursing. Let's explore the three key factors that influence the feet during pregnancy: weight gain, hormonal changes, and shifts in the body's centre of gravity.
Weight gain and increased pressure on the feet:
As the baby grows and the body nurtures the pregnancy, weight gain is a natural and necessary occurrence. This weight gain places additional pressure on the feet, leading to discomfort and potential foot problems. The feet bear the brunt of this increased load, and the added pressure can cause aches, soreness, and swelling. The increased weight can also lead to the flattening of the foot's arch, resulting in a condition known as overpronation. Overpronation occurs when the arch collapses excessively, causing the feet to roll inward. This misalignment can strain the ligaments, tendons, and muscles in the feet, contributing to discomfort and potential pain.
Hormonal changes and their effect on ligaments and joints:
During pregnancy, hormonal changes occur to support the body's preparation for childbirth. One such hormone is relaxin, which loosens the ligaments and joints in the pelvis to accommodate the growing baby. However, relaxin can also affect the ligaments and joints in the feet, making them more flexible and susceptible to strain or injury.
The increased flexibility of the foot's ligaments can lead to a condition called "loose joints," where the feet may feel unstable or wobbly. This can increase the risk of sprains, strains, and other foot-related injuries. Additionally, the hormonal changes can impact the overall alignment of the body, affecting the way weight is distributed on the feet.
Shifts in the body's centre of gravity and their impact on balance:
As the baby grows and the uterus expands, the body's centre of gravity gradually shifts forward. This change in balance affects the posture and gait, placing different stresses on the feet. The body naturally adjusts to accommodate this shift, but it can lead to altered walking patterns and increased strain on certain areas of the feet, such as the heels and balls of the feet.
The changes in balance and posture during pregnancy can also contribute to issues with stability and coordination. Pregnant women may feel less steady on their feet and may be more prone to tripping or losing balance. This increased risk of falls highlights the importance of proper footwear and precautionary measures to maintain stability and minimize the chances of foot-related accidents.
Understanding the impact of pregnancy on the feet is crucial for expectant mothers to proactively address any potential discomfort or foot-related issues. By recognizing the changes in weight, hormonal fluctuations, and shifts in balance, women can take appropriate steps to support their foot health and overall well-being throughout the beautiful journey of pregnancy.
In the next section, we will delve into common foot pain and issues experienced during pregnancy, providing valuable insights and practical tips for managing and alleviating these concerns.
Common Foot Pain and Issues During Pregnancy
Let's explore the most prevalent foot pain and foot related issues experienced by pregnant women:
Swollen Feet and Ankles:
Swelling, also known as edema, is a common occurrence during pregnancy, particularly in the feet and ankles. The body retains more fluid to support the baby's development, and this can lead to fluid accumulation in the lower extremities. The pressure from the growing uterus can also affect blood circulation, contributing to swelling. Swollen feet and ankles can cause discomfort, tightness, and a feeling of heaviness. It is advisable to elevate the feet whenever possible, wear comfortable shoes with proper arch support, and avoid prolonged periods of standing or sitting to help reduce swelling.
Arch and Heel Pain:
The increased weight and hormonal changes can strain the ligaments and muscles in the feet, leading to arch and heel pain. The arch of the foot may flatten or become more flexible, causing conditions like plantar fasciitis or flat feet. These conditions can result in sharp or stabbing pain in the arch or heel area. Wearing supportive footwear with adequate arch support, using orthotic inserts, and performing stretching exercises recommended by a healthcare professional or a qualified prenatal exercise specialist can help alleviate arch and heel pain.
Plantar Fasciitis:
Plantar fasciitis is a common foot condition characterized by inflammation of the plantar fascia, a thick band of tissue that runs along the bottom of the foot. The hormonal changes during pregnancy, combined with the added weight and increased pressure on the feet, can contribute to the development or exacerbation of plantar fasciitis. Stretching exercises, wearing supportive shoes, using orthotic inserts, applying ice packs to the affected area, and avoiding activities that exacerbate the pain can help manage plantar fasciitis symptoms during pregnancy.

Image by Freepik
Leg Cramps:
Leg cramps, often experienced as painful muscle contractions, can occur during pregnancy, particularly at night. These cramps most commonly affect the calf muscles and can cause significant discomfort and disruption to sleep. Staying well-hydrated, gently stretching the calf muscles, maintaining regular physical activity, and ensuring proper mineral and electrolyte intake may help reduce the frequency and intensity of leg cramps.
Ingrown Toenails:
Due to hormonal changes, increased blood flow, and possible swelling, pregnant women may be more prone to developing ingrown toenails. Ingrown toenails occur when the edge of the toenail grows into the surrounding skin, causing pain, redness, and inflammation. Proper toenail care, including regular trimming, avoiding tight footwear, and keeping the feet clean and dry, can help prevent ingrown toenails. Seeking professional assistance from a podiatrist or foot care specialist is advisable if an ingrown toenail becomes persistent or infected.
Balance Challenges:
The changes in the body's centre of gravity, along with the relaxation of ligaments, can impact balance and stability during pregnancy. Pregnant women may experience a decrease in balance, making them more susceptible to falls or injuries. Choosing supportive shoes with good traction, practicing gentle balance exercises, using handrails when necessary, and being mindful of changes in posture and gait can help maintain stability and minimize balance challenges.
In the next section, we will provide practical tips and strategies for effectively managing and promoting foot health during pregnancy, empowering women to embrace this phase with confidence and comfort.
Managing and Promoting Foot Health During Pregnancy
Taking proactive measures to manage and promote foot health during pregnancy is crucial for the well-being of expectant mothers. By implementing practical strategies and self-care practices, women can alleviate discomfort, reduce the risk of foot-related issues, and enhance their overall pregnancy experience.
Let's look at some effective ways to manage and promote foot health during this transformative phase:
Proper Footwear:
Choosing appropriate footwear is paramount for supporting the feet during pregnancy. Opt for comfortable shoes with adequate arch support, cushioning, and a wide toe box to accommodate any swelling. Avoid high heels and opt for shoes with low or moderate heels to reduce strain on the feet and promote better balance.
Regular Exercise:
Engaging in regular, low-impact exercises can help strengthen the muscles in the feet and lower limbs, improve circulation, and maintain overall foot health. Walking, swimming, prenatal yoga, and stationary cycling are excellent options. Consult with a healthcare professional or prenatal fitness expert to determine safe and suitable exercises based on individual needs.
Foot Stretches and Massage:
Performing gentle foot stretches and self-massage can help alleviate tension, reduce discomfort, and improve flexibility. Rolling a tennis ball or a frozen water bottle under the feet can provide relief. Stretching the calf muscles and flexing the toes upward and downward can also help alleviate common foot pain.
Elevation and Rest:
Elevating the feet whenever possible can help reduce swelling and relieve pressure. Aim to elevate the legs and feet above the heart level by using pillows or cushions while resting or sleeping. Regular breaks throughout the day to rest and elevate the feet can also provide relief and minimize fatigue.
Maintaining a Healthy Weight:
Managing weight gain within the recommended range can help alleviate excessive pressure on the feet and reduce the risk of foot-related discomfort. Maintaining a balanced and nutritious diet, staying hydrated, and incorporating gentle physical activity into daily routines can contribute to a healthy weight during pregnancy.
Professional Foot Care:
Seeking professional foot care, such as regular visits to a podiatrist or a foot care specialist, can be beneficial, especially for managing conditions like plantar fasciitis, ingrown toenails, or persistent foot pain. These healthcare professionals can provide expert guidance, recommend appropriate treatments or therapies, and offer tailored advice based on individual needs.
Supportive Inserts or Orthotics:
In some cases, using supportive inserts or orthotic devices may be recommended to provide additional support, alignment, and relief for specific foot conditions. These devices can help correct imbalances, alleviate pressure points, and improve overall foot function. Consult with a healthcare professional to determine if orthotics are suitable and beneficial for individual circumstances.
Regular Foot Care:
Maintaining good foot hygiene is essential during pregnancy. Practice regular washing and drying of the feet, keeping toenails trimmed straight across, and moisturizing to prevent dryness or cracking. Proper foot care minimizes the risk of infections and promotes overall foot health.
Restoring Balance and Posture:
Practicing gentle exercises and activities that focus on improving balance and posture can help counteract the changes that occur during pregnancy. Prenatal yoga, tai chi, and exercises targeting core stability and alignment can contribute to better balance and posture, reducing the strain on the feet.
Try using these strategies in your daily routine to manage for pain during pregnancy. As always, consult with a healthcare professional for personalized advice and guidance, taking into account individual circumstances, any pre-existing conditions, and specific considerations for a safe and healthy pregnancy.
In the next section, we will provide additional insights and recommendations for maintaining foot health and comfort throughout the different stages of pregnancy, empowering women to enjoy this special time with confidence and vitality.
Foot Care Throughout the Stages of Pregnancy
Understanding the evolving needs of your feet throughout the different stages of pregnancy is vital for maintaining optimal foot health and comfort. As your body undergoes remarkable transformations, specific foot care practices can help address changing concerns and ensure your well-being. Let's explore foot care tips for each stage of pregnancy:
**First Trimester: Nurturing the Foundation**
During the first trimester, focus on establishing a strong foundation for foot health:
Regular Check-ups:
Schedule a visit with a podiatrist or foot care specialist for an initial assessment. They can address any pre-existing foot conditions and provide guidance on preventive measures.
Comfortable Shoes:
Invest in well-fitting, supportive shoes to accommodate potential foot changes and provide ample cushioning. Opt for breathable materials and adjustable closures for flexibility as your feet may experience slight swelling.
Gentle Exercises:
Engage in low-impact exercises like walking or swimming to promote circulation and strengthen foot muscles. Avoid high-impact activities that could strain the feet and joints.
Second Trimester: Embracing Adaptation
The second trimester often brings noticeable changes in weight and body proportions. Focus on adapting your foot care routine accordingly:
Arch Support:
As the arches may flatten due to weight gain and hormone-induced ligament relaxation, consider using orthotic inserts or arch-supporting footwear for additional stability.
Regular Stretching: Incorporate gentle foot stretches and calf exercises into your routine to relieve tension, improve flexibility, and enhance circulation.
Moisturization:
Keep your feet moisturized to prevent dryness and cracking. Avoid applying lotion between the toes to maintain dryness and reduce the risk of fungal infections.
Third Trimester: Relieving Discomfort
As you near the end of pregnancy, your body experiences increased pressure and potential swelling. Prioritize these foot care practices for enhanced comfort:
Elevation
Elevate your feet whenever possible to reduce swelling and improve circulation. Prop up your legs on pillows while resting or sleeping to alleviate discomfort.
Massage
Regularly massage your feet, focusing on the soles and arches, to alleviate tension and promote relaxation. Consider using a foot roller or seeking a professional foot massage.
Compression Socks
Wear compression socks or stockings recommended by a healthcare professional to improve blood flow, reduce swelling, and alleviate leg fatigue.
Postpartum Care: Nurturing Recovery
After delivery, your feet may require time to recover. Pay attention to these essential postpartum foot care practices:
Supportive Shoes:
Continue wearing comfortable, supportive footwear during the postpartum period. Consider shoes with adjustable closures to accommodate potential changes in foot size.
Gradual Return to Activity:
Ease back into physical activity gradually to allow your body to recover fully. Start with gentle exercises and gradually increase intensity under the guidance of your healthcare provider.
Foot and Leg Exercises:
Incorporate foot and leg exercises to improve circulation, strengthen muscles, and promote overall foot health. Ankle circles, toe curls, and calf stretches can be beneficial.
Remember, every pregnancy is unique, and individual circumstances may vary. Consult with your healthcare provider and a foot care specialist to receive personalized advice and address any specific concerns or conditions you may have.
In the final section of this article, we will discuss additional self-care tips and practical recommendations to support your foot health during pregnancy and beyond, empowering you to navigate this incredible journey with comfort and confidence.
Additional Self-Care Tips for Foot Health during Pregnancy
In addition to the specific foot care practices mentioned earlier, implementing these self-care tips can further contribute to your overall foot health and well-being during pregnancy:
Maintain a Healthy Weight:
Strive to maintain a healthy weight range as recommended by your healthcare provider. Excessive weight gain can put additional strain on your feet and contribute to foot discomfort.
Stay Hydrated:
Drink an adequate amount of water to prevent dehydration, which can lead to muscle cramps and swelling. Proper hydration supports overall circulation and helps maintain foot health.
Practice Good Posture:
Be mindful of your posture throughout the day. Stand tall, distribute your weight evenly, and avoid prolonged periods of standing or sitting in one position to reduce strain on your feet.
Rest and Elevate:

Image by valuavitaly on Freepik
Take regular breaks to rest and elevate your feet to alleviate swelling and fatigue. Use pillows or a footstool to elevate your feet above the level of your heart whenever possible.
Gentle Foot Soaks:
Enjoy soothing foot soaks with warm water and Epsom salt to relax the muscles and relieve any discomfort. Ensure the water temperature is comfortable and safe for pregnancy.
Pregnancy-Safe Pain Relief:
If you experience foot pain or discomfort, consult your healthcare provider for suitable pain relief options. They can recommend pregnancy-safe over-the-counter medications or alternative therapies like hot/cold therapy or topical creams.
Monitor Swelling:
Keep an eye on swelling in your feet and ankles. Sudden or excessive swelling could indicate a more serious condition, so consult your healthcare provider if you notice significant changes or have concerns.
Seek Professional Help:
If you experience persistent or severe foot pain, swelling, or other foot-related issues, don't hesitate to seek professional help. A podiatrist or foot care specialist can provide expert advice, diagnosis, and appropriate treatment options tailored to your needs.
Partner Support:
Enlist the support of your partner or loved ones to help with foot massages, elevating your feet, or performing simple foot care tasks. Sharing the load can provide relief and ensure proper foot care is maintained.
Remember, self-care during pregnancy extends beyond just foot health. It is essential to maintain a well-rounded approach to overall wellness by eating a balanced diet, getting adequate rest, managing stress levels, and following the guidance of your healthcare provider.
In the concluding section of this article, we will summarize the key points discussed and reinforce the importance of foot care during pregnancy.
The Importance of Foot Care During Pregnancy
Throughout this article, we have explored the impact of pregnancy on the feet, effective strategies for managing foot health, and practical self-care tips. Now, let's emphasize the significance of foot care during pregnancy and highlight the benefits it can bring to expectant mothers:
Alleviating Discomfort:
Pregnancy can bring various foot-related discomforts such as swelling, arch pain, and general foot fatigue. By implementing proper foot care practices, expectant mothers can alleviate these discomforts and enhance their overall well-being.
Preventing Foot Issues:
Pregnancy puts additional stress on the feet, making them more susceptible to conditions like plantar fasciitis, edema, and flat feet. By practicing preventive foot care, women can minimize the risk of developing these issues and maintain optimal foot health.
Enhancing Mobility:
Healthy feet are crucial for maintaining mobility and an active lifestyle during pregnancy. By prioritizing foot care, expectant mothers can support their foot structure, improve balance, and reduce the chances of mobility limitations.
Promoting Circulation:
Proper foot care practices, including regular exercise, elevation, and wearing supportive footwear, can enhance blood circulation in the feet and lower limbs. Improved circulation reduces the risk of swelling, varicose veins, and other circulatory issues.
Supporting Overall Well-being:
Foot care is an essential component of holistic self-care during pregnancy. By nurturing foot health, women can contribute to their overall physical and emotional well-being, promoting a positive pregnancy experience.
In conclusion, taking care of your feet during pregnancy is not just a matter of comfort; it is a way to support your overall well-being. Embrace the opportunity to nurture your feet, seek professional guidance when needed, and remember that by investing in your foot health, you are investing in the joyous experience of pregnancy itself.
Congratulations on your journey to motherhood, and may your feet carry you with strength, grace, and comfort throughout this incredible chapter of your life.
safely rebuild your body postpartum
our mummies baby steps seven day guide shows you exactly how

looking for a complete comprehensive and progressive postnatal online exercise plan…


The Joy of Purposeless Walking

Walking holds incredible benefits for everyone. Throughout history, many influential thinkers, from Thoreau to Gandhi, found solace and inspiration in the simple act of walking. In our modern age, where technology consumes our attention, rediscovering the art of purposeless walking can bring numerous advantages to our daily lives.
Walking without a specific destination or goal allows us to break free from the demands and stresses of our busy routines. It becomes an opportunity to detach ourselves from screens, slow down, and reconnect with the world around us. By stepping outside and taking a leisurely stroll, we can experience a much-needed respite, refreshing our minds and bodies.
Engaging in purposeless walking promotes mindfulness and presence. Instead of being preoccupied with thoughts of the future or tasks at hand, we can focus on the present moment. We become more aware of our surroundings—the gentle breeze, the colors of nature, and the sounds of the environment. It's a chance to reawaken our senses and appreciate the beauty that often goes unnoticed in our hectic lives.
Moreover, purposeless walking encourages self-reflection and introspection. It provides a space for deep thoughts, creative ideas, and problem-solving. By allowing our minds to wander freely, we can gain new perspectives and insights, finding clarity and inspiration along the way. It's a valuable time for self-discovery and personal growth.
Walking also offers physical health benefits. It serves as a form of exercise that is accessible to most people, improving cardiovascular health, strengthening muscles, and promoting overall well-being. Walking regularly can boost our energy levels, reduce stress, and enhance our mood.
So, let's embrace purposeless walking as a simple yet transformative practice in our lives. Whether it's a leisurely stroll in the park, a walk around the neighborhood, or a brief escape during our lunch break, let's step outside and experience the joy and benefits that walking brings. Rediscover the art of walking without distractions and reconnect with yourself and the world around you.
Looking for walking trip ideas? Here’s a list of 7 of the best walks within the uk:
The West Highland Way, Scotland:
Stunning long-distance trail through the Scottish Highlands.
Covers approximately 96 miles from Milngavie to Fort William.
Highlights include Loch Lomond, Rannoch Moor, and the dramatic Devil's Staircase.
The Coast to Coast Walk, England:
Iconic route that spans across three national parks: Lake District, Yorkshire Dales, and North York Moors.
Extends about 190 miles from St. Bees on the west coast to Robin Hood's Bay on the east coast.
Showcases diverse landscapes, including mountains, lakes, moors, and charming villages.
The South West Coast Path, England:
The UK's longest national trail, stretching approximately 630 miles along the stunning coastline of southwest England.
Offers various sections for shorter walks, ranging from cliff-top routes to sandy beaches.
Highlights include Jurassic Coast, Cornwall's picturesque villages, and Land's End.
Hadrian's Wall Path, England:
Follows the ancient Roman wall across northern England, spanning approximately 84 miles from Bowness-on-Solway to Wallsend.
Provides a mix of history and scenic beauty, with Roman forts, rolling countryside, and panoramic views.
Notable sites along the way include Housesteads Roman Fort and Vindolanda.
The Causeway Coast Way, Northern Ireland:
A spectacular coastal walk along Northern Ireland's Causeway Coast.
Covers around 33 miles from Portstewart to Ballycastle, passing through iconic attractions like Giant's Causeway and Carrick-a-Rede Rope Bridge.
Offers breathtaking views of rugged cliffs, sandy beaches, and basalt columns.
The Pembrokeshire Coast Path, Wales:
A picturesque trail that hugs the coastline of Pembrokeshire in southwest Wales.
Stretches approximately 186 miles from Amroth to St. Dogmaels.
Features stunning sea views, rugged cliffs, sandy coves, and the opportunity to spot wildlife such as seals and seabirds.
The Three Peaks Challenge, United Kingdom:
A demanding but rewarding hike that involves conquering the highest peaks of Scotland, England, and Wales.
Covers approximately 23 miles and includes Ben Nevis (Scotland), Scafell Pike (England), and Snowdon (Wales).
Requires good fitness and planning but offers a unique adventure and a sense of accomplishment.
Remember to check for any necessary permits, weather conditions, and safety guidelines before embarking on these walks. Enjoy exploring the beautiful landscapes of the UK!
image by brisketjegor on freepik

Five Reasons To Choose Pilates Post C-Section

If you're looking for a safe and effective exercise option after a C-section, Pilates might be just what you need. Here are five reasons why Pilates is a fantastic choice for post C-section recovery:
Core Strengthening: Pilates focuses on developing core strength, which is crucial for post C-section recovery. The abdominal muscles, including the rectus abdominis, transverse abdominis, and obliques, are directly involved in the C-section procedure. Restoring strength in these muscles can aid in healing, reduce discomfort, and support overall postural alignment.
Gentle and Low-Impact: Pilates is a low-impact exercise method that emphasises controlled movements and proper alignment. This makes it a safe choice for individuals recovering from surgery, including C-sections. The gentle nature of Pilates exercises minimises strain on the incision site and surrounding muscles while allowing for gradual rehabilitation.
Pelvic Floor Rehabilitation: Pregnancy and C-sections can weaken the pelvic floor muscles. Pilates incorporates exercises that specifically target the pelvic floor, helping to restore strength, stability, and function. Strengthening the pelvic floor muscles is essential for improving bladder control, supporting the organs, and preventing issues like urinary incontinence.
Postural Alignment: Pregnancy and C-sections can affect postural alignment due to changes in the body's center of gravity and the strain placed on various muscles and ligaments. Pilates exercises focus on improving posture, alignment, and body awareness, which can be particularly beneficial in restoring balance and stability after pregnancy and surgery.
Flexibility and Mobility: Pilates includes a range of exercises that promote flexibility and mobility. After a C-section, it's important to gradually regain flexibility in the abdominal area and other parts of the body. Pilates movements incorporate stretching and controlled movements, helping to enhance flexibility without putting excessive strain on the healing incision.
It is crucial to consult with your healthcare provider before starting any exercise program post C-section. They can provide personalised guidance based on your individual circumstances, ensuring that Pilates is suitable and safe for you. Additionally, working with a qualified Pilates instructor experienced in postnatal and post-surgical rehabilitation is recommended. They can provide proper form guidance and make necessary modifications to accommodate your specific needs during the recovery process.
are you a new mum?
looking for high quality and safe online pilates training

Chakras - a beginners guide to the 7 Chakras and how to unblock them

How many chakras are there
In various spiritual traditions and practices, the concept of chakras refers to energy centres within the human body. The number of chakras can vary depending on the belief system or cultural context. The most well-known system of chakras originates from Hindu and yogic traditions. This system typically recognises seven main chakras, which are aligned along the spine from the base to the top of the head. Here are the names and locations of these seven chakras:
Root Chakra (Muladhara): Located at the base of the spine.
Sacral Chakra (Svadhishthana): Located in the lower abdomen, below the navel.
Solar Plexus Chakra (Manipura): Located in the upper abdomen, near the diaphragm.
Heart Chakra (Anahata): Located in the centre of the chest.
Throat Chakra (Vishuddha): Located at the throat.
Third Eye Chakra (Ajna): Located between the eyebrows.
Crown Chakra (Sahasrara): Located at the top of the head.
Some traditions may refer to additional chakras, such as the eight or nine chakra systems, while others may describe a more extensive network of energy centres throughout the body. The interpretation and understanding of chakras can vary across different cultures, spiritual paths, and individuals.
The history of chakras
The history of chakras is rooted in ancient Indian spiritual traditions, particularly within Hinduism, Yoga, and Tantra. The concept of chakras can be traced back thousands of years, with its origins found in ancient texts known as the Vedas and Upanishads.
The earliest mentions of energy centres resembling chakras can be found in the Vedas, which are the oldest sacred scriptures of Hinduism, dating back to around 1500-500 BCE. These texts refer to subtle energy channels in the body known as nadis, through which the vital life force or prana flows. The nadis intersect at specific points, forming energy vortexes or centres that are believed to influence physical, mental, and spiritual well-being.
The more elaborate system of chakras as we understand it today gained prominence through the teachings of Yoga and Tantra, which developed between the 5th and 9th centuries CE. The Yoga Upanishads and the Hatha Yoga Pradipika are some of the influential texts that discuss the chakras in detail. These systems identified and described a set of major chakras along the central channel of the body, called the sushumna, which runs from the base of the spine to the crown of the head.
Yogic and Tantric traditions recognised different numbers of chakras, ranging from four to more than a thousand. The commonly known system of seven chakras gained popularity, as mentioned earlier, and has been widely adopted in the West through the influence of various spiritual and New Age practices.
The interpretation and understanding of chakras have evolved over time and vary among different lineages, teachers, and practitioners. The chakra system continues to be explored and expanded upon, with modern interpretations incorporating psychological, emotional, and energetic aspects into their understanding.
What are some everyday activities we can do to help our chakras?
There are several common everyday activities that can help balance and harmonize the chakras. Here are some examples:
Meditation: Engaging in regular meditation is one of the most effective ways to balance and align the chakras. Different meditation techniques can focus on specific chakras or the overall energy system. Simply taking a few minutes each day to sit in stillness, focus on your breath, and bring awareness to your chakras can have a positive impact.
Yoga: Practicing yoga postures that target specific chakras can help activate and balance their energy. Each yoga pose corresponds to certain chakras, and by practicing a variety of poses, you can stimulate the entire chakra system.
Breathwork: Conscious breathing exercises can help regulate and balance the flow of energy within the chakras. Deep belly breathing, alternate nostril breathing, and other breathwork techniques can be incorporated into your daily routine to support chakra alignment.
Spending Time in Nature: Connecting with nature has a grounding and balancing effect on the chakras. Take walks in natural settings, sit by a tree, or spend time near bodies of water to absorb the healing energy of nature.
Creative Expression: Engaging in creative activities such as painting, drawing, writing, singing, or dancing can help activate and balance the chakras. Creative expression allows for the free flow of energy and stimulates the higher chakras, particularly the Sacral and Throat Chakras.
Mindfulness and Self-Awareness: Practicing mindfulness and cultivating self-awareness throughout the day can support chakra balance. Pay attention to your thoughts, emotions, and physical sensations, and notice how they relate to the different chakras. This self-reflection helps you identify imbalances and take appropriate steps to restore harmony.
Healthy Eating: Consuming a balanced and nutritious diet can support overall chakra health. Each chakra is associated with specific colours and foods. Including a variety of fresh fruits, vegetables, whole grains, and plant-based proteins in your diet can provide the necessary nutrients to support chakra balance.
Sound Therapy: Listening to soothing music, chanting mantras, or using singing bowls or tuning forks can have a harmonizing effect on the chakras. Different sounds and frequencies correspond to specific chakras and can help balance their energy.
Remember that consistency and intention are key when working with the chakras. Incorporating these activities into your daily routine and bringing mindful awareness to the energy centres can support their optimal functioning and overall well-being.

What are the corresponding colours to each of the 7 chakras
In the commonly recognised system of seven chakras, each chakra is associated with a specific colour. Here are the corresponding colours for each of the seven chakras:
1. Root Chakra (Muladhara) - Red: The root chakra is associated with the colour red, symbolizing vitality, grounding, and physical energy.
2. Sacral Chakra (Svadhishthana) - Orange: The sacral chakra is associated with the colour orange, representing creativity, passion, and emotional well-being.
3. Solar Plexus Chakra (Manipura) - Yellow: The solar plexus chakra is associated with the colour yellow, symbolizing personal power, self-confidence, and transformation.
4. Heart Chakra (Anahata) - Green or Pink: The heart chakra is associated with the colours green and pink. Green represents love, compassion, and harmony, while pink is often associated with unconditional love and emotional healing.
5. Throat Chakra (Vishuddha) - Blue: The throat chakra is associated with the colour blue, representing communication, self-expression, and truth.
6. Third Eye Chakra (Ajna) - Indigo or Purple: The third eye chakra is associated with the colours indigo and purple. Indigo represents intuition, inner wisdom, and perception, while purple is often associated with spirituality and higher consciousness.
7. Crown Chakra (Sahasrara) - Violet or White: The crown chakra is associated with the colours violet and white. Violet symbolizes spiritual connection, enlightenment, and cosmic awareness, while white represents purity and transcendence.
It's worth mentioning that the interpretation of colours associated with chakras may vary slightly in different traditions or individuals. Some sources may use slightly different shades or variations of colours, but the general colour correspondences listed above are widely accepted in the context of the seven chakra system.
The Root Chakra

The Root Chakra, known as Muladhara in Sanskrit, is the first chakra in the seven-chakra system. It is located at the base of the spine, near the perineum. The Root Chakra is associated with feelings of stability, grounding, security, and connection to the physical world. It governs our basic survival needs, including safety, shelter, and a sense of belonging.
When the Root Chakra is blocked or imbalanced, it can manifest in various ways, such as feeling insecure, fearful, anxious, or having a lack of trust in oneself and the world. Physical symptoms may include lower back pain, immune system issues, and digestive problems.
Here are a few techniques to help unblock and balance the Root Chakra:
Grounding Exercises: Engage in activities that promote grounding and connection with the Earth. Walking barefoot in nature, gardening, or practicing yoga poses such as Mountain Pose (Tadasana) can be beneficial.
Physical Exercise: Engaging in physical activities, especially those that involve the lower body, can help activate and balance the Root Chakra. Activities like jogging, dancing, or any form of exercise that brings awareness to the legs and feet can be helpful.
Meditation and Visualization: Practice specific meditation techniques that focus on the Root Chakra. You can visualize a vibrant red energy at the base of your spine while breathing deeply and imagining that energy expanding and flowing freely.
Affirmations: Repeat positive affirmations related to safety, security, and trust. Examples include "I am grounded and secure," "I trust in the abundance of the universe," or "I am safe and supported."
Use of Crystals: Certain crystals are believed to have properties that can aid in balancing the Root Chakra. Red jasper, hematite, smoky quartz, and garnet are some examples. You can place these crystals on your lower abdomen or carry them with you.
Benefits of unblocking and balancing the Root Chakra may include:
Increased feelings of stability and security in life.
Enhanced self-confidence and self-esteem.
Improved ability to deal with challenges and stress.
Heightened sense of grounding and connection to the physical world.
Strengthened sense of belonging and community.
Greater vitality and overall physical well-being.
Remember that working with chakras is a holistic process, and it's important to approach it with patience, self-care, and regular practice. If you have persistent or severe issues, it may be helpful to seek guidance from a qualified energy healer or holistic practitioner.
The Sacral Chakra

The Sacral Chakra, known as Svadhishthana in Sanskrit, is the second chakra in the seven-chakra system. It is located in the lower abdomen, just below the navel. The Sacral Chakra is associated with emotions, creativity, sensuality, and passion. It governs our ability to experience pleasure, express our emotions, and cultivate healthy relationships.
When the Sacral Chakra is blocked or imbalanced, it can manifest in various ways, such as feeling emotionally unstable, experiencing a lack of creativity, or having difficulties with intimacy and relationships. Physical symptoms may include lower abdominal issues, reproductive system problems, or hormonal imbalances.
Here are some techniques to help unblock and balance the Sacral Chakra:
Creative Expression: Engage in creative activities that allow you to express yourself, such as painting, dancing, writing, or playing a musical instrument. Explore activities that bring you joy and ignite your creativity.
Emotion Exploration: Take time to understand and process your emotions. Journaling, therapy, or talking with a trusted friend or counselor can assist in releasing emotional blockages and fostering emotional well-being.
Sensuality and Pleasure: Embrace activities that bring pleasure and sensuality into your life. This can include enjoying a soothing bath, practicing self-care rituals, engaging in mindful eating, or exploring healthy sexual expression.
Sacral Chakra Meditation: Practice meditation techniques that focus on the Sacral Chakra. Visualize a warm, glowing orange energy in your lower abdomen. Breathe into this area and imagine the energy becoming balanced and vibrant.
Movement and Dance: Engage in fluid and expressive movements, such as yoga, belly dancing, or any form of dance that encourages freedom of movement and connection with your body.
Use of Crystals: Certain crystals are associated with the Sacral Chakra and can aid in balancing its energy. Examples include carnelian, orange calcite, and sunstone. You can place these crystals on your lower abdomen or carry them with you.
Benefits of unblocking and balancing the Sacral Chakra may include:
Increased creativity and inspiration.
Enhanced emotional well-being and stability.
Improved ability to form and maintain healthy relationships.
Heightened sensuality and enjoyment of pleasure.
Increased flow of creative ideas and expression.
Greater sense of joy, passion, and vitality in life.
Remember to approach chakra work with patience and self-care. Regular practice and a holistic approach to well-being can help in balancing and harmonizing the Sacral Chakra.
The Solar Plexus Chakra

boat pose
The Solar Plexus Chakra, known as Manipura in Sanskrit, is the third chakra in the seven-chakra system. It is located in the upper abdomen, near the diaphragm. The Solar Plexus Chakra is associated with personal power, confidence, willpower, and self-esteem. It governs our sense of self, inner strength, and the ability to assert ourselves in the world.
When the Solar Plexus Chakra is blocked or imbalanced, it can manifest in various ways, such as low self-esteem, lack of confidence, difficulty making decisions, or feeling powerless. Physical symptoms may include digestive issues, stomach ulcers, or tension in the abdominal area.
Here are some techniques to help unblock and balance the Solar Plexus Chakra:
Core-strengthening Exercises: Engage in exercises that focus on the core muscles, such as yoga poses like Boat Pose (Navasana) or Pilates. Strengthening the physical area around the Solar Plexus Chakra can help stimulate its energy flow.
Affirmations and Positive Self-Talk: Repeat affirmations that empower and boost self-confidence. Examples include "I am worthy of love and success," "I embrace my personal power," or "I trust my intuition and make decisions with clarity."
Self-Reflection and Personal Growth: Engage in self-reflection practices, such as journaling or meditation, to understand and address any underlying beliefs or patterns that may be affecting your self-esteem or personal power. Seek personal growth opportunities that challenge and expand your comfort zone.
Healthy Boundaries: Establish and maintain healthy boundaries in your relationships and interactions with others. Learn to say no when necessary and honor your own needs and desires.
Solar Plexus Chakra Meditation: Practice meditation techniques that focus on the Solar Plexus Chakra. Visualize a bright, golden-yellow energy in your upper abdomen, radiating confidence and personal power. Breathe into this area, imagining the energy becoming balanced and empowered.
Use of Crystals: Certain crystals are associated with the Solar Plexus Chakra and can aid in balancing its energy. Examples include citrine, tiger's eye, and yellow calcite. You can place these crystals on your Solar Plexus Chakra during meditation or carry them with you.
Benefits of unblocking and balancing the Solar Plexus Chakra may include:
Increased self-confidence and self-esteem.
Improved decision-making abilities.
Enhanced personal power and assertiveness.
Strengthened willpower and determination.
Greater clarity of purpose and direction in life.
Improved digestion and overall physical well-being.
Remember that chakra work is an ongoing practice, and it's essential to approach it with patience, self-compassion, and consistency.
The Heart Chakra

Camel Pose
The Heart Chakra, known as Anahata in Sanskrit, is the fourth chakra in the seven-chakra system. It is located in the centre of the chest, at the level of the heart. The Heart Chakra is associated with love, compassion, forgiveness, and emotional well-being. It governs our ability to give and receive love, form meaningful connections with others, and cultivate empathy.
When the Heart Chakra is blocked or imbalanced, it can manifest in various ways, such as experiencing difficulty in giving or receiving love, holding onto grudges, feeling disconnected from others, or having a fear of intimacy. Physical symptoms may include heart-related issues, respiratory problems, or poor circulation.
Here are some techniques to help unblock and balance the Heart Chakra:
Self-Love and Compassion: Cultivate a practice of self-love and self-care. Treat yourself with kindness, acceptance, and compassion. Engage in activities that bring you joy and nourish your well-being.
Practice Forgiveness: Work on forgiving yourself and others. Let go of past hurts and resentments, releasing emotional baggage that may be blocking the flow of love and compassion.
Cultivate Loving-Kindness: Practice loving-kindness meditation, directing feelings of love, compassion, and well-wishes towards yourself, others, and all beings. This practice helps open and expand the heart energy.
Heart-Opening Yoga Poses: Engage in heart-opening yoga poses, such as Camel Pose (Ustrasana) or Cobra Pose (Bhujangasana). These poses help to open and activate the energy of the Heart Chakra.
Expressive Arts: Engage in creative activities that allow you to express and explore your emotions, such as painting, writing, singing, or dancing. Letting your heart's emotions flow through artistic expression can be healing.
Use of Crystals: Certain crystals are associated with the Heart Chakra and can aid in balancing its energy. Examples include rose quartz, green aventurine, and emerald. You can place these crystals on your chest during meditation or carry them with you.
Compassionate Connections: Foster meaningful connections with others and practice acts of kindness and compassion. Engage in activities that involve supporting and serving others, cultivating empathy and connection.
Benefits of unblocking and balancing the Heart Chakra may include:
Increased capacity for love, compassion, and empathy.
Improved ability to form and maintain healthy relationships.
Greater emotional well-being and harmony.
Enhanced sense of interconnectedness and unity with others.
Increased capacity for forgiveness and letting go.
Improved heart health and overall well-being.
Remember that working with the Heart Chakra involves cultivating love and compassion not only towards others but also towards yourself. Regular practice and a heart-centred approach to life can support the balance and harmonization of the Heart Chakra.
The Throat Chakra

The Throat Chakra, known as Vishuddha in Sanskrit, is the fifth chakra in the seven-chakra system. It is located at the base of the throat. The Throat Chakra is associated with communication, self-expression, authenticity, and creativity. It governs our ability to express our thoughts, ideas, and emotions, and to communicate effectively with others.
When the Throat Chakra is blocked or imbalanced, it can manifest in various ways, such as difficulty expressing oneself, fear of public speaking, feeling unheard or misunderstood, or struggling with communication issues. Physical symptoms may include throat-related problems, thyroid issues, or neck and shoulder tension.
Here are some techniques to help unblock and balance the Throat Chakra:
Expressive Voice Practices: Engage in activities that promote vocal expression and communication, such as singing, chanting, or reciting affirmations out loud. Practice speaking your truth with clarity and confidence.
Creative Writing: Engage in writing activities, such as journaling or creative writing, to explore and express your thoughts, ideas, and emotions. Allow your authentic voice to flow through the written word.
Throat Chakra Meditation: Practice meditation techniques that focus on the Throat Chakra. Visualize a bright blue energy at the base of your throat. Breathe into this area and imagine the energy expanding and flowing freely, enhancing your ability to express yourself.
Speak Your Truth: Honour and express your authentic thoughts, feelings, and opinions. Practice assertiveness and set healthy boundaries in your communication with others.
Mindful Listening: Cultivate the practice of active and empathetic listening. Give others your full attention and create a safe space for open and honest communication.
Use of Crystals: Certain crystals are associated with the Throat Chakra and can aid in balancing its energy. Examples include lapis lazuli, aquamarine, and blue lace agate. You can place these crystals on your throat during meditation or carry them with you.
Clear Communication Practices: Engage in practices that improve your communication skills, such as public speaking, taking communication workshops, or engaging in activities that promote effective self-expression.
Benefits of unblocking and balancing the Throat Chakra may include:
Enhanced communication skills and the ability to express oneself clearly and authentically.
Increased confidence in public speaking and self-expression.
Improved listening skills and empathy towards others.
Strengthened throat and vocal health.
Greater creativity and the ability to manifest ideas into reality.
Harmonious and effective communication in relationships.
Remember that working with the Throat Chakra involves both expressing yourself authentically and listening to others with an open heart. Regular practice and conscious communication can support the balance and harmonization of the Throat Chakra. If you feel the need for additional guidance, consider seeking support from a qualified energy healer or holistic practitioner.
The Third Eye Chakra

The Third Eye Chakra, known as Ajna in Sanskrit, is the sixth chakra in the seven-chakra system. It is located in the middle of the forehead, between the eyebrows. The Third Eye Chakra is associated with intuition, inner wisdom, insight, and higher perception. It governs our ability to see beyond the physical realm and connect with our inner guidance.
When the Third Eye Chakra is blocked or imbalanced, it can manifest in various ways, such as feeling disconnected from intuition, lacking clarity or insight, or struggling to trust one's inner wisdom. Physical symptoms may include headaches, eye strain, or issues with the sinuses.
Here are some techniques to help unblock and balance the Third Eye Chakra:
Meditation and Visualization: Engage in meditation practices that focus on the Third Eye Chakra. Visualize a deep indigo or purple energy in the middle of your forehead. Breathe into this area, allowing the energy to expand and awaken your intuition.
Mindful Awareness: Cultivate present-moment awareness and mindful observation. Pay attention to the subtle signals and messages from your intuition and inner guidance.
Dreamwork and Journaling: Pay attention to your dreams and keep a dream journal. Dreams can offer insights and symbolic messages from the subconscious mind, activating the Third Eye Chakra. Journaling can help you reflect on your dreams and tap into your intuition.
Practice Trusting Your Intuition: Listen to your inner voice and follow your gut instincts. Trust the guidance that arises from within, even if it may seem unconventional or contrary to external influences.
Energy Healing Modalities: Explore energy healing practices that work with the Third Eye Chakra, such as Reiki, acupuncture, or sound healing. These modalities can help unblock and balance the chakra's energy.
Use of Crystals: Certain crystals are associated with the Third Eye Chakra and can aid in balancing its energy. Examples include amethyst, lapis lazuli, and sodalite. You can place these crystals on your forehead during meditation or carry them with you.
Benefits of unblocking and balancing the Third Eye Chakra may include:
Heightened intuition and enhanced psychic abilities.
Expanded awareness and deeper insights.
Improved clarity and decision-making abilities.
Increased connection to higher guidance and spiritual realms.
Enhanced imagination and creative visualization.
Greater understanding of oneself and the world.
Remember that working with the Third Eye Chakra requires cultivating a sense of trust in your intuition and inner wisdom. Regular practice of meditation, mindfulness, and other techniques can support the balance and harmonization of the Third Eye Chakra.
The Crown Chakra

The Crown Chakra, known as Sahasrara in Sanskrit, is the seventh and highest chakra in the seven-chakra system. It is located at the top of the head or slightly above the head. The Crown Chakra is associated with spiritual connection, higher consciousness, transcendence, and enlightenment. It represents our connection to the divine, universal consciousness, and the infinite.
When the Crown Chakra is blocked or imbalanced, it can manifest in various ways, such as feeling disconnected from spirituality, lacking purpose or meaning in life, or experiencing a sense of isolation. Physical symptoms may include headaches, migraines, or neurological imbalances.
Here are some techniques to help unblock and balance the Crown Chakra:
Meditation and Mindfulness: Engage in regular meditation and mindfulness practices to quiet the mind, cultivate inner stillness, and open yourself to spiritual connection. Focus on the top of your head, envisioning a bright white or violet light radiating from the Crown Chakra.
Connection with Higher Self: Foster a connection with your higher self or inner divine through practices such as journaling, reflection, and contemplation. Seek moments of solitude and silence to listen to the wisdom and guidance that arises from within.
Spiritual Study and Exploration: Engage in spiritual study, explore different philosophies, and seek knowledge that resonates with your spiritual journey. This can include reading sacred texts, attending workshops or retreats, or connecting with spiritual communities.
Nature Connection: Spend time in nature, appreciating the beauty and interconnectedness of all living things. Engage in activities that help you feel a sense of awe and reverence for the natural world.
Energy Healing and Reiki: Explore energy healing modalities that work with the Crown Chakra, such as Reiki or energy healing sessions. These practices can help remove energetic blockages and support the flow of divine energy.
Use of Crystals: Certain crystals are associated with the Crown Chakra and can aid in balancing its energy. Examples include amethyst, clear quartz, and selenite. You can place these crystals on the top of your head or hold them during meditation.
Benefits of unblocking and balancing the Crown Chakra may include:
Heightened spiritual awareness and connection.
Expanded consciousness and a deeper understanding of the self and the universe.
Enhanced intuition and access to higher wisdom.
Increased sense of purpose and meaning in life.
Greater peace, serenity, and harmony.
Transcendence of limiting beliefs and identification with the ego.
Remember that working with the Crown Chakra involves cultivating a sense of openness, surrender, and trust in the divine. Regular practice of meditation, spiritual exploration, and connection with the higher self can support the balance and harmonization of the Crown Chakra.
Which of the 7 chakras are important to postpartum women

During the postpartum period, several chakras are particularly relevant and important for women as they go through the physical, emotional, and spiritual changes associated with childbirth and early motherhood. Here are the chakras that tend to be of significance during this phase:
Root Chakra (Muladhara): The Root Chakra is especially important for postpartum women as it relates to feelings of stability, grounding, and security. This chakra supports the physical recovery after childbirth and helps address any feelings of fear or anxiety that may arise during this transition.
Sacral Chakra (Svadhishthana): The Sacral Chakra is closely linked to the reproductive organs and emotions, making it relevant during the postpartum period. It governs creativity, sexuality, and the ability to nurture oneself and others. Balancing this chakra can help address issues such as emotional fluctuations and the establishment of a healthy bond with the newborn.
Heart Chakra (Anahata): The Heart Chakra plays a vital role in the postpartum period, as it governs love, compassion, and emotional well-being. It is connected to the mother-child bond, nurturing, and the ability to give and receive love. Nurturing and balancing the Heart Chakra can support a mother's emotional connection and bonding with her baby.
Throat Chakra (Vishuddha): The Throat Chakra is significant during the postpartum period as it relates to self-expression and communication. It can help mothers voice their needs, concerns, and emotions, and seek support from loved ones or healthcare professionals. Clear communication and self-expression are important during this phase of adjustment and change.
Third Eye Chakra (Ajna): The Third Eye Chakra is associated with intuition, inner wisdom, and insight. It can be particularly helpful for postpartum women as they navigate their new role as a mother, make decisions for their child, and trust their maternal instincts.
Crown Chakra (Sahasrara): The Crown Chakra is relevant during the postpartum period as it relates to spiritual connection, higher consciousness, and the integration of the physical and spiritual aspects of motherhood. Balancing this chakra can support a sense of purpose, connection to a higher power, and finding meaning in the transformative experience of childbirth and caring for a new-born.
While all the chakras are interconnected and contribute to overall well-being, focusing on these specific chakras can help address the unique needs and experiences of postpartum women. Balancing and nurturing these energy centres can support physical healing, emotional well-being, bonding with the baby, self-expression, and the development of maternal intuition.
Images by Freepik

6 Reasons To Meditate During The Fourth Trimester

For many, meditation may seem like a mysterious and time-consuming practice. I have certainly heard every reason under the sun why someone can't or won't meditate. However, during the postpartum period, meditation can be a valuable tool to support your mental and emotional recovery after delivery, as well as your transition into motherhood. In this article, we will explore the benefits of postpartum meditation and debunk some common misconceptions.

Benefits of Postpartum Meditation:
You Only Need to Meditate for 10 Minutes a Day:
One of the most common reasons people cite for not meditating is a lack of time. However, studies have shown that you only need to meditate for 10 minutes a day to experience the neurological and physiological benefits of meditation. As a busy individual juggling multiple roles, finding those 10 minutes can make a significant difference in your overall well-being during the postpartum period.
Meditation Can Physically Change Your Brain:
The benefits of meditation extend beyond temporary relaxation. Daily meditation over a period of 8-12 weeks can lead to structural changes in the brain. It has been found to reduce the size of the amygdala, which is responsible for pain, fear, and anxiety, while increasing the size of the prefrontal cortex, which is associated with rational decision-making, emotion regulation, and focus. By practicing meditation, you can effectively reduce pain, anxiety, and mental fog commonly experienced by new mothers.
Meditation Can Shorten Recovery Time and Boost Your Immune System:
The postpartum period is a time of physical healing and adjustment. Daily meditation has been shown to improve immune system function and promote faster recovery times for both vaginal and cesarean births. Numerous studies have demonstrated that individuals with a regular meditation practice tend to heal faster and experience less pain compared to those who do not meditate. By incorporating meditation into your routine, you can expedite your recovery and get back on your feet sooner.
A Daily Meditation Practice Can Increase Your Sense of Well-Being and Self-Compassion:
The postpartum period can be challenging, as it involves accepting and adapting to the changes brought on by pregnancy and motherhood. Feelings of self-doubt and guilt may arise, making it essential to cultivate self-compassion and love. Meditation offers a valuable opportunity to dedicate 10 minutes a day to yourself, fostering a sense of well-being and self-care. By prioritizing your mental health, you can show up as the best version of yourself for your family and little ones.
Scientific Benefits of Meditation:
Scientific studies show evidence of meditation's benefits for the physiological system. Meditation is particularly beneficial for the nervous and endocrine systems. The endocrine system produces hormones, and during pregnancy and the postnatal period, hormone production is at its highest. Stress and anxiety during this period release cortisol and adrenaline, which can weaken the immune system and increase blood pressure. Meditation can significantly reduce blood pressure, boost immunity, and create balanced hormones. Meditation has been found to lower blood pressure and heart rate, with replicated findings in many studies.
Positive Effects and Generating Positivity: Meditation releases "feel good" hormones like endorphins and melatonin, reducing pain and promoting relaxation. Yogis have long practiced using imagery during meditation to manifest positivity and visualize a safe, healthy body and supportive home. Meditation creates a sense of connection, both within the body and to the surrounding environment. Pregnancy and the postpartum period can be isolating, but meditation helps establish a connection beyond the physical form. This connection can be described as faith, support from a higher self, connection to the cosmos, or to ancestors. Balanced hormones, physiological changes, decreased blood pressure, and relaxation are all benefits of meditation.

Myth Busting: Clearing Up Common Misconceptions About Meditation
Meditation Does Not Have to Be Time-Consuming: Contrary to the belief that meditation requires hours of practice, studies have shown that even 10 minutes a day can yield significant benefits. By carving out a small portion of your day, you can reap the rewards of meditation without feeling overwhelmed.
Meditation Is Accessible to Everyone: Meditation is not reserved for a select few. It is a practice that can be tailored to suit your preferences and needs. Whether you choose to meditate seated with your eyes closed, in nature, or by gazing at a burning candle flame, there is a style of meditation that can resonate with you.
Meditation Is Not a Mysterious or Challenging Practice: Meditation is often viewed as a complex and elusive practice. However, it is a simple technique that anyone can learn. By finding the right resources and guidance, you can embark on your meditation journey with ease.

Find our top tips for beginner’s starting out on their meditation journey here.
Incorporating meditation into daily life can have profound effects on postpartum recovery and overall well-being. By reminding oneself of the numerous positive health benefits, meditation can become an integral part of a new mother's daily routine. So why not start today and embark on a journey of self-care, healing, and growth through the power of meditation?
Namaste!
are you a new mum?
looking improve sleep, energy, mindset and emotional well-being
Images by rawpixel.com on Freepik

Without Trying: A Beginner's Guide to Meditation

In our fast-paced modern world, finding inner calm and relaxation has become increasingly crucial for our overall well-being. The practice of meditation holds immense power in helping us achieve a sense of peace, clarity, and self-awareness. Its benefits range from improved sleep and reduced anxiety to a strengthened immune system.
Whether you're a newcomer to meditation or have previously attempted it without success, this beginner's guide will provide you with the necessary tools to embark on your meditation journey without feeling overwhelmed. If you've never explored meditation before, there's no better time than now to start. Allow me to present a comprehensive guide that will assist you in commencing your meditation practice, even if the idea of sitting quietly and calming your thoughts initially appears challenging.
understanding meditation:
Meditation is a practice that involves training the mind to focus and redirect thoughts, leading to relaxation, mindfulness, and self-awareness. By cultivating a state of deep focus and present-moment awareness, meditation promotes a sense of inner calm and clarity. Through observing thoughts and emotions without judgment, individuals develop mindfulness, enhancing emotional well-being and self-compassion. Additionally, meditation induces a relaxation response, reducing stress and fostering mental resilience. It also fosters self-awareness, providing insights into patterns of thinking and behaviour. Overall, meditation is a skill that, with consistent practice, allows individuals to cultivate a deeper connection with themselves and the world, leading to personal growth and a greater sense of well-being
10 top tips as you set out on your meditation journey:
Embrace the Challenge: The best time to meditate is when you feel like you can't. Meditation is like exercising your mind—it helps you get in shape mentally. Just as you would start using a treadmill to get fit, even if you don't feel physically prepared, you should begin meditating when your mind feels scattered or anxious. Embrace the challenge and view meditation as a way to train your mind.
Start with Realistic Expectations: As a beginner, don't expect too much from your meditation practice right away. Start with daily ten-minute sessions where you sit quietly and comfortably, focusing on the sensation of breathing. Understand that thoughts will flood your mind, and that's completely normal. The key is to approach meditation without any specific goals.
Cultivate Nonchalance: When thoughts arise during meditation, imagine them as guests at your birthday party. Instead of trying to push them away, welcome them with nonchalance. Avoid getting caught up in trying to control or eliminate unwanted thoughts, as this can make your mind busier. Over time, your mind will naturally become less active and settle into a quieter state.
Creating a Peaceful Environment: Find a quiet and comfortable space where you can meditate without distractions. Silence your phone or any other potential sources of interruption to create a serene atmosphere.
Find a Comfortable Position: You don't have to sit on the floor in an uncomfortable position to meditate. Choose a posture that allows you to be both relaxed and alert. Sitting on a chair or your bed with back support is perfectly fine. The goal is to create a comfortable environment for your mind to settle beyond its busy surface.
Focusing on Your Breath: Close your eyes gently and bring your attention to your breath. Take slow, deep breaths, paying attention to the sensation of the air entering and leaving your body. Use your breath as an anchor to keep your mind in the present moment.
Establish a Routine: Make meditation a habit by incorporating it into your daily routine. A beginner's practice session can take as little as 10 to 15 minutes. Ideally, meditate early in the morning before your first cup of tea/coffee. Even if you doze off during your session, it's okay—it may be an indication that you needed the extra rest.
Embrace Meditative Practices: In addition to daily meditation, explore other meditative habits. Spend time in nature, make a gratitude list, or practice saying "next" to negative thoughts instead of dwelling on them. Initially, changing your thought patterns may feel awkward, but after a few weeks of practice, it will become more natural. These meditative practices have a ripple effect and can positively impact various aspects of your life.
Seeking Guidance: If you find it challenging to meditate on your own, consider using guided meditation apps or attending meditation classes. These resources can provide structure, techniques, and support for your practice.
Patience and Persistence: Remember that meditation is a lifelong journey. Some sessions may be effortless and tranquil, while others may be more challenging. Be patient with yourself and embrace the process. Over time, you will experience the benefits of meditation and develop a deeper understanding of your mind and emotions.
techniques to explore:
There are numerous meditation techniques, each with its own unique focus and approach. The effectiveness of a technique can vary depending on the individual and their preferences. However, here are some popular meditation techniques:
Mindfulness Meditation: This technique involves focusing your attention on the present moment, observing your thoughts and sensations without judgment or attachment.
Loving-Kindness Meditation: Also known as Metta meditation, it cultivates feelings of love, compassion, and kindness towards oneself and others by repeating positive affirmations or phrases, or visualizations.
Transcendental Meditation (TM): TM is a technique where you repeat a mantra silently, aiming to achieve a state of deep relaxation and heightened awareness.
Breath Awareness Meditation: This technique involves focusing your attention on the breath, observing its natural flow and rhythm, which helps cultivate mindfulness.
Body Scan Meditation: It involves systematically directing your attention throughout your body, bringing awareness to each part and observing physical sensations without judgment.
Visualization Meditation: This technique involves creating vivid mental images or scenarios to enhance relaxation, concentration, or positive emotions.
Walking Meditation: Rather than sitting, walking meditation involves mindful walking, paying attention to each step and the sensations in your body as you move.
Zen Meditation: Zen meditation, also known as Zazen, emphasizes seated meditation in a specific posture, focusing on breath awareness and maintaining present-moment awareness.
Remember that the best meditation technique for you may vary based on your personal preferences and needs. It's worth exploring different techniques to find the one that resonates with you and brings the desired benefits.
guided meditation:
Guided meditation is a commonly recommended starting point for individuals embarking on a meditation practice. It involves the use of an instructor or a pre-recorded audio guide who provides verbal instructions throughout the meditation session. The purpose of guided meditation is to lead participants through various stages of relaxation, visualization, or mindfulness. By following the guidance of the instructor or audio guide, individuals can effectively engage in the practice of meditation, allowing them to experience the benefits of enhanced focus, stress reduction, and inner calm.
a simple technique to kick off your meditation practice
Here's how to practice Breathwork to promote a sense of calm & relaxation
Find a comfortable position, whether sitting on a chair, sitting upright with a cushion, or lying down.
Close your eyes and lower your gaze, keeping your eyes closed throughout the practice.
Settle into a comfortable position, rolling back your shoulders and ensuring your body feels relaxed.
Bring your awareness to the qualities of calm, balance, ease, stillness, and peace.
Whenever your mind starts to wander, gently bring it back to the focus on calm, balance, ease, stillness, and peace.
Place one hand on your abdomen and the other on your chest.
Breathe in through your nose and out through your mouth.
As you inhale, feel your abdomen expand, rather than your chest.
As you exhale, feel your abdomen contract.
Continue breathing at your own natural pace, without forcing or pressuring your breath.
With each inhalation, visualize and feel positive, uplifting energy entering your body.
With each exhalation, visualize and feel any negative or toxic energy being released.
Now, as you breathe in, gently lower your left ear toward your left shoulder, and return your head to centre as you breathe out.
Repeat the same movement on the opposite side, lowering your right ear toward your right shoulder and returning to centre as you exhale.
Begin a cycle of breath where you inhale through your nose for a count of 4, hold the breath for a count of 4, and exhale through your mouth for a count of 4.
Repeat this cycle for a total of ten breaths.
Slowly return to your normal state of awareness in your own time.
When you feel ready, open your eyes.
These instructions provide a simple breathwork meditation practice to promote a sense of calm and relaxation. Feel free to adjust the instructions to suit your preferences and make the practice more comfortable for you.
Remember, meditation is a personal journey, and it's normal to encounter challenges along the way. Be patient with yourself and allow your practice to evolve naturally. Over time, you'll experience the profound benefits of meditation, such as reduced stress, clarity of thought, and improved overall well-being.

Best Postpartum Supine Pilates Exercises
Why Postpartum Pilates?
Postpartum Pilates offers a myriad of benefits tailored to meet the unique needs of new mothers. It combines gentle movements, controlled breathing techniques, and targeted exercises to help you rebuild core strength, restore flexibility, and improve overall posture. This low-impact workout not only promotes physical healing but also enhances mental well-being, alleviating the stresses associated with the demands of motherhood.

Relaxation Position
The relaxation position is a fundamental starting position in Pilates that offers excellent support and helps establish proper alignment. It's a great position to begin your Pilates session with. Here's a step-by-step guide on how to get into the relaxation position:
Step 1: Starting position
Lie on your back on a mat, ensuring that your neck is lengthened and released, maintaining the natural curves of your neck. If needed, you can place a small firm flat cushion or folded towel under your head for additional support.
Bend your knees and place the soles of your feet firmly on the mat. Your legs should be hip-width apart and parallel to each other.
Step 2: Arm position options. a) Place your hands on your lower abdomen with your elbows bent, resting on the mat. This arm position promotes relaxation and body awareness. OR b) Extend your arms by the sides of your body on the mat, palms facing down. This arm position prepares you for movement.
Now, let's focus on settling into the relaxation position:
Allow your entire spine to widen and lengthen, feeling supported by the mat.
Bring your attention to three areas of your body weight: the back of your pelvis (sacrum), the back of your ribcage, and your head.
Be aware of the parts of your body that are in contact with the mat and encourage them to feel heavy and supported. You may notice less contact in your lower spine.
Release tension in your thighs and soften the area around your hips.
Pay attention to the width across your chest and allow your breastbone to feel released.
Feel a lengthening sensation in your neck and release any tension in your jaw and the rest of your face.
Allow some time for your body to adapt to this position and for your spine to fully release.
By following these steps and focusing on relaxation and alignment, you can effectively assume the relaxation position in Pilates. This position provides a strong foundation for your practice and helps you establish a mind-body connection as you prepare for your Pilates session.

Finding Neutral
Finding Neutral - The Compass is a valuable exercise for developing awareness of neutral alignment in the pelvis and lower spine. It also serves as an effective way to mobilize and release tension in the lower back. Here's a step-by-step guide on performing this exercise:
Step 1: Starting position
Begin by aligning yourself correctly in the Relaxation Position, lying on your back with your arms extended by your sides on the mat. Visualize a compass on your lower abdomen, with your navel representing the north, your pubic bone representing the south, and the prominent bones of your pelvis on either side representing the west and east.
Now, let's go through the actions involved in finding neutral:
Tilting the pelvis north and south:
Take a deep breath in to prepare your body for movement.
Breathe out as you gently tilt your pelvis to the north, allowing the pubic bone to move forward and upward. As you do this, feel your lower spine releasing into the mat as your pelvis tilts backward.
Breathe in as you continue tilting your pelvis back through the mid-position without pausing, until the pelvis gently tilts forward to the south. In this position, the pubic bone moves backward and downward, causing a slight arch in your lower back.
Repeat this north-south tilting movement five times.
Finding neutral:
Return to the Starting Position after the fifth repetition and focus on finding your neutral position, which lies between the north and south positions. To be sure you have found neutral: bring both thumbs and both index fingers together, place your hands on the lower abdominals and if you are in a true neutral pelvis position your thumbs and index fingers will be horizontally level with each.
Breathe out as you roll your pelvis to the west, feeling the opposite side of the pelvis lift slightly as it rotates.
Breathe in as you continue rolling your pelvis through the mid-position without stopping, moving it to the east. Once again, feel the opposite side of your pelvis lift slightly.
Return to the mid-position, where your pelvis is level and neutral. One should feel equal contact with the mat through both sides of the back of your pelvis.
Here are some important watch points to consider:
Keep the tilting of your pelvis small and effortless. While the rest of your spine will react slightly, avoid overexaggerating the movement.
The final neutral position should feel natural and comfortable, not fixed or rigid.
In neutral, you should feel the back of your pelvis (sacrum) heavy and grounded on the mat.
Allow your hip joints to be free and released, avoiding any unnecessary tension.
By following these steps and keeping the watch points in mind, you can effectively perform the Finding Neutral through The Compass exercise. It will help you cultivate a sense of neutral alignment in your pelvis and lower spine, while also promoting freedom and release in your hip joints.
pelvic stability exercises
In Pilates, pelvic stability exercises are crucial for developing a strong and stable core, improving posture, and enhancing overall body alignment. Here are some basic pelvic stability exercises commonly practiced in Pilates:
Zip and Abdominal Hollowing
Teaches you how to feel and connect to your centre. The self- awareness that this exercise helps develop can be used in all Pilates exercise.
Here's how to perform Zip and Abdominal Hollowing:
Step 1: Starting position
Begin by aligning yourself correctly in the Relaxation Position, place your hands on your lower abdomen with your elbows bent, resting on the mat.
Now, let's go through the actions involved in Zip and Abdominal Hollowing:
Breathe in wide across your back and lengthen your spine.
Breathe out as you 'zip' from the back to the front of your pelvic floor region: first, lifting from your back passage (anus) as if trying to prevent yourself from passing wind, then bringing this feeling forward towards your pubic bone as if trying to stop yourself from passing water. Continue gently to draw up these muscles inside. You should feel your abdominals begin subtly to hollow and tighten automatically.
Continue to breathe out fully as you gently increase the hollowing of the abdominal area but do not over-engage.
Maintain this connection and breathe normally for five breaths before releasing, ensuring that your abdominals and ribs are still able to move with your breath.
Here are some important watch points to consider:
Ensure that you do not zip, pull up, or pull in, too hard. It is very important that you do not force this action by gripping.
Make sure that your buttock muscles remain relaxed throughout.
Keep your chest and the front of your shoulders open and avoid any tension in your neck area.
Keep your breathing smooth and evenly paced.
Ensuring that your ribage and abdominal area are still able to expand with your in-breath is a good sign that you haven't over engaged.
If you lose any of the connections, relax and start again from the beginning.
If you find the 'zip' part too difficult, don't worry: it will come eventually. It may be easier to focus on simply scooping the abdominals, drawing them lightly back towards the spine. Above all what matters is that you are in control of your body as you move to avoid injury. This will become automatic as you practise more.
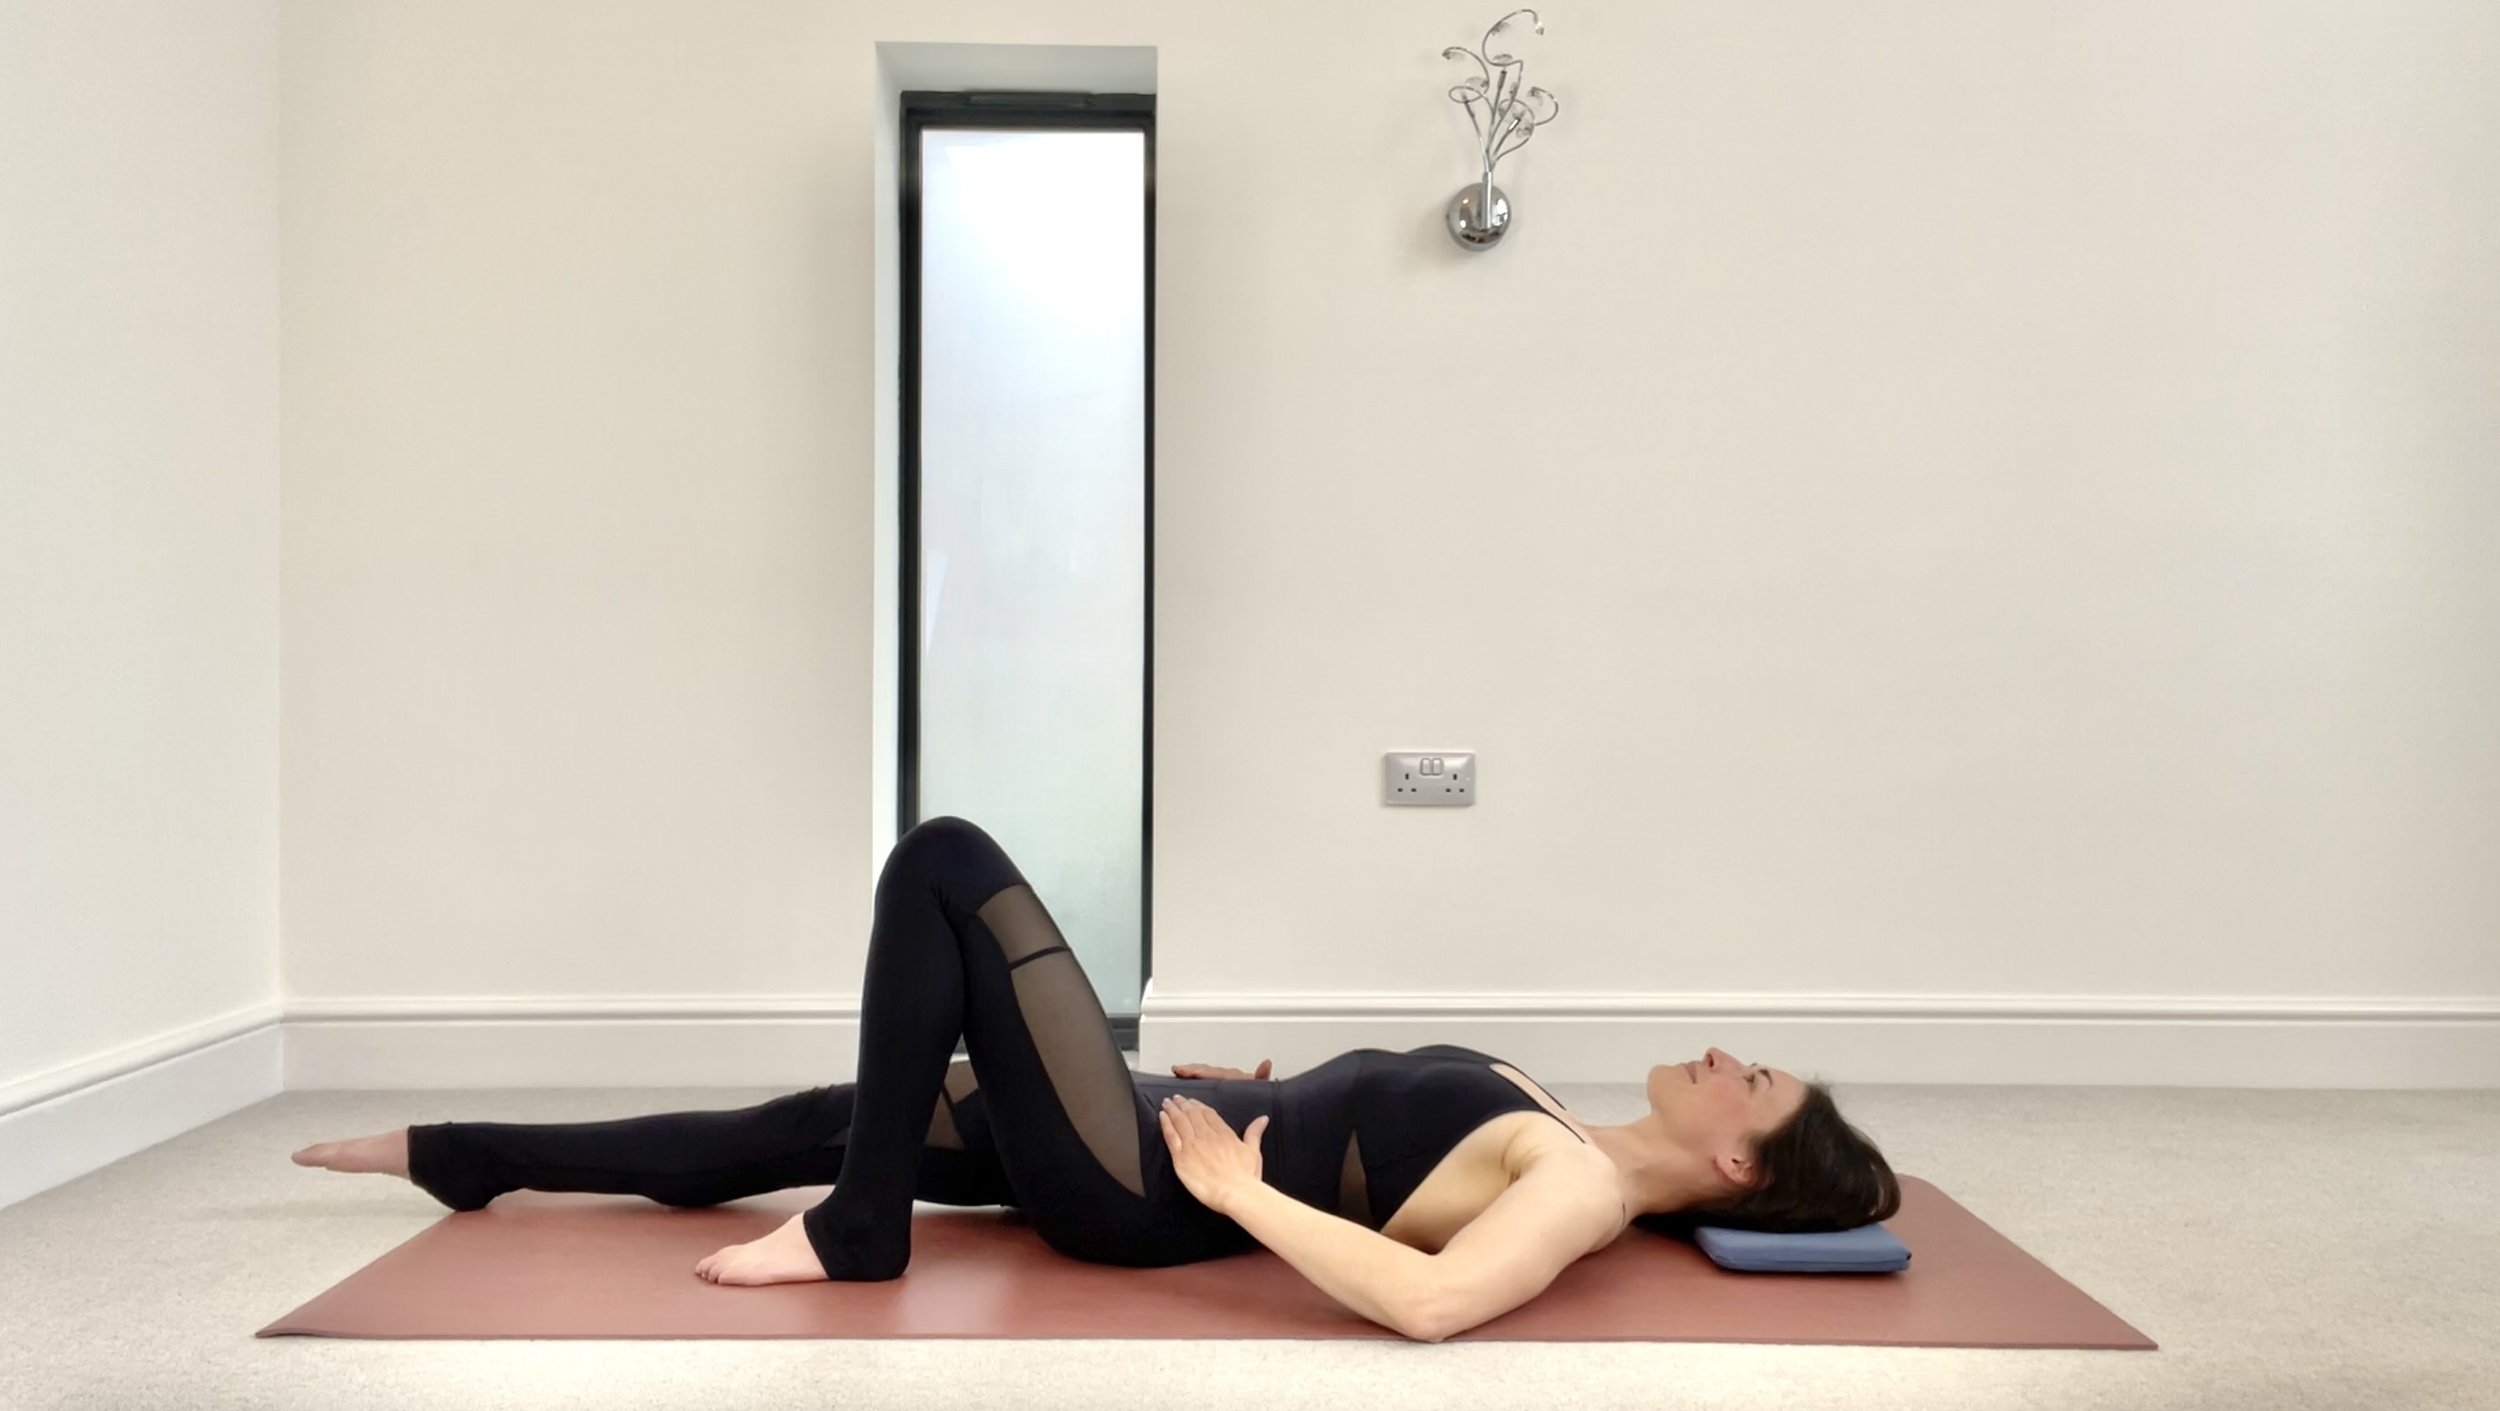
Leg Slides
Leg Slides in Pilates are an exercise that targets the hip muscles, enhances pelvic stability, and improves overall body control.
Here's how to perform Leg Slides:
Start by lying on your back with your knees bent and feet flat on the mat. Keep your arms relaxed by your sides. (However to begin with, you may want to place your hands on your pelvis to check for unwanted movement).
Breathe in, preparing your body to move.
Breathe out as you gently connect to your centre by applying the Zip and Abdominal Hollowing (explained above). Maintain an appropriate level of connection to your centre throughout.
Take a deep breath to prepare, and as you exhale, slide one leg along the mat, extending it straight while maintaining stability in the pelvis and a neutral spine.
Inhale as you smoothly return the leg back to the starting position, maintaining control and awareness of your movements.
Repeat the exercise with the other leg, sliding it along the mat while keeping the pelvis stable and the core engaged.
When performing Leg Slides, pay attention to the following key points:
Maintain a stable pelvis throughout the movement, avoiding any excessive tilting or movement in the hips.
Keep your core muscles activated to provide support and stability to the spine and pelvis.
Focus on lengthening through the extended leg while maintaining proper alignment and control.
Breathe naturally throughout the exercise, coordinating your breath with the movement.
Leg Slides help strengthen the hip stabilizer muscles, including the hip abductors and adductors, which play a vital role in maintaining pelvic stability and proper alignment. This exercise also enhances body awareness, promotes balanced muscle development, and contributes to overall control and coordination.

Knee Openings
Knee Openings are a valuable exercise in Pilates that help you focus on maintaining stability between the pelvis and spine, while promoting independent movement of your leg at the hip joint. They also help to improve hip mobility and strengthen the hip muscles.
Here's how to perform Knee Openings:
Begin by lying on your back with your knees bent and feet flat on the mat, hip-width apart.
Keep your arms relaxed by your sides. (However to begin with, you may want to place your hands on your pelvis to check for unwanted movement).
Breathe in, to prepare.
Breathe out as you gently connect to your centre by applying the Zip and Abdominal Hollowing (explained above). Maintain an appropriate level of connection to your centre throughout.
Breathe in, preparing your body to move and maintaining the connection to your centre.
Breathe out as you allow one knee to open slowly to the side, keeping the foot down on the mat but allowing the foot to roll to its outer side. Open as far as you can without moving the pelvis.
Breathe in as you bring the knee back to the Starting Position.
ontinue alternating sides, ensuring a smooth and controlled motion.
Repeat five times with each leg
When performing Knee Openings, keep the following tips in mind:
Keep your pelvis and spine still and centred throughout. Focus on your leg moving in isolation from the rest of your body.
Move your leg as far as you can without disturbing the pelvis and losing neutral.
Focus on your waist remaining long and even on both sides.
Keep your chest and the front of your shoulders open and avoid any tension in your neck area.
Remain still in the supporting leg, without tension.
Knee Openings in Pilates help enhance hip mobility, particularly in the external rotation of the hips. They engage the hip abductors muscles which contribute to improved stability and proper alignment of the pelvis. This exercise also enhances body awareness, promotes balanced muscle development, and contributes to overall control and coordination.
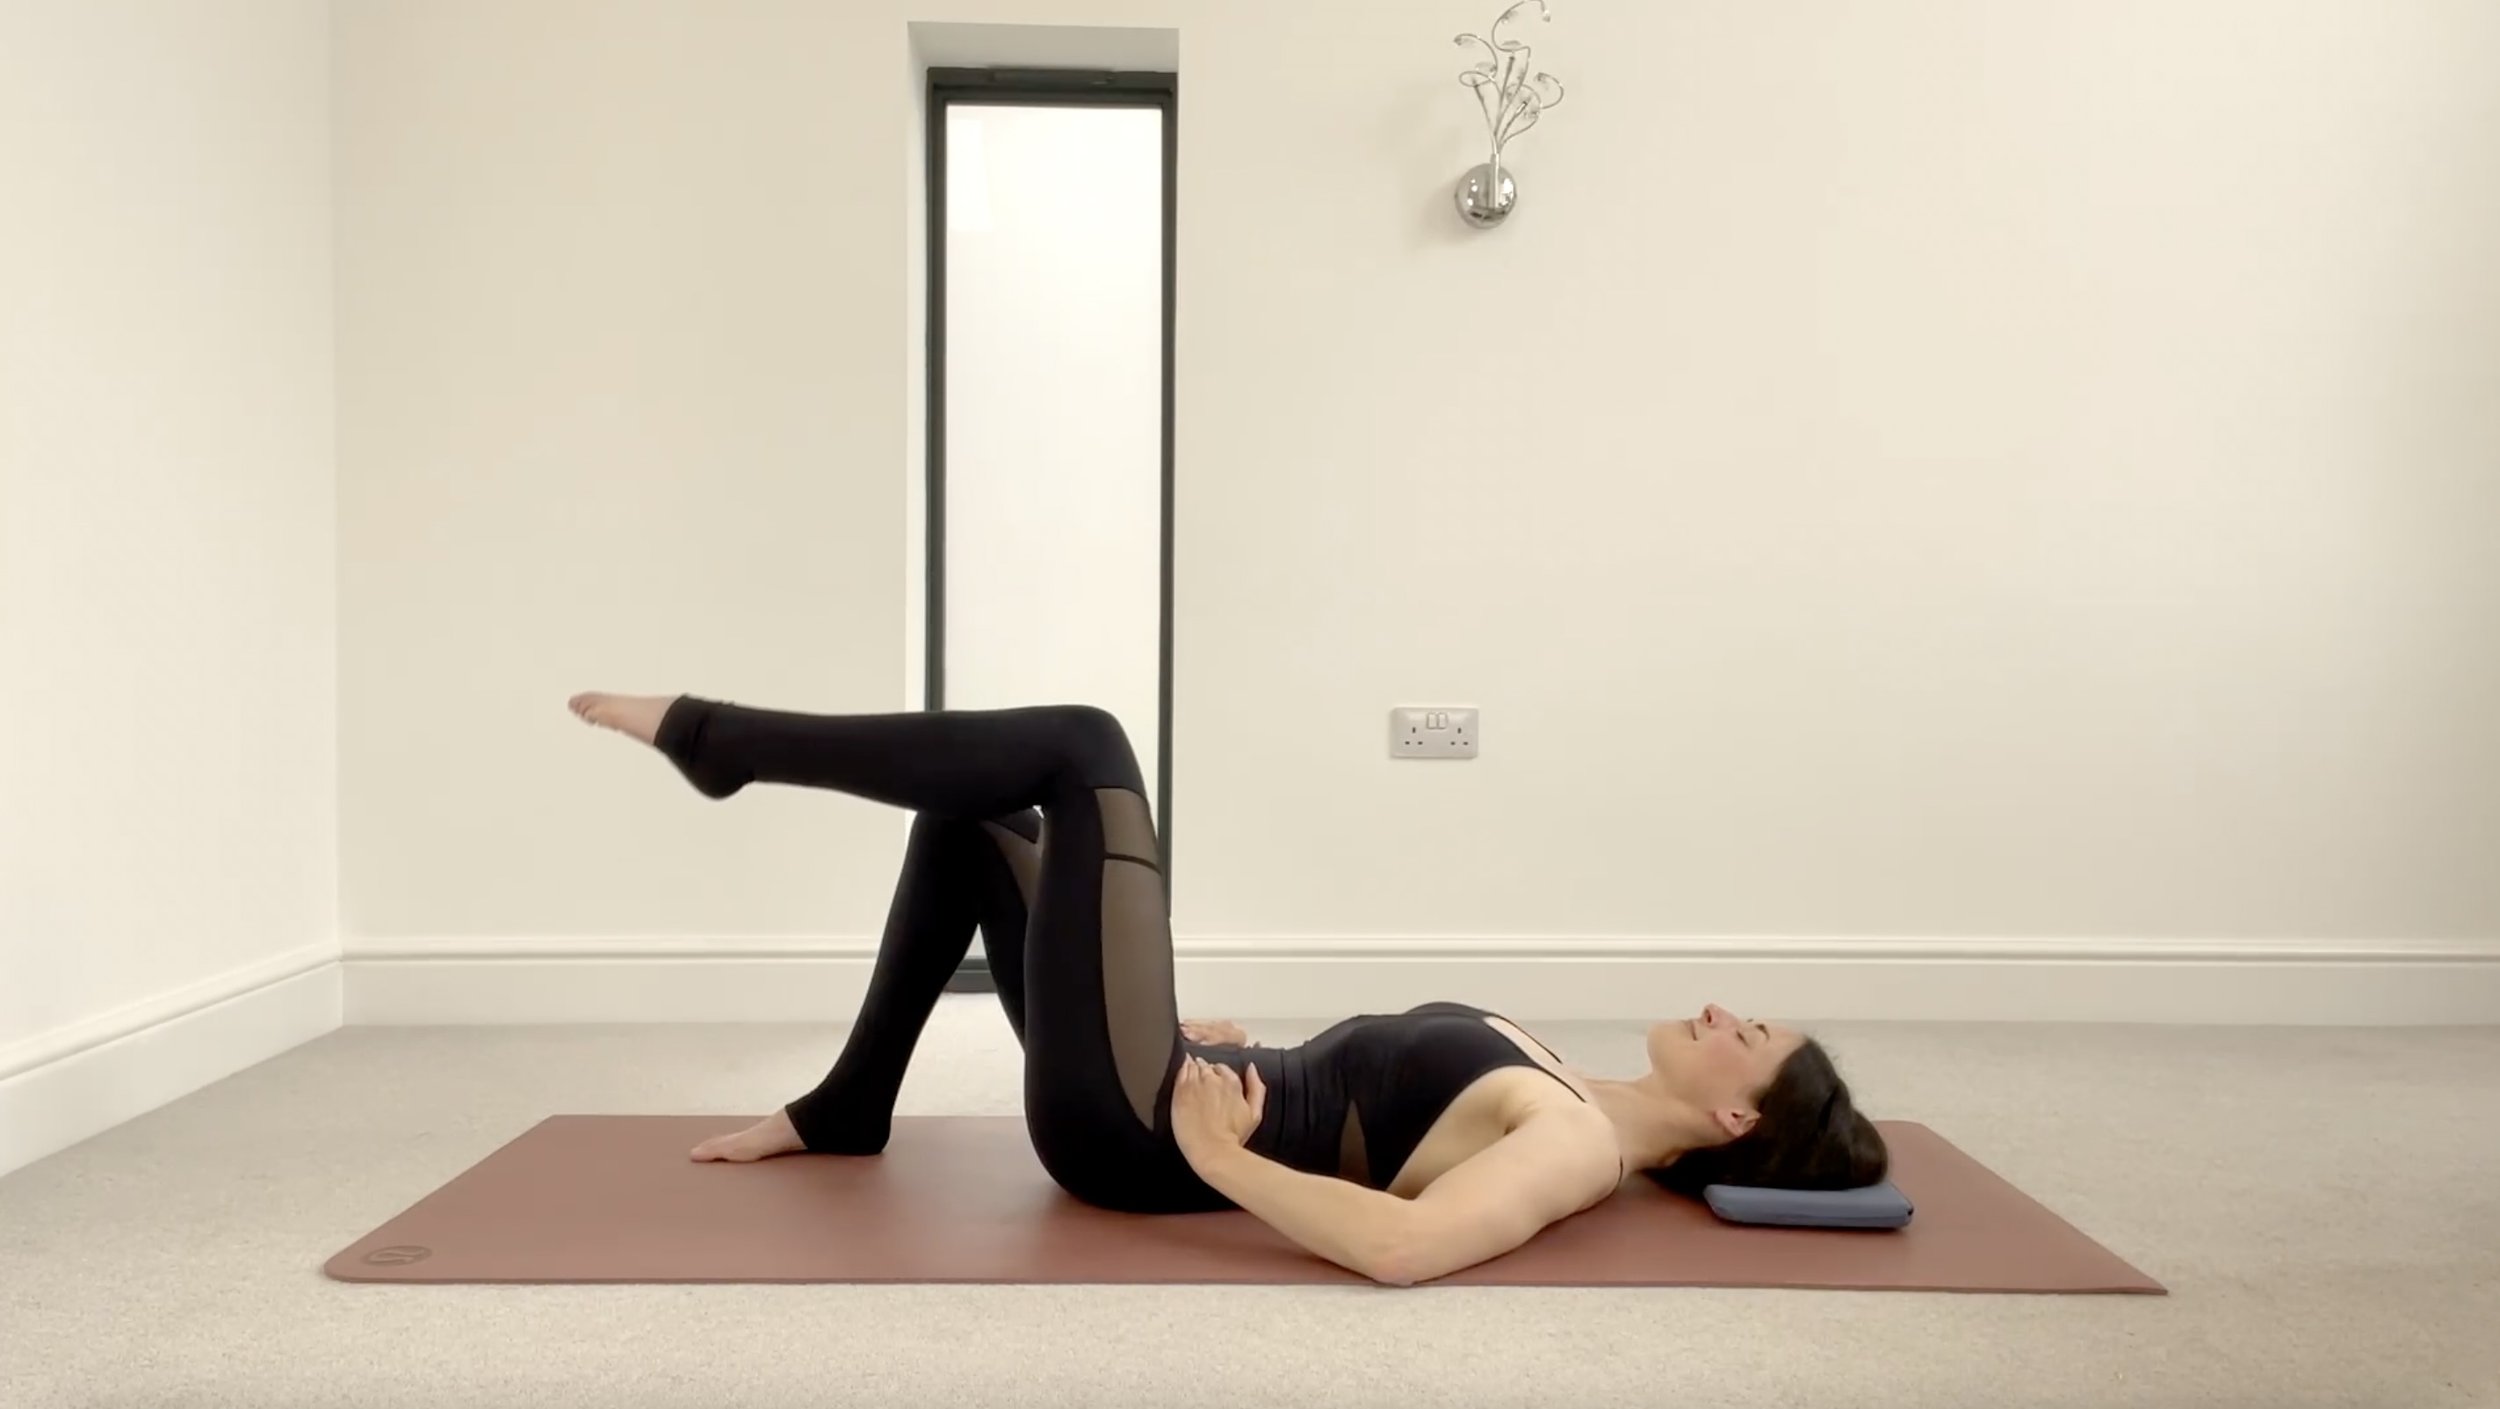
Single Knee Folds
Single Knee Folds target the abdominal muscles, particularly the deep core muscles, while also working on pelvic stability and hip mobility.
Here's how to perform Single Knee Folds:
Begin by lying on your back with your knees bent and feet flat on the mat. Keep your arms relaxed by your sides. (However to begin with, you may want to place your hands on your pelvis to check for unwanted movement.)
Breathe in, to prepare.
Breathe out as you gently connect to your centre by applying the Zip and Abdominal Hollowing (explained above). Maintain an appropriate level of connection to your centre throughout.
Breathe in, preparing your body to move and maintaining the connection to your centre.
Breathe out as you lift your right foot off the mat and fold the knee up towards your body. Allow the weight of the leg to drop down into your hip socket and remain grounded in your pelvis and long in your spine.
Breathe in, maintaining a stable pelvis and neutral spine.
Breathe out as you slowly return the leg back down and your foot to the mat, maintaining control and engaging the core.
Continue alternating between the two legs.
Repeat five times with each leg.
As you perform Single Knee Folds, focus on the following key points:
Keep your pelvis stable and avoid any excessive movement or tilting.
Maintain a neutral spine, avoiding any arching or flattening of the lower back.
Engage your deep core muscles throughout the exercise to support and control the movement.
Breathe naturally, coordinating your breath with the movement.
Single Knee Folds provide a gentle yet effective way to strengthen the abdominal muscles, promote pelvic stability, and improve hip mobility. They can be incorporated into your Pilates routine as part of a comprehensive core workout or used as a warm-up exercise.

Chin Tucks and Neck Rolls
Chin tucks and neck rolls are two exercises commonly performed in Pilates to release tension, improve neck mobility, and promote proper alignment in the cervical spine.

Chin Tucks
Here’s how to perform Chin Tucks:
Start by lying on your back with your knees bent and feet flat on the mat. Keep your arms relaxed by your sides.
Breathe in, preparing your body to move.
Breathe out as you lengthen the back of the neck, tipping your chin down. Be sure to keep your head in contact with the mat.
Breathe in as you tip your head back gently, passing through the mid-position without stopping. Once again, keep the back of the head in contact with the mat; this is a small and subtle movement.
Repeat the Chin Tuck five times and then find the mid-position. This is neutral, with your face and your focus both directed towards the ceiling.
Chin tucks in Pilates help strengthen the deep neck flexors and promote proper alignment of the cervical spine, which can alleviate neck tension and improve posture.
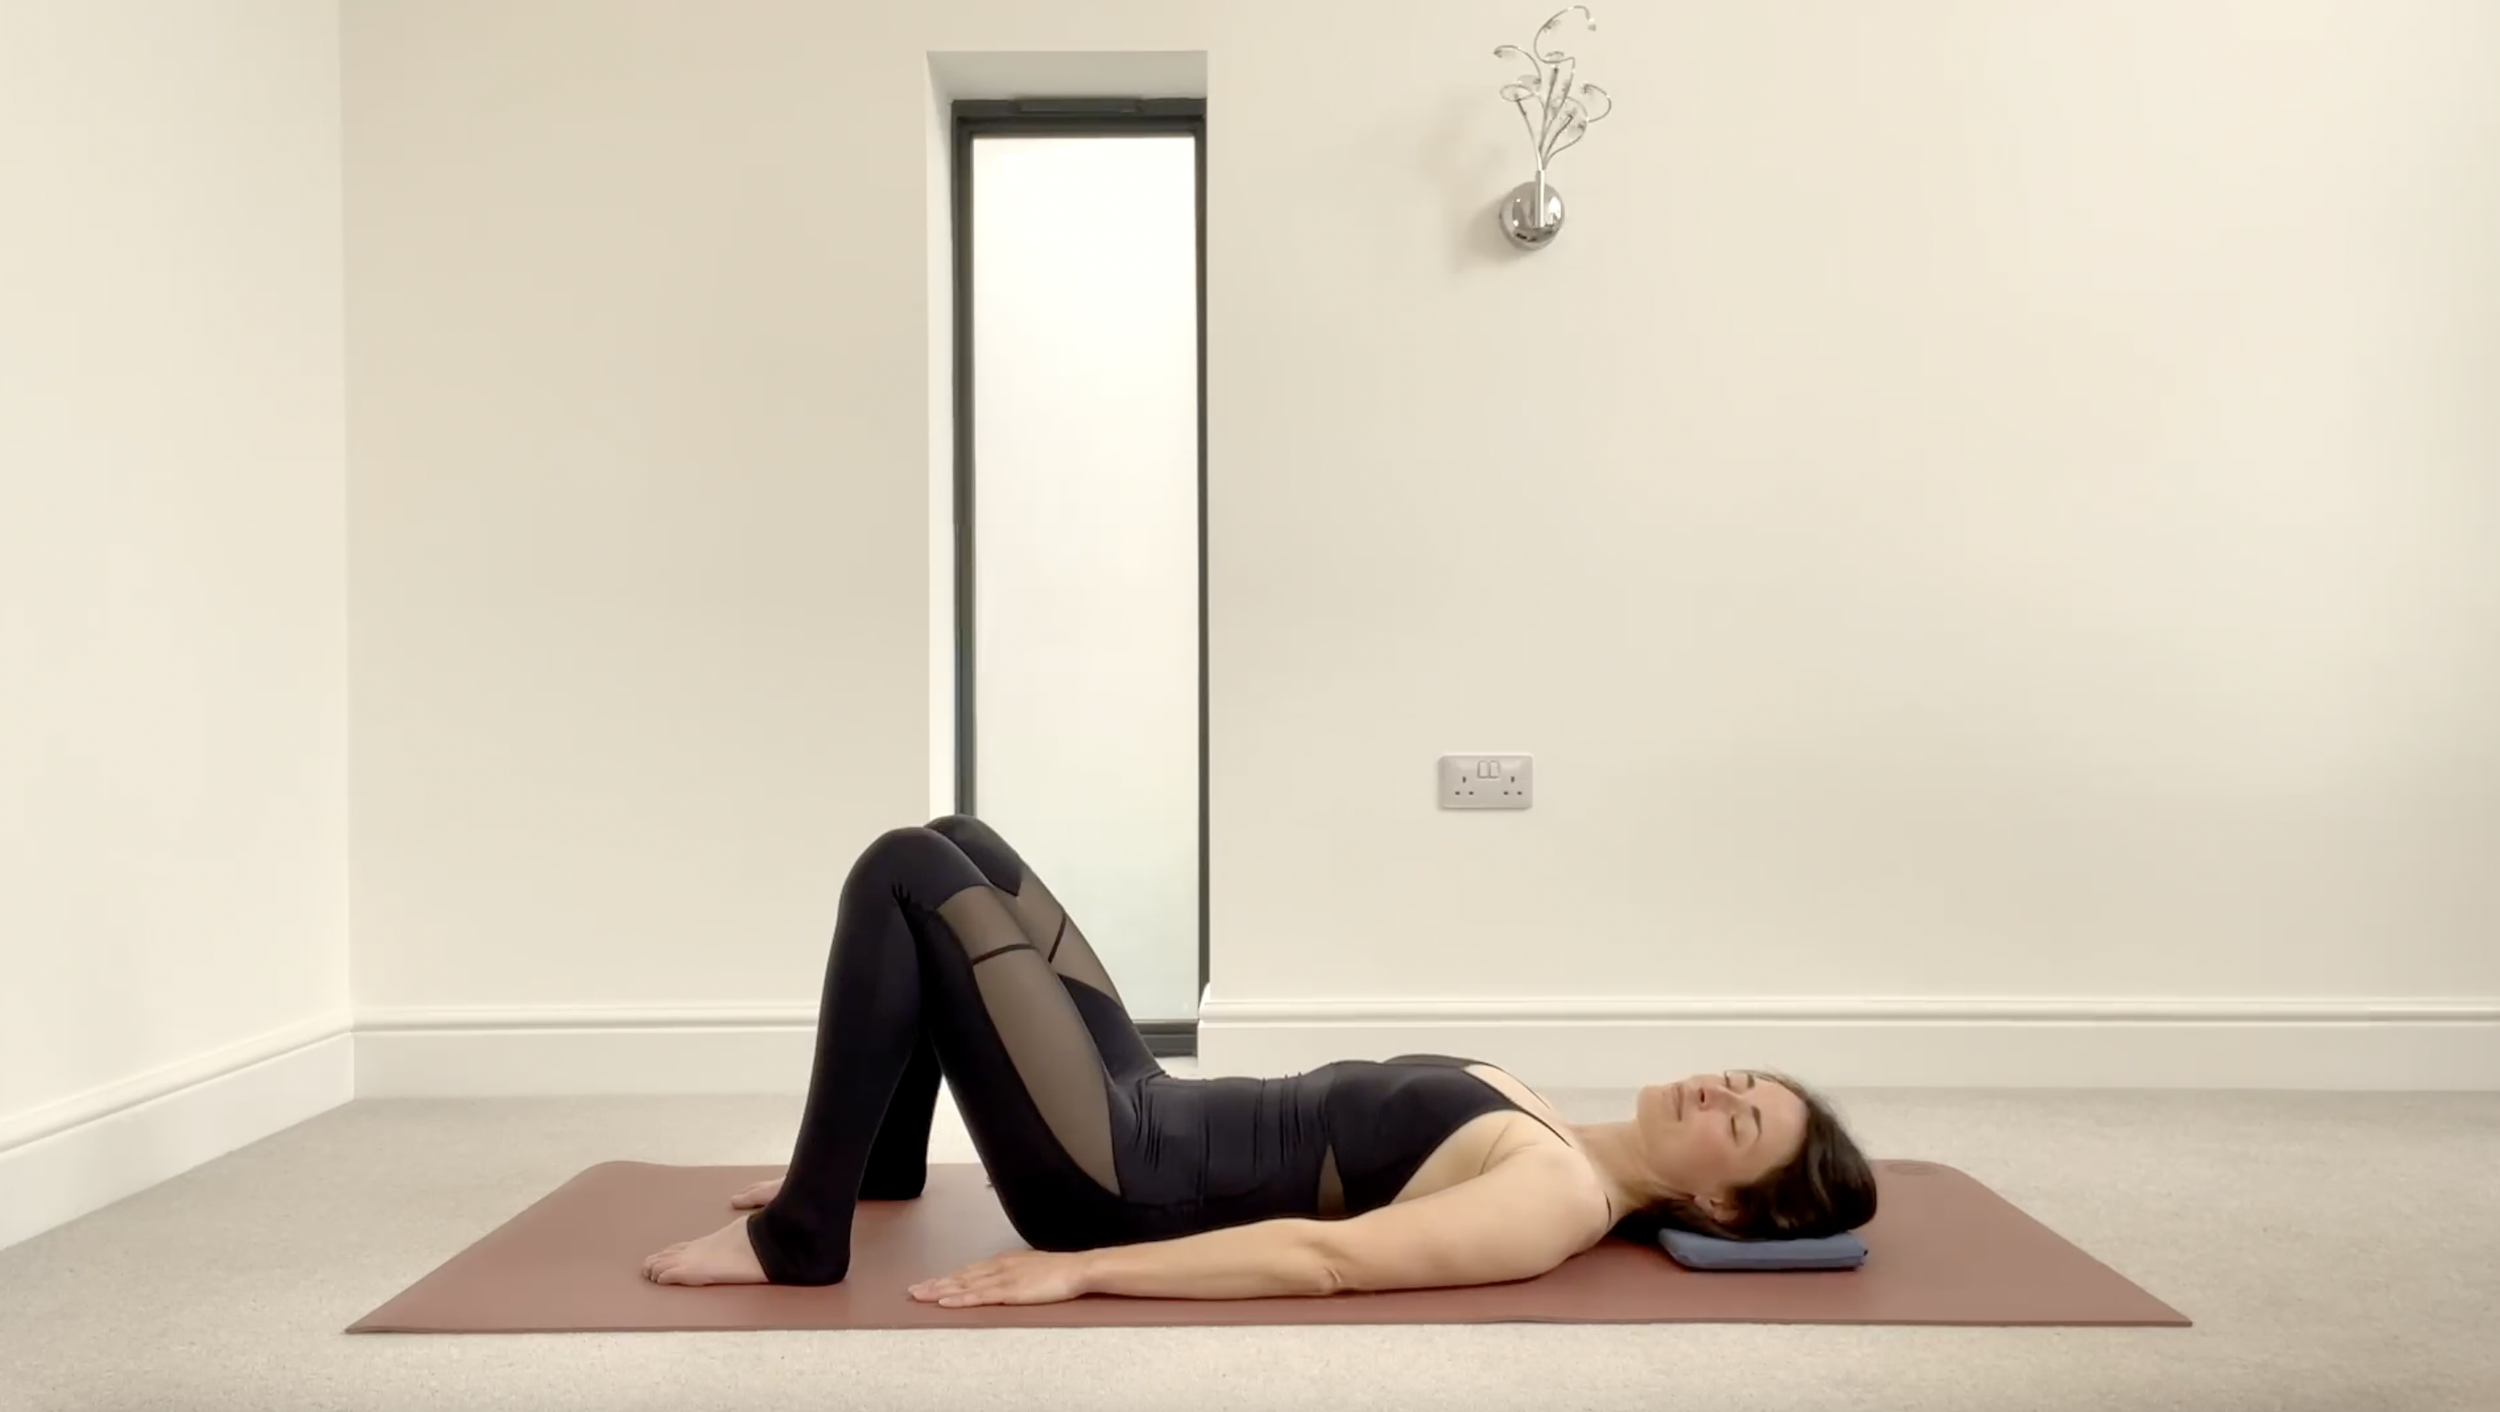
Neck Rolls
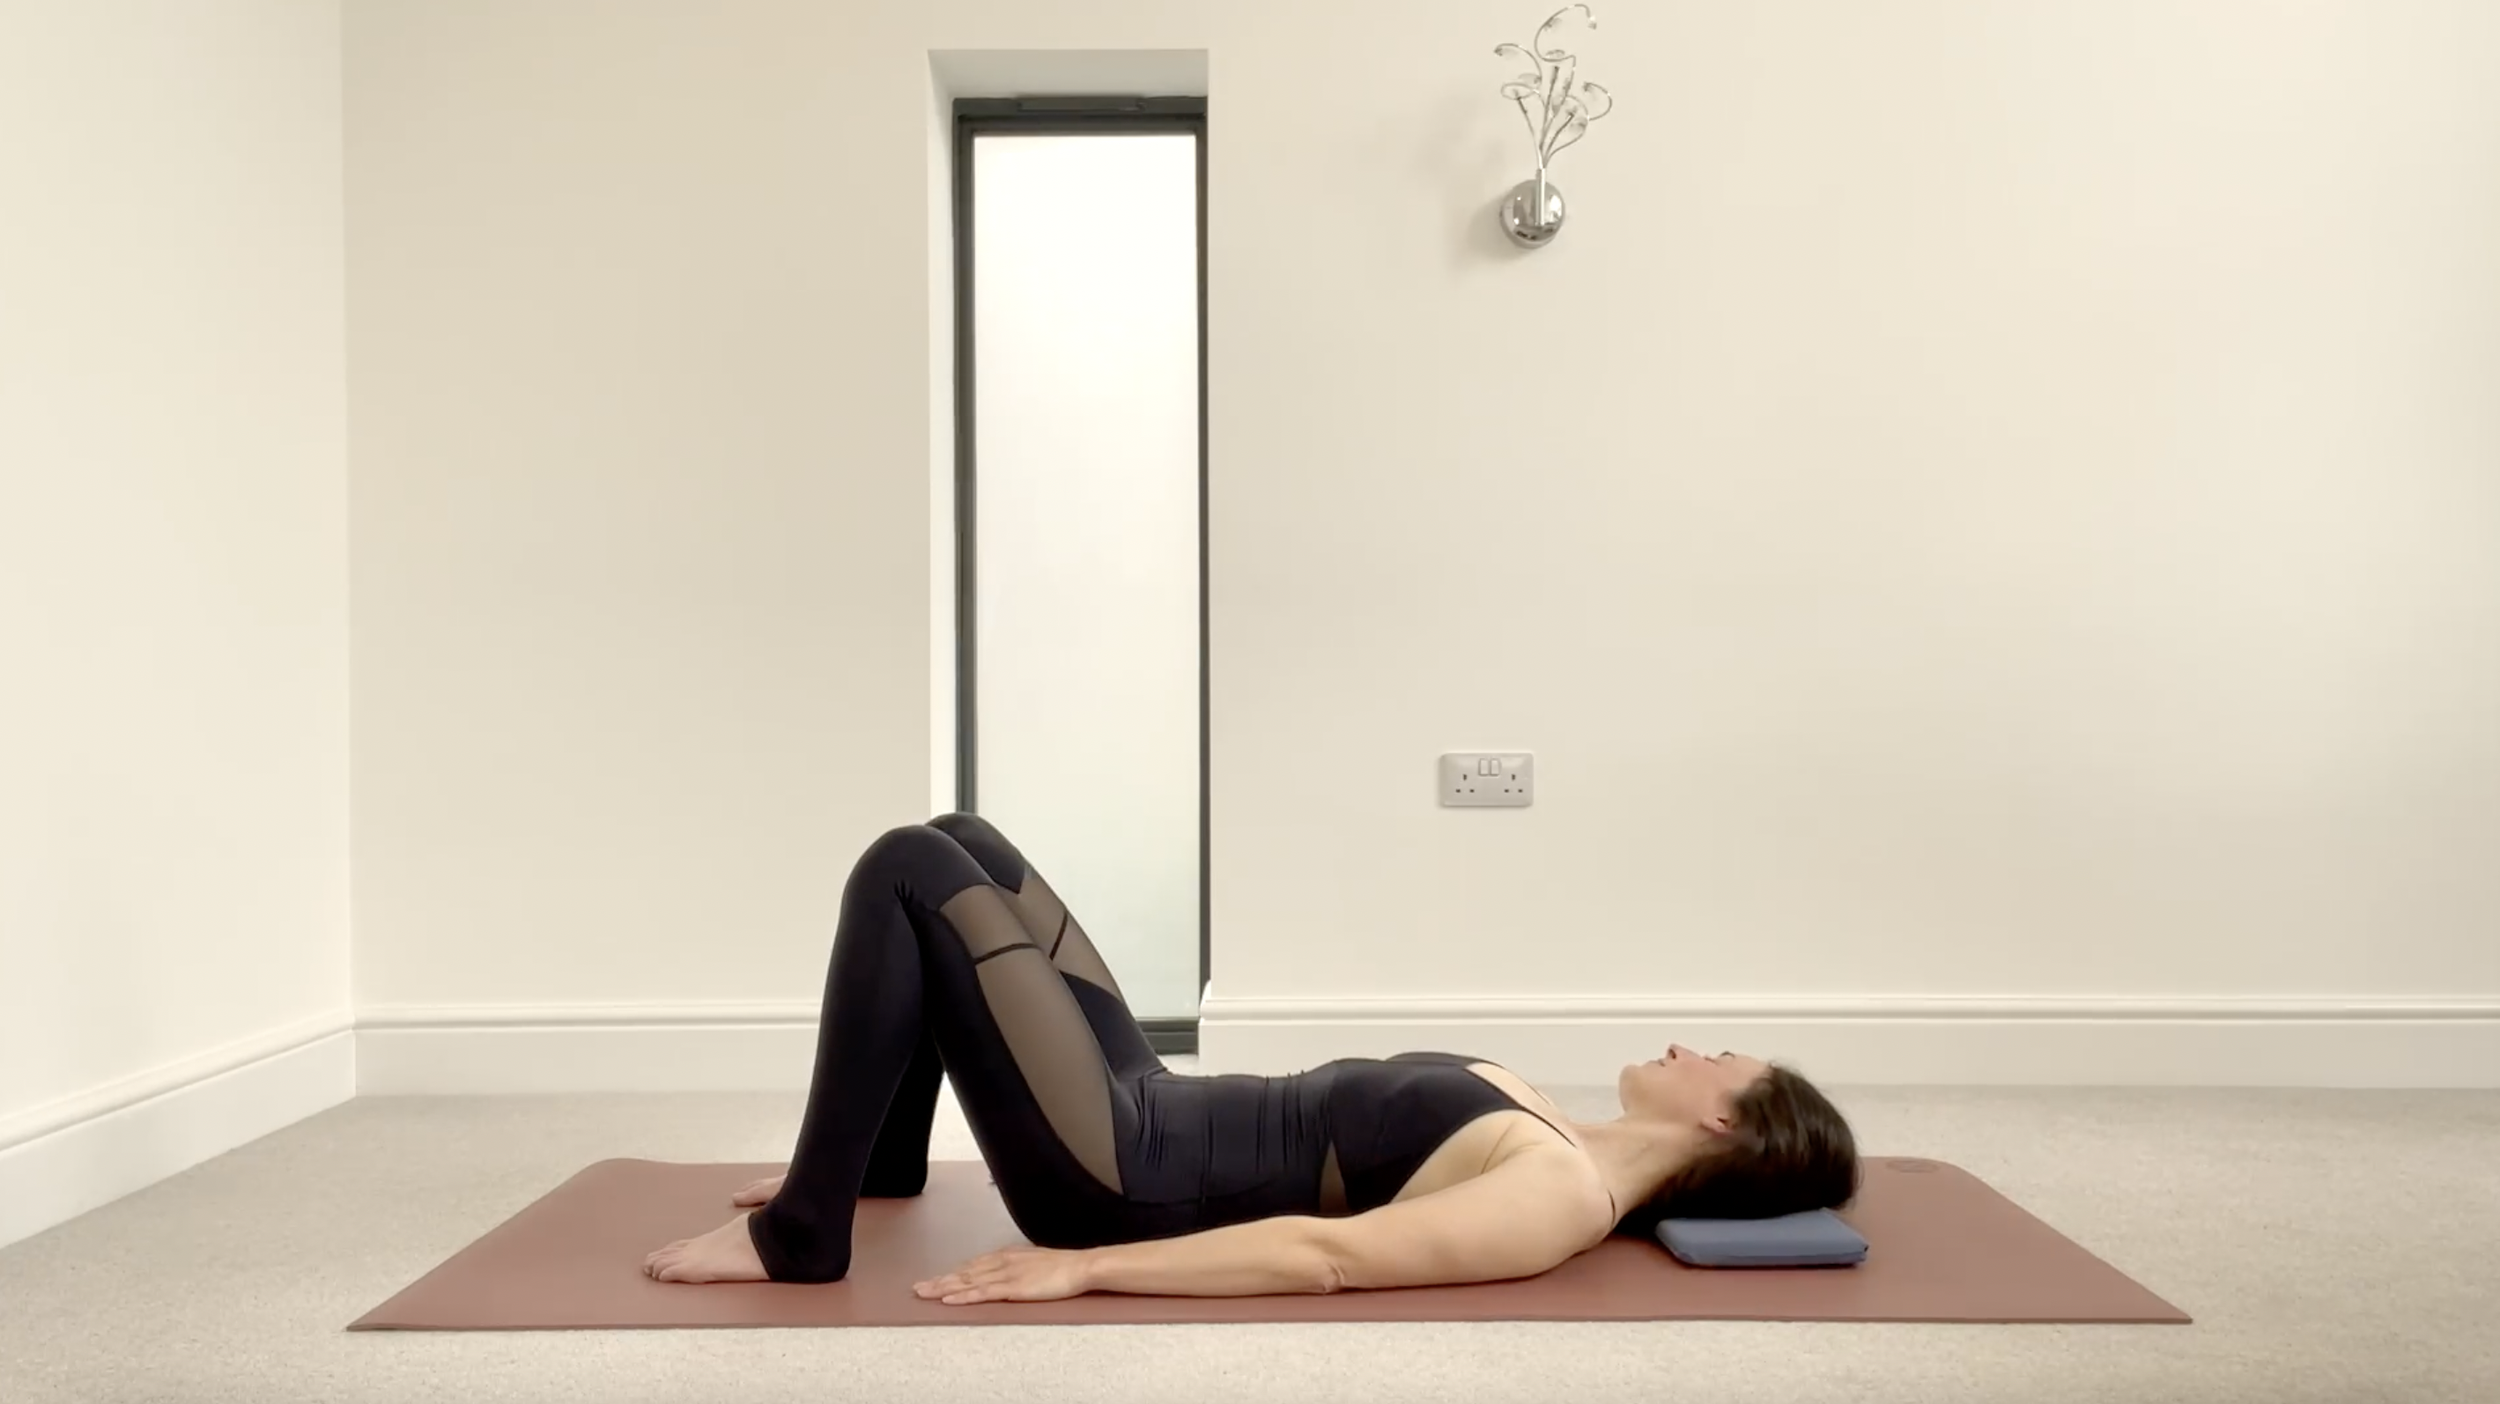
Here’s how to perform Neck Rolls:
Start by lying on your back with your knees bent and feet flat on the mat. Keep your arms relaxed by your sides.
Breathe in, preparing your body to move.
Breathe out, roll your head to one side. Again, make sure that you keep your head in contact with the mat.
Breathe in as you roll your head back to the centre.
Repeat the Neck Roll up to five times each side before returning your head to the central neutral position.
Neck rolls in Pilates help improve neck mobility, release tension in the neck and upper back muscles, and promote a sense of relaxation and flexibility.
During both the Chin tucks and neck rolls exercises, it's important to remember the following tips:
Keep your movements slow, controlled, and within a comfortable range of motion.
Maintain an lengthened spine throughout the exercises.
Avoid any sudden or jerky motions that may cause strain or discomfort.
Listen to your body and modify the exercises as needed to suit your individual flexibility and comfort level.

Shoulder Drops
Shoulder Drops are a beneficial exercise in Pilates that help release tension in the shoulders and improve shoulder mobility.

Here's how to perform Shoulder Drops:
Start by lying on your back with your knees bent and feet flat on the mat. Raise both arms vertically above your chest, shoulder-width apart, palms facing one another.
Maintain an appropriate level of connection to your centre throughout.
Breathe in as you reach one arm up towards the ceiling, peeling the shoulder blade away from the mat.
Breathe out as you gently release the arm back down, returning the shoulder blade back onto the mat.
Repeat up to ten times, alternating arms.
When performing Shoulder Drops, keep the following tips in mind:
Keep your pelvis and spine stable and still throughout.
Keep your neck long and free from tension; your head remains still and heavy throughout.
Use the breathing pattern to guide your movements:
The inhalation encourages the ribcage to widen and the shoulder blades to glide.
The exhalation encourages a release of tension.
Fully lengthen your arms but avoid locking your elbows.
Shoulder Drops in Pilates help release tension that often accumulates in the shoulders and upper back due to poor posture or stress. They promote proper alignment, improve shoulder mobility, and enhance overall body awareness.

Spine Curls
Spine Curls are a fundamental exercise in Pilates that help improve spinal mobility, strengthen the core, and promote spinal alignment.
Here's how to perform Spine Curls:
Start by lying on your back with your knees bent, feet hip-width apart, and arms relaxed by your sides.
Maintain an appropriate level of connection to your centre throughout.
Take a in breath to prepare.
As you exhale, begin to articulate your spine, lifting your tailbone off the mat, followed by each vertebrae, until your entire spine is off the mat.
Continue to lift until you reach a bridge position, where your knees, hips, and shoulders form a straight line.
Inhale at the top of the bridge position, maintaining stability and engaging your glutes and core.
Exhale as you begin to roll the spine back down to the mat, articulating each vertebrae in a controlled manner until your spine is back in a neutral position.
Repeat the movement for six repetitions, focusing on smooth and controlled motion throughout.
When performing Spine Curls, keep the following tips in mind:
Focus on wheeling your spine off the mat vertebra by vertebra.
Control the sequential return of your spine back down to the mat.
Avoid rolling up too far, maintain the connection of your ribs to your pelvis and avoid arching your spine.
Ensure there is equal weight through both feet; this will help to prevent your pelvis dipping to either side.
Try to avoid 'hitching' your pelvis up towards your ribcage.
Spine Curls in Pilates help improve spinal mobility, strengthen the deep core muscles, and promote proper alignment and articulation of the spine. They also contribute to increased body awareness and can alleviate tension in the lower back.
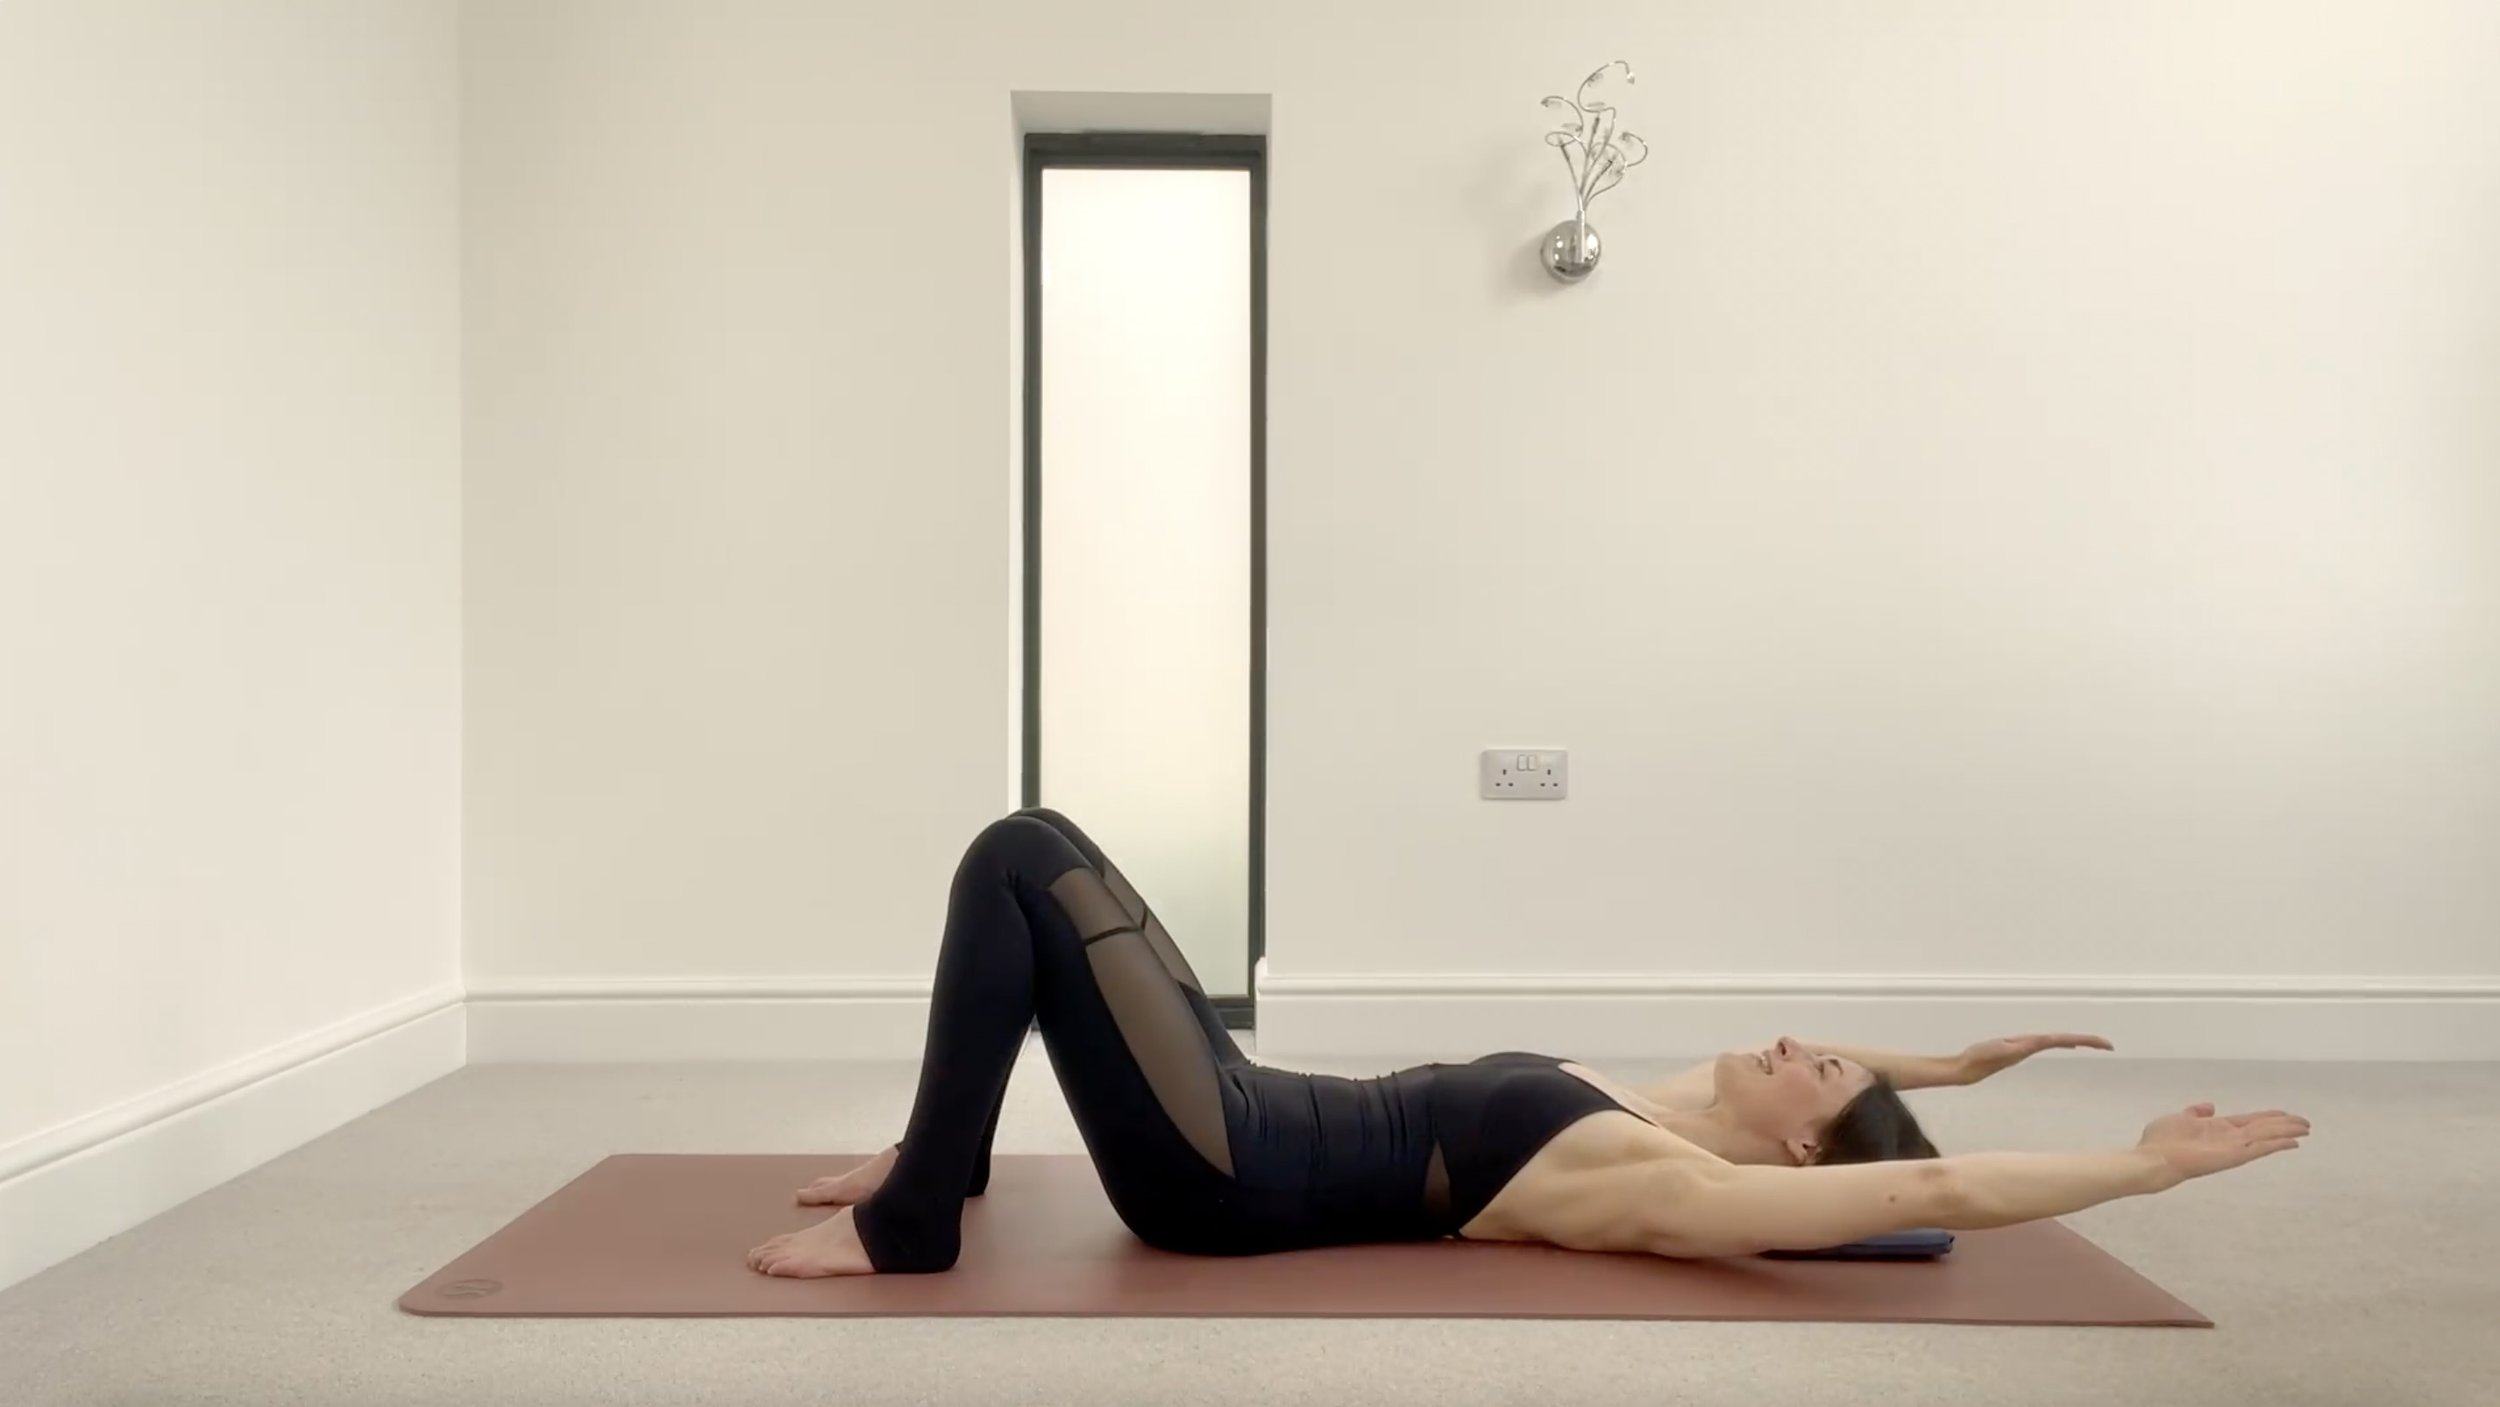
Ribcage Closure
Ribcage Closure is a beneficial exercise in Pilates that focuses on improving core stability, enhancing postural alignment, and promoting a sense of control and support through the ribcage.
Here's how to perform Ribcage Closure:
Start by lying on your back with your knees bent, feet hip-width apart, and arms relaxed by your sides.
Maintain an appropriate level of connection to your centre throughout.
Breathe in and raise both arms to a vertical position above your chest, palms facing forwards.
Breathe out. Maintaining a stable and still spine, reach both arms overhead towards the floor. Keep your neck long and encourage the softening and the closing of the ribcage during this exhalation.
Breathe in as you return the arms above your chest. Feel your ribcage heavy and your chest open.
Breathe out and lower the arms, returning them to the mat and lengthening them by the sides of your body.
Repeat ten times, ensuring smooth and controlled movements.
When performing Ribcage Closure, keep the following tips in mind:
Keep your pelvis and spine stable and still throughout.
Be particularly careful not to allow your upper spine to arch as you reach your arms overhead.
Although your shoulder blades will naturally glide upwards on the back of your ribcage as your arms rise, do not over-elevate your shoulders.
It is equally as important not to depress your shoulders down your back; simply allow them to move naturally and without tension.
Fully lengthen your arms but avoid locking your elbows.
Keep your neck long and free from tension.
Ribcage Closure in Pilates helps activate and strengthen the deep core muscles, including the transverse abdominis and obliques. It promotes proper alignment, enhances postural control, and contributes to overall core stability.

Hip Rolls With Feet Down
Hip Rolls with feet down are a beneficial exercise in Pilates that target the core muscles, improve spinal mobility, and enhance pelvic stability.
Here's how to perform Hip Rolls with feet down:
Start by lying on your back with your knees bent, bring your legs together and connect your inner thighs. ( You may wish to place a cushion between your knees to encourage the inner thigh connection.)
Reach your arms out on the mat slightly lower than shoulder height with your palms facing upwards.
Maintain an appropriate level of connection to your centre throughout.
Breathe in and, maintaining the connection of the inner thighs, begin to rotate your pelvis and legs to the Left from a strong centre. The right side of the pelvis and the lower right ribs will peel slightly off the mat.
Breathe out, initiating the movement from the connection in your centre, as you return the pelvis and legs back to the Starting Position.
Repeat 10 tens, alternating sides.
When performing Hip Rolls with feet down, keep the following tips in mind:
Roll your pelvis and your legs directly to the side and avoid any deviation; there should be no shortening on either side of the waist.
Maintain a connection between your ribcage and your pelvis and ensure that you don't arch your back as you roll.
Control the movement of your legs and don't just allow them to 'drop'.
Ensure the foot that is on top peels away from the mat during the roll.
Keep your chest and the front of your shoulders open and avoid any tension in your neck area.
Hip Rolls with feet down in Pilates help improve spinal mobility, strengthen core muscles, and promote proper alignment and control of the pelvis. They also contribute to increased body awareness and can alleviate tension in the lower back.
Guidelines and Recommendations for Postnatal Pilates
1. Consult with Your Healthcare Provider
Before starting any postnatal exercise program, it's essential to consult with your healthcare provider, particularly if you had a complicated pregnancy or delivery. Your healthcare provider can assess your individual needs, provide specific recommendations, and address any concerns you may have.
2. Wait for the Right Time
Give yourself sufficient time to recover postpartum before diving into Pilates. Generally, it's recommended to wait until your healthcare provider gives you the green light, typically around six weeks after a vaginal delivery and longer for a cesarean section. Listen to your body and start Pilates when you feel physically ready.
3. Gradual Progression is Key
Begin with gentle, low-impact exercises that focus on rebuilding your core strength and pelvic floor, such as the exercise found above. Progress gradually, gradually increasing the intensity and complexity of exercises as your body becomes stronger and more resilient. Respect your body's limits and avoid overexertion or pushing yourself too hard too soon.
4. Prioritise Core and Pelvic Floor Exercises
Postnatal Pilates places significant emphasis on rebuilding core strength and pelvic floor function. Focus on exercises that target these areas, such the Zip and Abdominal Hollowing engagement. These exercises lay the foundation for overall stability and support as you progress.
5. Mindful Breathing
Incorporate mindful breathing techniques into your Pilates practice. Deep diaphragmatic breathing promotes relaxation, improves oxygenation, and enhances mind-body connection. Coordinate your breath with the movements, inhaling during the preparatory phase and exhaling during the exertion phase of each exercise.
6. Listen to Your Body
Pay close attention to how your body feels during and after each exercise. If something feels uncomfortable, painful, or causes any unusual symptoms, stop immediately and consult your healthcare provider or pilates instructor. Honor your body's signals and modify or skip exercises as needed.
7. Stay Hydrated and Well-Nourished
Maintain proper hydration before, during, and after your Pilates sessions. Also, ensure you're fueling your body with nutritious foods to support your postpartum recovery and energy levels. Adequate hydration and nourishment are crucial for your overall well-being and the quality of your Pilates practice.
8. Be Patient and Kind to Yourself
Remember, postnatal recovery is a gradual process, and each person's journey is unique. Be patient with yourself and celebrate the progress you make along the way, no matter how small. Embrace the opportunity to reconnect with your body and enjoy the mental and physical benefits that Pilates can bring.
By following these guidelines and recommendations, you'll embark on a safe and rewarding postnatal Pilates journey, reclaiming your strength, vitality, and confidence as a new mum. Enjoy the process, and remember to prioritise self-care throughout your postpartum recovery.
are you a new mum?
looking for a complete postpartum pilates training

The Simple Science of Weight Loss
Calories In Calories Out
When it comes to weight loss, one fundamental principle reigns supreme: calorie deficit. It's the key to shedding those extra pounds, regardless of the specific diet or exercise you follow.
Here's the deal, for effective weight loss, it's crucial to consume fewer calories than your body burns. It's as simple as that. This results in a calorie deficit, triggering your body to access its stored energy (aka fat) to compensate. Now, I get it. Diet trends and exercise programs may promise quick fixes or magical results, but let's stick to the facts. No matter what diet you choose—be it low carb, high fat, paleo, vegan—or how intense or long your workouts are, the underlying principle remains unchanged.
You can't escape the laws of thermodynamics! If you consume more calories than your body needs (over any given period), you'll start putting on weight. On the flip side, if you consistently consume fewer calories than your body requires, you'll see those extra pounds melt away. It's just how the math works. So, remember, finding that sweet spot of balance is key to reaching your weight goals! It's science, not opinion. But don't let that discourage you! You have the power to determine what and how much you eat, and you can actively select activities that enhance your calorie burn. It's all within your control!
Having said that not all calories are created equal. Nutrient-dense foods are essential for overall health, energy levels, and satiety (how full you feel). So, while quantity matters for weight loss, quality matters too. Opting for whole, unprocessed foods will provide the necessary nutrients your body needs to thrive.
The Tipping Of The Scales

To understand this idea better I want you to imagine a scale, on one side you have the calories you consume from everything you eat and drink and on the other end of the scale the calories you burn from being alive and all the activities and or exercise that may include. The term used for this is CICO and stands for "Calories In, Calories Out," it is a concept of energy balance in the context of weight management. The idea behind CICO is that weight loss or gain is primarily determined by the relationship between the calories you consume (calories in) and the calories you burn (calories out).
So, on the calories out end of the scale we have:
BMR
Exercise Activity (EA)
NEAT
TEF
Basal Metabolic Rate (BMR)
BMR stands for Basal Metabolic Rate, which refers to the number of calories your body needs to maintain basic bodily functions while at rest. It represents the energy required for essential processes such as breathing, circulation, cell production, and maintaining body temperature.
Several factors influence your BMR, including:
Body composition: Lean body mass, which includes muscles, organs, and bones, tends to have a higher metabolic rate than fat mass. As a result, individuals with a higher percentage of lean body mass generally have a higher BMR.
Age: BMR tends to decrease with age due to factors such as a decrease in muscle mass and hormonal changes. Older individuals often experience a decline in BMR compared to their younger counterparts.
Sex: Men typically have a higher BMR than women. Men typically having higher muscle mass and lower fat mass than women.
Genetics: Some people may have a naturally higher or lower BMR based on their genetic predispositions. Genetic factors can influence the efficiency of metabolic processes and the rate at which calories are burned at rest.
Exercise Activity (EA)
The number of calories burned during 1 hour of exercise activity (EA) can vary depending on several factors, including the type of exercise, intensity, duration, body weight, and individual fitness level. It's challenging to provide an exact number without specific details, but here are approximate calorie expenditure ranges for various types of exercises based on an average-weight individual (around 155-175 pounds or 70-80 kilograms):
Walking: Walking at a moderate pace (3-4 mph) typically burns around 240-300 calories per hour. Brisk walking or walking uphill can increase the calorie burn.
Running: Running at a moderate pace (5-6 mph) can burn approximately 450-600 calories per hour. Higher intensities or faster speeds can lead to greater calorie expenditure.
Cycling: Bicycling at a moderate intensity (10-12 mph) generally burns around 300-500 calories per hour. Riding at a higher intensity or faster speed can increase calorie burn.
Strength training: The calorie burn during strength training exercises varies based on factors like the specific exercises performed, the number of sets and repetitions, and the intensity. On average, strength training can burn approximately 200-400 calories per hour.
Yoga: A typical yoga session can burn around 150-400 calories per hour. The calorie burn can vary depending on the style of yoga (e.g., Hatha, Vinyasa, Power), the pace of the practice, and the level of exertion involved.
Pilates: A session can burn around 200-400 calories per hour, depending on the intensity of the workout, the specific exercises performed, and the individual's body mechanics.
To obtain a more accurate estimation of your calorie expenditure during exercise, you can consider using wearable fitness trackers or online calculators that take into account more specific details about your exercise and personal attributes.
Non-Exercise Activity Thermogenesis (NEAT)
NEAT stands for "Non-Exercise Activity Thermogenesis" It refers to the energy expended through daily activities that are not planned exercise sessions but still contribute to your overall energy expenditure. NEAT encompasses the calories burned during activities such as walking, standing, fidgeting, gardening, cleaning, and other forms of non-exercise movement.
NEAT plays a significant role in your total energy expenditure and can vary greatly among individuals based on their occupation, lifestyle, and habits. Some people naturally have higher NEAT levels due to their occupation or lifestyle factors that involve more physical activity throughout the day, while others may have lower NEAT levels due to a sedentary job or lifestyle.
Increasing NEAT can be an effective strategy for managing weight because it can contribute to additional calorie burning without the need for structured exercise. Small changes in daily habits and incorporating more movement into your routine can have a cumulative effect on calorie expenditure over time.
Here are a few examples of how you can increase your NEAT:
Walking: Opt for walking whenever possible. Take the stairs instead of the elevator, park your car farther away from your destination, or take short walking breaks during work or study sessions.
Standing and movement breaks: If you have a sedentary job or spend long hours sitting, try incorporating regular standing or movement breaks. Set reminders to get up and stretch, walk around, or do some light exercises.
Active chores: Engage in household chores that require physical effort, such as cleaning, gardening, or doing DIY projects. These activities can contribute to NEAT while accomplishing necessary tasks.
Fidgeting: While it may seem minor, fidgeting, such as tapping your feet, moving your legs, or fidgeting with your hands, can increase energy expenditure slightly throughout the day.
Active leisure activities: Instead of sedentary activities like watching TV or playing video games, choose active leisure activities such as dancing, playing with kids or pets, or engaging in sports or recreational activities.
Remember, NEAT should be seen as a complement to regular exercise rather than a replacement for structured workouts. While NEAT can contribute to calorie burning, it is still essential to engage in purposeful exercise to promote cardiovascular health, muscular strength, flexibility, and overall fitness.
Thermic Effect of Food (TEF)
TEF stands for "Thermic Effect of Food" It refers to the energy expenditure associated with the digestion, absorption, and metabolism of food that you consume. When you eat, your body needs energy to break down the food, extract nutrients, and process them for use in various bodily functions.
The process of digesting and metabolizing food requires energy, and the TEF represents the calories burned during these processes. Different macronutrients have varying effects on TEF:
Protein: Protein has the highest thermic effect among the macronutrients. Approximately 20-30% of the calories from protein are used during digestion and metabolism.
Carbohydrates: Carbohydrates have a moderate thermic effect, accounting for around 5-10% of the calories consumed.
Fats: Fats have the lowest thermic effect, contributing to approximately 0-3% of the calories consumed.
It's important to note that the TEF is proportional to the caloric intake, meaning that consuming more calories will result in a higher absolute energy expenditure through TEF.
However, it's worth mentioning that the TEF represents a relatively small portion of the total energy expenditure, typically ranging from 5-10% of the calories consumed. The majority of the calories you consume are utilized for basal metabolic rate (BMR) and physical activity.
While TEF itself does not significantly contribute to weight loss or gain, it is still a factor to consider when calculating your total daily energy expenditure (TDEE). By accounting for the TEF along with your BMR and physical activity, you can have a more accurate estimation of your caloric needs. It's important to focus on overall dietary balance and the quality of nutrients rather than solely relying on the TEF to manipulate calorie intake. A healthy and balanced diet that includes adequate protein, carbohydrates, and healthy fats is essential for overall well-being and energy balance.
In practice, achieving a sustainable and healthy weight involves not only considering calorie balance but also adopting a balanced and nutritious diet, engaging in regular physical activity, managing stress levels, and addressing any underlying health conditions. Remember, exercise is just one component of weight loss and trying to rely solely on exercise to lose weight could prove ineffective.
Homeostasis
Homeostasis and maintenance calories:
Homeostasis is your body's natural ability to maintain a stable internal environment despite changes in the external environment. It's like your body's internal thermostat that strives to keep things balanced. In the context of weight management, homeostasis plays a role in maintaining your current weight.
Your body has a set point, which is the weight range that it tends to defend and maintain. This set point is influenced by various factors, including genetics, metabolism, hormones, and lifestyle. Homeostatic mechanisms work to regulate your energy balance and keep your weight within that set point range.
Maintenance calories, also known as Total Daily Energy Expenditure (TDEE), represent the number of calories your body needs to maintain its current weight. It includes the calories required for your basal metabolic rate (BMR), physical activity, and the thermic effect of food (TEF).
Here's where homeostasis comes into play. When you create a calorie deficit or surplus, your body strives to restore balance and return to its set point. This can involve adjustments in your metabolism, hunger and satiety signals, and energy expenditure. It's a protective mechanism that aims to defend your current weight and make weight loss or gain more challenging as you deviate from your set point.
Understanding homeostasis and maintenance calories is crucial for effective weight management. To lose weight, you need to create a sustained calorie deficit below your maintenance calories. However, it's important to note that individual variations exist, and weight loss may not always be a linear process due to the influence of homeostasis.
lets wrap it up
When you consistently consume calories equal to your maintenance calories, you're in energy balance. This means the calories you take in are equivalent to the calories you burn, resulting in weight maintenance.
However, if you consume more calories than your maintenance calories, you create a calorie surplus. In this scenario, your body stores the excess energy as fat, and you experience weight gain. On the other hand, if you consume fewer calories than your maintenance calories, you create a calorie deficit. This prompts your body to use its stored energy (fat) to make up the difference, leading to weight loss.
Making gradual and sustainable changes in your eating habits and physical activity levels is the key to achieving and maintaining a healthy weight in the long run. Remember, each person's body is unique, so it's important to seek guidance from healthcare professionals or registered dietitians. They can help you develop an individualized approach to weight management that aligns with your specific needs and goals. Your journey to a healthier you starts with taking proactive steps and seeking expert support.

Overtraining

Warning Signs of Overtraining: What to do and How to Cut Back
Introduction
Welcome to our comprehensive guide on overtraining syndrome. In this article, we will explore the causes, symptoms, and preventive measures to help you identify and address the warning signs of overtraining. Overtraining syndrome is a condition that occurs when the body is pushed beyond its limits without adequate rest and recovery. It is not limited to professional athletes and can affect anyone engaged in intense physical activities. Understanding the warning signs and taking prompt action is crucial for maintaining optimal physical and mental health. So, let's dive in!
What Is Overtraining Syndrome?
Overtraining syndrome is a state of physical and mental exhaustion caused by prolonged and intense exercise without sufficient recovery. It can be triggered by factors such as excessive training volume, inadequate rest, and improper nutrition. Overtraining syndrome is particularly common among elite athletes and individuals who push their bodies to the limit. Overtraining can be detrimental to your fitness goals and negatively affect your day to day life. By recognizing the warning signs and implementing preventive measures, you can avoid the detrimental effects of overtraining and maintain a healthy exercise routine.
Impact on Health Conditions
Overtraining can have significant implications for various health conditions. It can lead to nutritional deficiencies, affecting the body's ability to function optimally. Additionally, overtraining can affect the cardiovascular, gastrointestinal, endocrine, nervous, and reproductive systems. Being aware of these potential health impacts can help you take the necessary precautions to prevent overtraining syndrome.
Signs and Symptoms of Overtraining
Overuse/Chronic injuries or muscle pain: Chronic or lingering injuries indicate the need for rest and recovery. Common overuse injuries, especially in activities like running and weightlifting, can be a result of overtraining. Injuries like shin splints, stress fractures, and plantar fasciitis. Joint strains and soft tissue injuries are also common. If you sustain an injury, it's crucial to take a break from all types of training to allow proper healing.
Tired and Exhausted: Distinguishing between normal tiredness and fatigue is important. Fatigue caused by overtraining is a result of the cumulative effect of inadequate recovery and nutrition. Feeling tired after exercise is normal, but persistent fatigue arises when your body fails to fully recover e.g. when you are feeling tired during your workout and continue to do so afterwards
Appetite Reduction and Weight Loss: Hormonal imbalances due to overtraining can lead to decreased appetite and weight loss. This is often associated with exhaustion. Typically, exercise stimulates a healthy appetite. However, excessive training can disrupt hormonal balance, influencing your hunger and satiety cues. Overtraining syndrome (OTS) often causes exhaustion, reduced appetite, and unintentional weight loss.
Triggered or irritable: Overtraining can influence stress hormone levels, resulting in irritability and mood changes. It can affect stress hormone levels, potentially leading to depression, mental fog, and mood changes. Feelings of restlessness, lack of concentration, and diminished enthusiasm may also arise.
Performance Deterioration/workouts feeling harder: Plateau or decrease in performance instead of improvement, including effects on strength, agility, endurance, reaction time, and speed. Workouts may feel more challenging, and recovery may be delayed. Overtraining hampers performance, causing a plateau or decline instead of improvement. Decreased strength, agility, and endurance make it more challenging to achieve your training goals. Additionally, overtraining can negatively impact your strength, reaction time and running speed. If you're experiencing OTS, you might find that your workouts feel more demanding, requiring extra effort to complete. This heightened perceived effort may make you feel like you're working harder, even though your body is performing at its usual level. Your heart rate may be higher during exercise and take longer to return to its resting rate after finishing.
Lacking drive and motivation: Mental and physical exhaustion can contribute to a lack of motivation to work out.
Restless nights and sleep issues: Imbalances in stress hormones caused by overtraining can affect sleep quality. Restful sleep is essential for proper recovery. When stress hormones are imbalanced, relaxation and tension release become difficult, affecting your ability to unwind before bed. This intrusion cuts into the essential time your body requires for rest, repair, and restoration during sleep. Lack of quality sleep can lead to chronic fatigue and mood changes.
Weakened immune system: Overtraining can compromise the immune system, making you more susceptible to infections and illnesses, particularly upper respiratory tract infections.
Not eating enough: Inadequate nutrition can have negative effects on both your health and performance, leading to nutritional deficiencies. When your body consistently relies on its energy reserves, it can lead to nutritional deficiencies like anaemia. Moreover, more severe conditions can arise, affecting crucial systems such as cardiovascular, gastrointestinal, and endocrine. Complications in the nervous and reproductive systems, including irregular cycles or period loss, are also possible.
When to Take a Break
If you experience any of the warning signs mentioned above, it's crucial to take a break from intense exercise. Rest is the most crucial factor in the recovery process. During this period, it's essential to avoid high-impact or intense workouts that could exacerbate the symptoms of overtraining.
Treatments and Recovery
The primary treatment for overtraining syndrome is rest and recovery. Taking an extended break allows the body to heal and rejuvenate. Additionally, you can explore other supportive measures such as professional massage, self-massage using essential oils or muscle balm, hydration, and proper sports nutrition. Hot and cold therapy can also help soothe muscles and promote recovery. The recovery process varies for each individual, and it's important to listen to your body. Cross-training and engaging in low-impact exercises can alleviate muscle fatigue while gently exercising during the recovery period. If symptoms persist upon returning to exercise, it's important to return to rest and seek professional guidance.
Prevention
Preventing overtraining syndrome is essential for maintaining a healthy and sustainable exercise routine. Here are some key preventive measures:
Schedule regular rest days after demanding workouts to allow for adequate recovery.
Give muscles time to recover in weight or resistance training by focusing on different muscle groups on different days.
Avoid excessively long breaks between workout sessions to maintain consistency and progress.
Incorporate rest intervals within your workouts and reduce the volume and intensity of training when needed.
Engage in low-impact activities on active rest days to promote recovery and blood flow without overloading the muscles.
Vary your activities to promote whole-body development and prevent overuse injuries.
Balance stress levels by incorporating relaxation activities such as meditation, deep breathing, or gentle stretching.
Maintain a well-balanced diet with adequate nutrition to support muscle recovery and overall health.
Prevention of Overtraining Syndrome
To prevent overtraining syndrome, it's important to:
Recognize the importance of varying your training routines and scheduling regular rest periods.
Pay attention to mood changes and negative feelings, as they can be early indicators of overtraining.
Utilize training logs to track your workouts and monitor your progress.
Monitor your heart rate as an indicator of overtraining, using resting heart rate and orthostatic heart rate tests as diagnostic tools.
When to See a Doctor
If you experience persistent symptoms of overtraining syndrome despite implementing preventive measures and taking adequate rest, it's important to seek medical advice. A healthcare professional can provide guidance in balancing rest and training and help you navigate the recovery process.
Conclusion
Recognizing the warning signs of overtraining and taking appropriate action is crucial for maintaining a healthy and sustainable exercise routine. By understanding the impacts of overtraining syndrome and implementing preventive measures, you can avoid the pitfalls of pushing your body beyond its limits. Remember to prioritize rest, hydration, and nutrition in your recovery process, and always listen to your body. If needed, don't hesitate to seek professional guidance. With a balanced approach to training, you can achieve long-term fitness success while safeguarding your physical and mental well-being.
Key Takeaways:
Overtraining syndrome is a state of physical and mental exhaustion caused by excessive exercise without sufficient recovery.
Warning signs include inadequate nutrition, soreness and strain, overuse injuries, fatigue, reduced appetite and weight loss, irritability and agitation, decline in performance, disturbed sleep, decreased immunity or illness, weight gain, and loss of motivation.
Taking a break and implementing rest and recovery is crucial for overcoming overtraining syndrome.
Prevention involves scheduling regular rest days, varying training routines, balancing stress levels, and maintaining a well-balanced diet.
Recognizing warning signs, monitoring heart rate, and seeking professional guidance when needed are key to preventing overtraining syndrome.
Image by Drazen Zigic on Freepik